HeatSync - Ultimate Heat Insert Press


Print Profile(2)

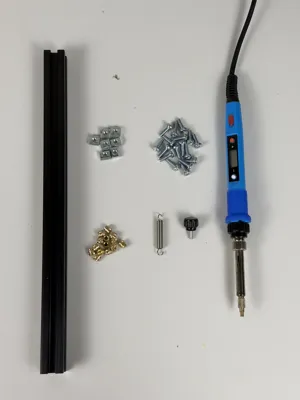
Bill of Materials


- 6x30x1mm Extension Spring x 1: for the main action to work
- 300mm Metal Extrusion Bar x 1: for the main structure of HeatSync
- Soldering Iron x 1: generic
- M4x10mm thumb screw x 1: optional for jig mounts
Description
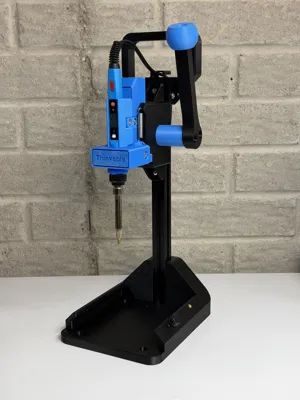
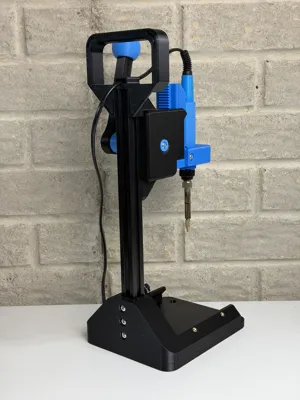
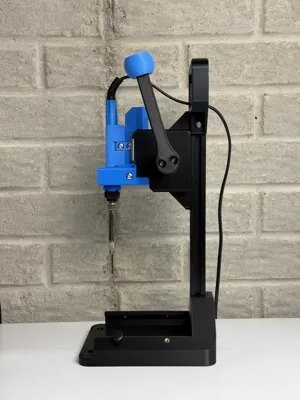
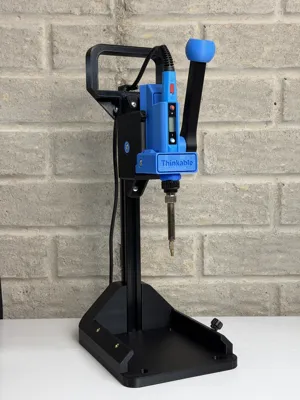
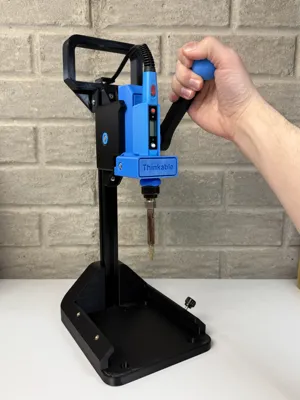
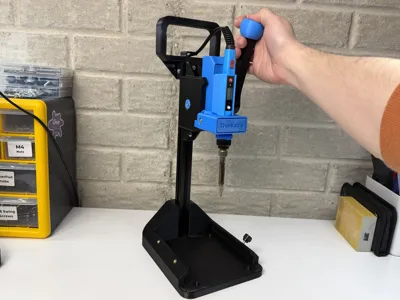
HeatSync - The Ultimate Heat Insert Press
“This has been a long time coming and now it's finally here, the upgraded version of HeatSync! I make these models in my free time so if you would like to support me, follow Thinkable on Patreon, leave a boost, and follow me on YouTube! Thank you all for the support! Let's build a better future together!
Boost Me (for free)
I make these models for free, so thanks for supporting my designs!
Back Story of the HeatSync Project:
Around 2022 when I started doing 3d printing I learned about different ways you could attach parts together using screws. Metal threaded heat inserts I found are amazing for this and so I bought a cheap soldering iron, press, and tips from amazon. The idea was that the iron in the press stayed in place and I could just press it down into the part to melt the insert into the part, simple and easy right? NO. That thing was a POS. It was wobbly and the ergonomics were hurting my arms after doing hundreds of inserts at a time. I also started thinking about using different kinds of platforms (jigs) for parts with similar heights/shapes. I saw that a power drill press had the exact type of mechanism I wanted (later adapted for HeatSync) and so I simply made an adapter for the soldering iron to go in. As time went on, I kept wanting to use my own custom jigs for the parts that I make all the time. The main problem was attaching/aligning the jigs to the base and easily removing them. At that time, there were NO similar options to what I wanted available online to download and print. So, like Thanos I said “I’ll do it myself”.
HeatSync is the culmination of the last few years of work I’ve put in to make my dream soldering iron press. And now YOU can make it too! Not only that, but I am also including the STEP files for developers so that you can easily modify and change this system to your needs/wants. I believe that you have to create the world you want to live in to make it a better place and this is one of my contributions. I hope you all enjoy and appreciate HeatSync and use it to make things you couldn’t make before. Happy printing everyone!

 First Prototypes vs HeatSync

Current Awesome Features of HeatSync:
- Custom Jig Compatible (NEW)
- Height Adjustable
- Easy Pull-Down Lever Action
- Cable guide
- Carrying handle
- Many different soldering irons supported
- New Simple Assembly (Instructions available)
- STEP Files included for developers to customize*
*Customizations of my models are always allowed, but must adhere to MakerWorld's License and can only be uploaded as a “Remix” of the original model. I believe that 3D Printing is a superpower and you can customize these models to your heart's content to best suit your needs. If you would like a feature to be added, comment down below and I or someone else can try to make it. Let's collaborate and build a better future together.
Future Features planned: (as of April 2, 2026)
- Extendable Base Gridfinity Storage System (coming soon)
- Comment other features you would like to see!
Update Log:
- April 2, 2026: “Jig Update”
- Added Jig base models
- Added Flat base option (no jigs)
- Feb 27, 2026 - Original model release date
Any further updates to the model will be linked in this section, so be sure to follow and stay up to date!
__________________________________________________________________
Printing/prep Guide:
3d Printer requirements:
You can use any printer including the A1 Mini :)
Filament:
- PETG-HF : (heat resistant PETG material RECOMMENDED for the soldering iron holder pieces. They can get kind of warm with extended use)
- PLA : Should be fine to be used for the rest of the parts. Tested to work great :)
Hardware:
You will need to supply a Soldering Iron, and Flat iron tips of your choice. Everything else you need is below.
HeatSync Hardware kit available on my Shop:https://thinkablecreations.etsy.com/listing/4464290389/heatsync-ultimate-heat-insert-press-for
This model uses mostly 3d printed parts with the main exception being the “300mm 2020 Metal Extrusion” bar that is the strong backbone of the system. I chose this bar to add strength as well as the ability to easily adjust the height to your needs. Some of the hardware is currently available on Bambu's Store, but I will be making a Hardware Kit available on my shop HERE which will have everything* you need to assemble the HeatSync. I will also include individual affiliate links to the items needed below. You will need to use your own Soldering Iron + Tips to complete the setup.

Hardware Type
Quantity Needed
USA Link (Affiliate)
M4x10mm Machine Head Screws 17
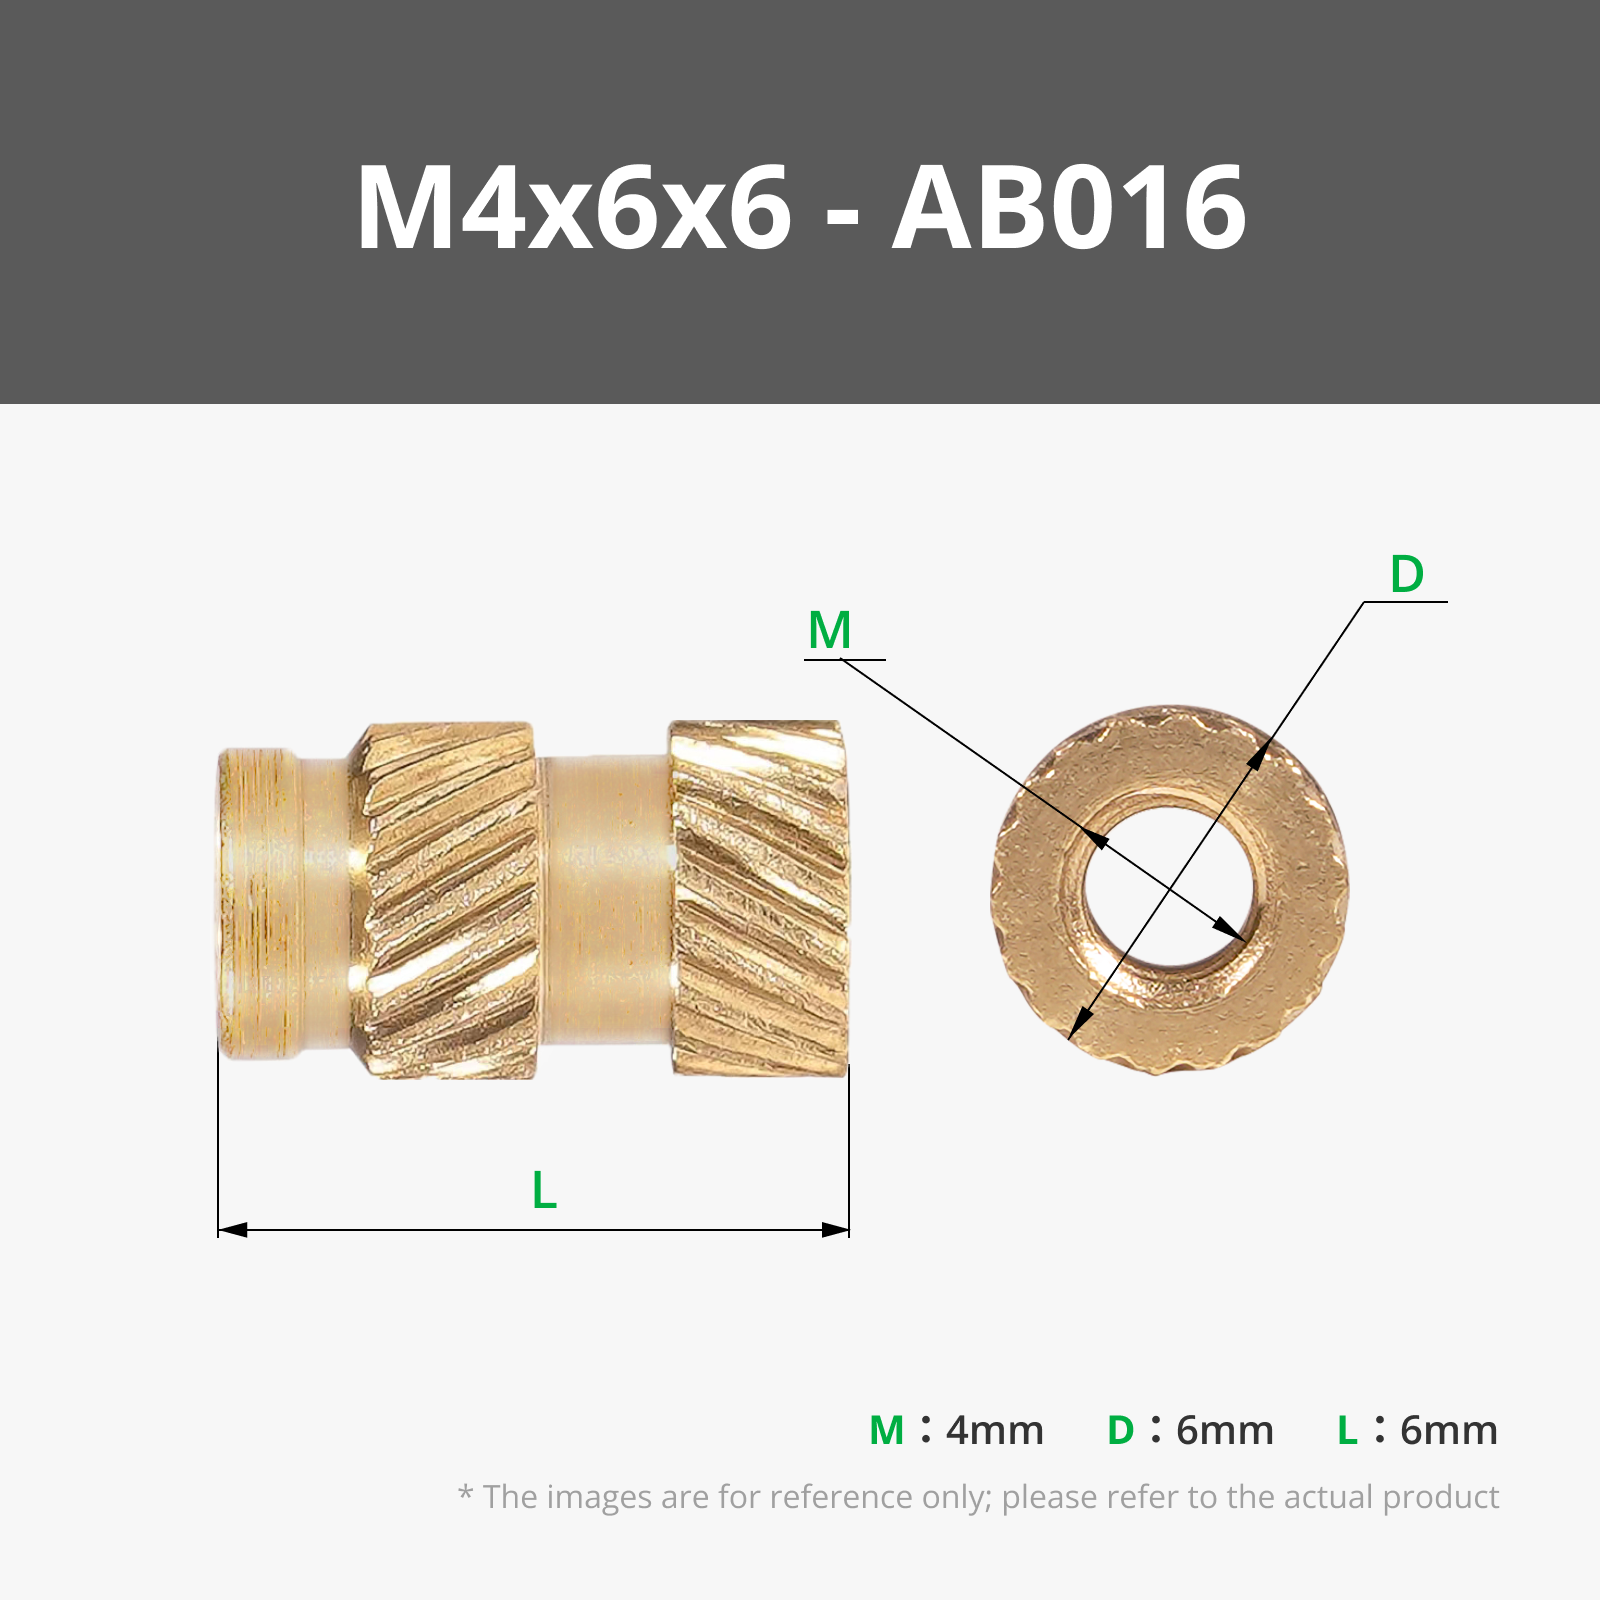
M4x6x6mm Heat Set Inserts 17
6.4x38x0.9mm Extension Spring with hook ends (¼"x1.5"x0.035") 1
M4 Extrusion Nuts 7
300mm 2020 Metal Extrusion Bar 1
Soldering Iron 1
Flat Tips for soldering iron 1
M4x10 Thumb Screws (optional) 1-4
Assembly Instructions:
Welcome to the complete guide for assembling HeatSync! Ideally it should take around 20-30 minutes to complete. Take your time and be sure to let me know if you have any questions or things you would want me to change or add to make it better.
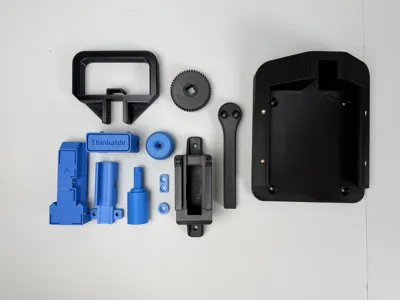
Full List of (12) 3d printed parts:

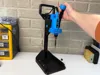
(READ CAPTIONS IN PICS) First Install the (x13) M4 threaded inserts with you soldering iron
(be sure to not insert them too far, put them just far enough to not stick out of the parts)


Main Assembly:
(READ CAPTIONS)


Thank you for Supporting my Projects, check out my other projects and Subscribe to Thinkable on YouTube!
https://www.youtube.com/@thinkable3D
Boost Me (for free)
Thank you for your boosts, let me know what else you want me to make in the comments!
License
You may create derivative works based on this object, provided that all such derivative works are published exclusively on the MakerWorld platform and include proper attribution to the original creator. You may not share, upload, host, distribute, or publish this object—or any derivative work of this object—on any other digital platform, marketplace, or distribution channel. Commercial use of this object and any derivative works is strictly prohibited. This includes, but is not limited to, selling, renting, sublicensing, or using the object in any context in which you receive monetary compensation or other financial benefits.
Comment & Rating (149)