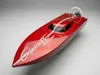
Scarlett 500


Print Profile(1)
Bill of Materials


Description
A lot of time and effort went into this project. If you build it, please Boost it, share your 'Makes' and post some photos! I’d love to see your work and hear your feedback. Thank You!!!
Description
- Extreme Performance: Engineered to reach incredible speeds of up to 80km/h with 3S 4000 mAh battery
- Perfect Size: 50cm length, designed for high-speed stability and agility.
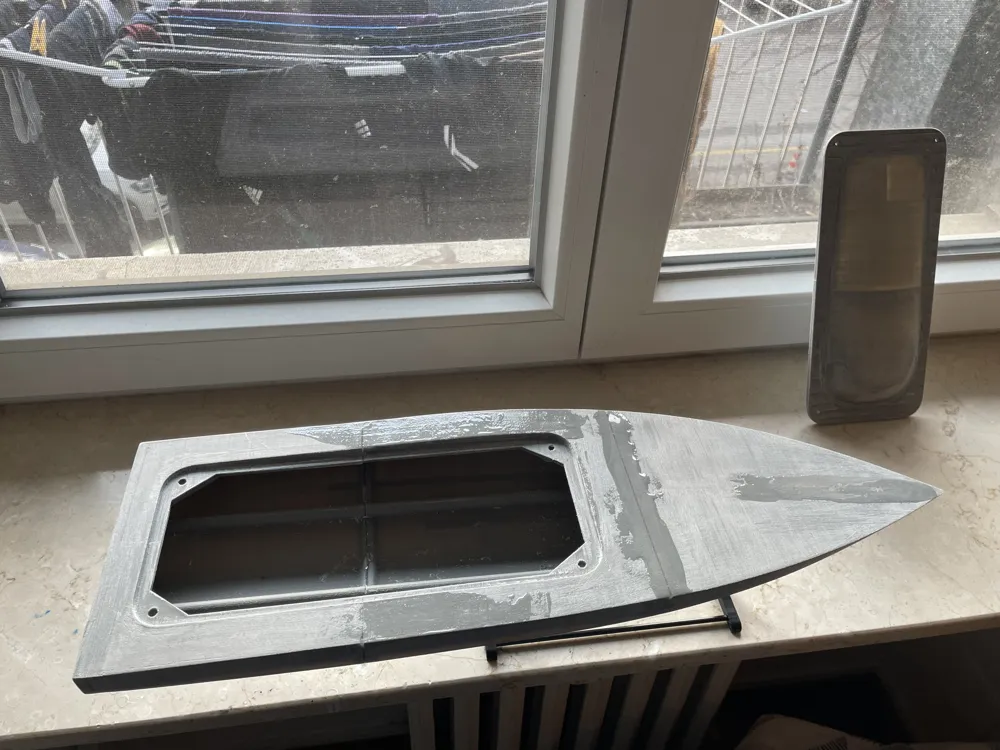
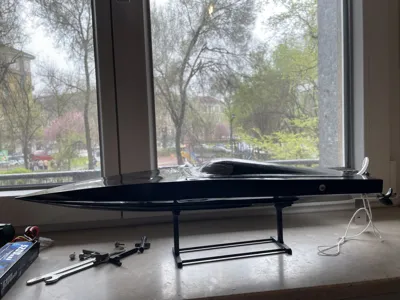
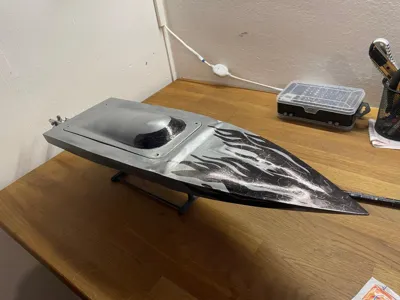
- Proven Design: The prototype (the black one in the photos) has already been successfully tested, and I am now building the final, refined version.
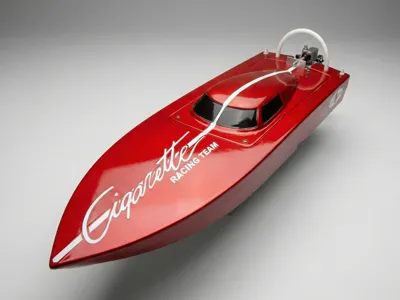
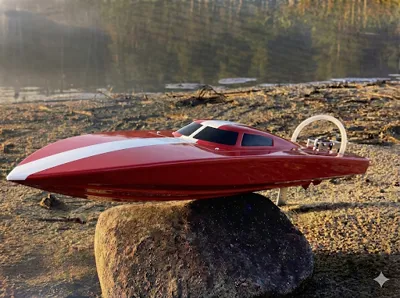
Illustrative Goal: The red boat in the cover image is for illustrative purposes to show the final aesthetic I am aiming for. The black one is the proto
*Technical Specifications (Inspired by CozyRC, but heavily modified and improved)
- Hull Geometry: Features a revised design with a deeper V-shape for enhanced performance and stability.
- Structural Reinforcements: Integrated slots designed for the insertion of carbon fiber reinforcement bars.
- Motor Mount: Completely redesigned motor mount with updated geometry.
- Servo Mount: Custom-engineered and built from scratch for superior fit.
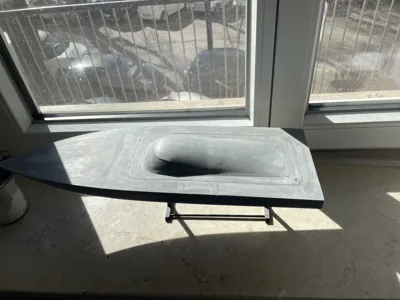
Canopy Cover: The cover can be securely bolted down using dedicated holes for brass threaded inserts.
Boost Me (for free)
Love this project? 🚀 Please consider giving it a Boost to support my work and help me fund new high-performance designs! Thank you for the support! 🙌
Hull Assembly Guide 🛠️
Follow these steps to assemble the three hull sections into a single, high-performance unit:
- Carbon Rods: Prepare two carbon fiber rods cut to approximately 32cm. These will serve as the boat's internal skeleton.
- Gluing the Holes: Apply a generous amount of two-component epoxy glue directly into the rod holes of the printed sections. Ensure the rods will be fully bonded inside.
- Stacking: Insert the rods and stack the three hull bodies together, making sure they are perfectly aligned.
- Structural Bond: Apply epoxy between the contact surfaces of each section.
Final Seal: Ensure every gap and seam is completely filled with epoxy. This is crucial for a 100% waterproof seal and the structural rigidity needed to handle 80km/h. If the glue overflows or leaks out of the seams, it’s perfectly fine! Any excess epoxy will be sanded down later during the finishing stage.
Let the epoxy cure for at least 24 hours.
Finishing & Waterproofing
- Resin Coating: Use a brush to apply a uniform layer of laminating resin over the entire exterior, including the hull and the canopy (lid). This is vital for 100% waterproofing and the structural strength required to handle 80km/h.
- Progressive Sanding: Once the resin is fully cured, sand the surface to remove all layer lines and imperfections.
Grits: Start with 240 grit for initial leveling, then gradually work your way up to 800 grit. This creates a perfectly smooth, hydrodynamic finish that minimizes water friction.
🎨 Painting & Clear Coat
- Prime & Paint: Once sanded, apply a primer followed by your preferred paint color.
- The Final Touch: For a professional result, apply a 1K or 2K transparent clear coat. Using a 2K clear coat is the absolute best choice for a high-end, durable, and glossy finish!

link for the stand: https://makerworld.com/it/models/2819794-rc-boat-stand#profileId-3140106
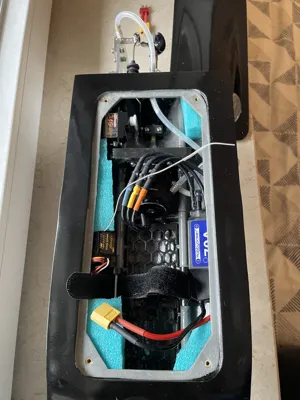
Bill of Materials (BOM) & Electronics: To complete this build, you will need the following components:
- Resin coating: https://amzn.eu/d/07BACJ7o
- two part epoxy glue
- 14x M3 10mm bolts
- 2x M3 30mm bolts
- 2x Self-locking nuts
Click on the photo and check the links!
Battery strap:

Motor 2948 3450kv:

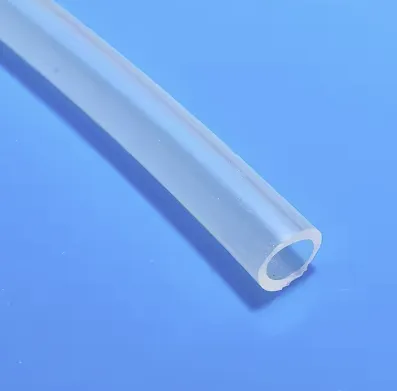
Silicon tube 3x5 mm:
Esc 70 A:

Shaft Coupling:

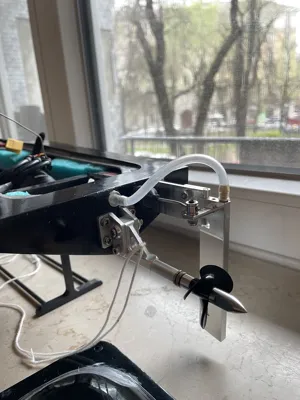
Water Inlet L32 M6:

Water Outlet M6:

Stinger drive kit:

Correct propeller to use: Any 33-36mm propeller with a pitch of at least 1.4 like this:

M2 Push rod kit:

Rudder 75 or 95mm:

Servo JR2.54:

Carbon fiber rod 4mm:

⚠️ PLEASE NOTE: Both the description and the 3D model are currently being updated. Stay tuned for the final, refined version! 🛠️
If you're excited about this high-performance project, please leave a Like and stay tuned for updates on the final build! 🚀
License
You shall not share, sub-license, sell, rent, host, transfer, or distribute in any way the digital or 3D printed versions of this object, nor any other derivative work of this object in its digital or physical format (including - but not limited to - remixes of this object, and hosting on other digital platforms). The objects may not be used without permission in any way whatsoever in which you charge money, or collect fees.
Comment & Rating (139)