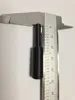
Fidget Squeeze Toy - Any Size!


Print Profile(3)
Bill of Materials


Description

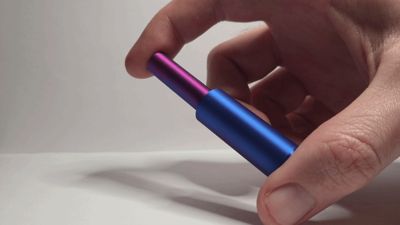
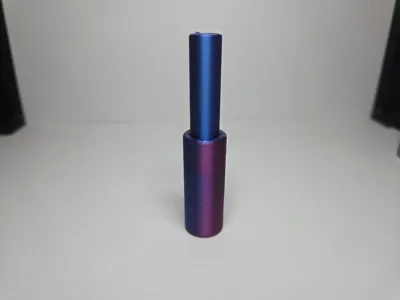
A simple yet extremely satisfying fidget toy with a smooth squeezing motion which you just can't stop doing over and over again!
This print is assembled using a stack of opposing magnets, which push back with a force which gets larger the more you squeeze. The amount of magnets can be changed depending on your preference for stiffness. If you prefer, you can also use this model with a spring in place of the magnets.
Magnets are inserted after the print and are not glued in place, meaning you can take this apart and change the characteristics again and again without having to buy any more magnets.
Printing in just half an hour with only 5 grams of filament and no supports, this is ready to go straight off the build plate, just insert your magnets and feel the satisfaction.
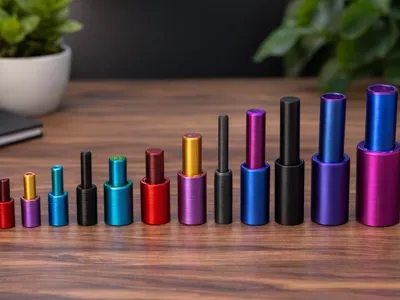
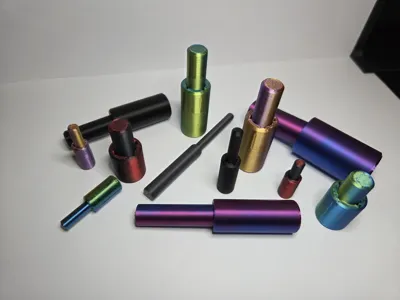
Infinitely Customizable!
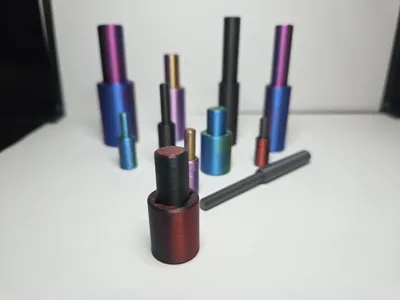
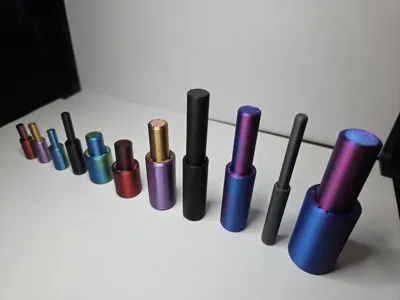
Magnet Sizes
This design allows any magnet size to be used, down to a minimum of around 4mm. There are print profiles for the most common sizes, and other in-between sizes can be made simply by scaling the print to your desired size in Bambu Studio. Because you can vary the amount of magnets inside, the thickness of the magnets doesn't matter, so the scaling is very easy.
There are three print profiles, set up for 5, 10, and 20mm diameter magnets. If your magnets are one of those sizes, skip this section and go straight to the next customization, or just print it!
To use magnet sizes in between these ones, simply scale the model using the table below:
| Magnet Diameter | Profile | Scaling |
| 2-3mm | - | Not Recommended |
| 4mm | 5mm | 80% |
| 5mm | 5mm | 100% (No Change) |
| 6mm | 5mm | 120% |
| 8mm | 5mm | 160% |
| 10mm | 10mm | 100% (No Change) |
| 12mm | 10mm | 120% |
| 15mm | 10mm | 150% |
| 20mm | 20mm | 100% (No Change) |
| 25mm | 20mm | 125% |
You can also use this formula to calculate any other size, just always try to scale up from a smaller profile instead of down from a larger profile, to make sure tolerances don't get too small.
Scale % = (MagnetWidth / Profile Size) x 100 e.g. scaling for 6mm magnet with 5mm profile: (6/5)x100=120%
To apply the scaling in Bambu Studio, make sure both halves of the print are selected and click “Scale”. Now make sure “uniform scale” is ticked, and enter your desired scaling percentage in the “X” box. Note that you do not have to enter the scaling for each axis, having uniform scale turned on does that for you.

Note that I haven't tried this with really small magnets (less than 3mm diameter) and I can't be sure there wouldn't be issues with the size of the prongs, but please do give it a go and let me know!
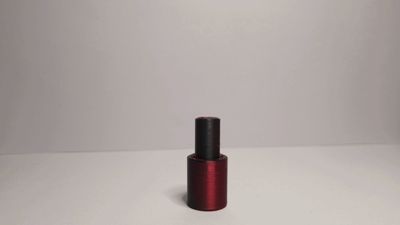
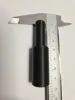
Cylinder Length
After the uniform scaling has been applied for the magnet width (or if you just chose one of the default profiles), you can now play with the length of the cylinder. A longer length will allow more magnet stacks to sit inside, and will allow a longer travel distance between full compression and full extension.
The default length is usually a good starting point for the scaled magnet sizes (e.g. 40mm for 10mm magnets, 20mm for 5mm magnets), but it can be interesting to play around with this and get the length that best fits your hand. Longer lengths can be really satisfying.
To apply this, simply turn off “uniform scale” and change the Z axis ONLY.

Magnets Per Stack
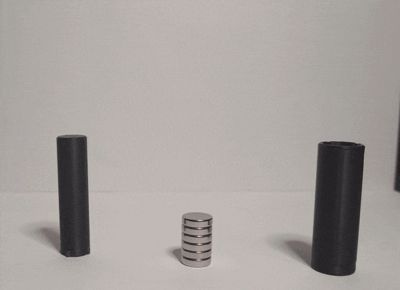
Magnets are added in multiple stacks of at least 2. The more magnets per stack, the stiffer the squeezing motion is.
You want the height of each set to be at least 4-5mm in order to make sure the magnets run smoothly and don't flip over during use. So for 10x3mm magnets you will want to use stacks of at least 2, and for 3x1mm magnets you will need to use stacks of at least 4. There isnt really a maximum number until you fill the whole cylinder, at which point of course nothing will move!
Number of Stacks
You can also vary the number of stacks you put in the cylinder. The more stacks, the stiffer the motion. Compared to adding more magnets per stack though, adding more stacks gives more stiffness over a longer range of motion, which makes for hundreds of different combinations giving slightly different characteristics.
Number of stacks would usually be between 2 and 5 depending on the amount of magnets per stack.
Assembly

Inserting Magnets
To assemble, put all of your magnets together so they are in the same orientation. Now pull off one “stack” worth of magnets, and put them in the cylinder so they fall to the bottom.
Now take another stack, and insert them in the cylinder in the opposite orientation. If the length is default this stack should also sit in the cylinder but will hover above the first stack.
Keep inserting stacks in opposite orientations (North down, North up, North down, North up…) until you have your desired number of stacks inside. Note that after a certain amount of magnets you will need to keep the stacks under tension with your thumb or they will want to ping back out of the cylinder.
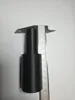
Inserting Plunger
To keep the plunger in place, there is a kind of locking mechanism for these prongs which looks like the below image.

Take the plunger piece and push it into the cylinder with the 4 prongs aligned with the 4 holes in the cylinder. You will feel it stop after a 5-10 millimetres, at which point you need to rotate the plunger anti-clockwise around 45 degrees, and you will feel it drop into the right-hand groove in the image. At this point the plunger should be free to slide up and down the long groove and should not come out by accident.
This geometry allows the plunger to stay in the groove during use, and if you want to disassemble all you need to do is push the plunger in 5-10mm while keeping light pressure in a clockwise direction until you feel it pop into the exit channel. Note at this point all your magnets might fly everywhere!
Boost Me (for free)
If you enjoy my designs, please comment and review, and if you particularly like something, a boost is very much appreciated!
Membership
Want to sell prints of this design? Offer your customers proven, high-quality models and build your brand with confidence. A commercial license gives you the rights to sell, plus access to assets and flexibility depending on your tier. Click here to find out more.
License
You shall not share, sub-license, sell, rent, host, transfer, or distribute in any way the digital or 3D printed versions of this object, nor any other derivative work of this object in its digital or physical format (including - but not limited to - remixes of this object, and hosting on other digital platforms). The objects may not be used without permission in any way whatsoever in which you charge money, or collect fees.
Comment & Rating (10)