LibreShred Two | 3D Printed Dual Shaft Shredder


Print Profile(1)
Description
this page is still under construction :) More to come!
Thanks for stopping by! Please read the assembly instructions thoroughly to ensure a smooth assembly experience!
Introduction
My name is Aaron Zhan, and I created Operation Perpetual Printing, a nonprofit organization to promote recycling and make recycling more accessible in terms of low-budget products. I immediately created many 3D printable ('cause 3D printing is accessible) products.
You can check out my website at sustainable3d.xyz. Or you donate to me on my transaction-transparent page or my GoFundMe! Your support is greatly appreciated!
And of course all of this is a work in progress, and I am a one-person-team, so there'll be some scuffs and scratches here and there! Feel free to contact me if you have any questions!
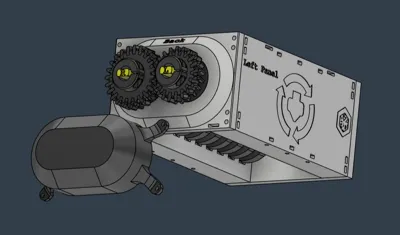
LibreShred Two
This page is on LibreShred Two, a 3D printed dual-shaft shredder
The Build
3D Printed Parts
Slicing and using the .3mf file
I have included a configured 3mf file with the proper infill and perimeter settings configured. Feel free to change things around.
Remember to set your correct printer (If you are using a MK4S or a Core One, be sure to set that!)
General Settings
Since this is a shredder, you would generally want to parts to be as strong as possible. That means, you can literally print all the parts with 100% infill.
But if you are low on filament and/or don't want to use too much filament, a good rule of thumb is 2-3 perimeters with at least 10% infill.
Calibration and Accuracy
My 3D model has clearances modeled in to compensate for the low tolerance of FDM 3D printed parts. However, some parts are necessary to be dimensionally accurate. For example, the fixed blades (the side walls, basically) need to have a sharp and accurate spacing.
Please use calipers (or an accurate measuring tool) to ensure accuracy!
Non-3D Printed Parts
Hardware
You will need some hardware to complete the build:
m3 nuts and screws
12mmx37mmx12mm bearings
you could possibly use a 3D printed part (bushing)
you could possibly use a 3D printed bearing (plastic cage w/ steel ball bearings)
If you don't have the metal part:
© 2025 A. Zhan for Operation Perpetual Printing. All rights reserved. Licensed under Open Community License V1.
Comment & Rating (9)