


Print Profile(4)
Description
Boost Me (for free)
If you like this model or find it helpful, please consider giving it a boost. Thank you!
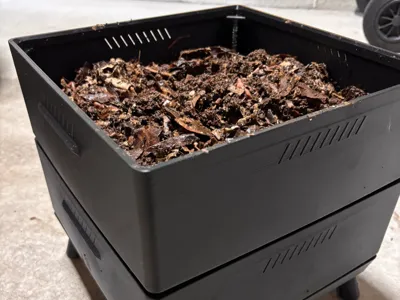
Vermicomposting (composting with earthworms) is a great way to turn your kitchen scraps into a nutrient-rich compost for your plants and garden. It's easy, low maintenance, and unlike “hot composting”, it doesn't produce any unpleasant odours-- just smells earthy, kind of like the forest floor. If you live in a condo or apartment, you could use this system to do worm composting indoors or on a small patio/balcony.
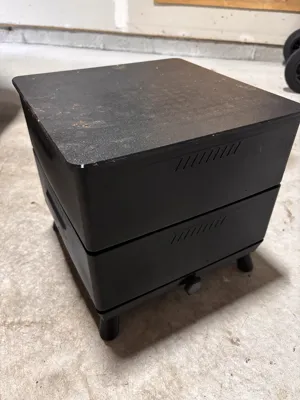
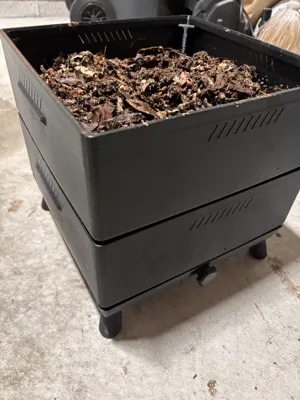
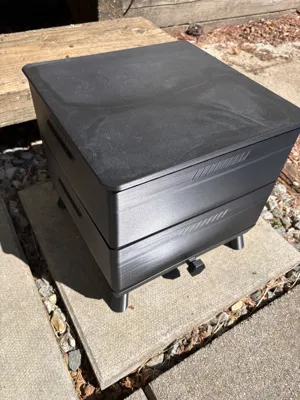
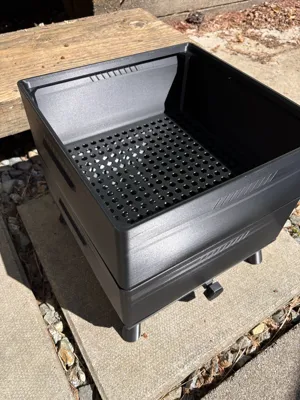
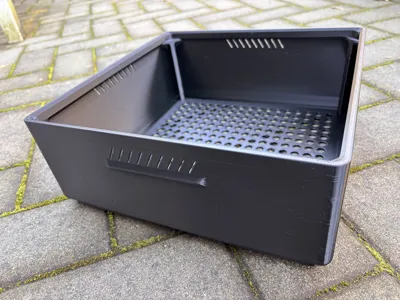
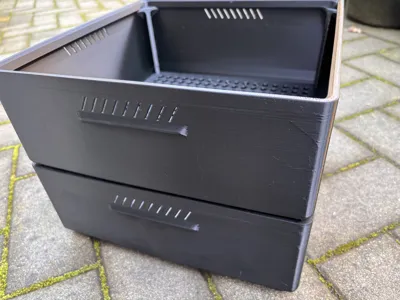
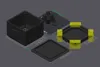
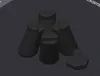
This worm composting tower features a stackable design, with small vents at the top for air circulation (but not large enough for your worms to escape!), and small handles on the side for easier handling. The corners of each bin are also reinforced with columns to help transfer the weight of the upper bins vertically down to the bottom. Holes throughout the bottom of each bin allows for worms to travel between each stacked bin.
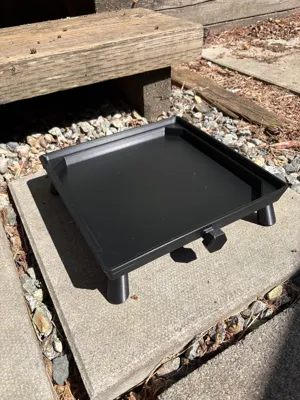
The base tray is raised slightly from the ground and includes a small pluggable drainage hole. The feet should be a friction fit, but you may need to use some glue to firmly attach the feet to the bottom tray.
The main print profile is sized for larger H series printers, but profiles are also included for smaller printers with 256x256 and 180x180 build plates (P/A & A1 mini respectively). If you want another size to fit your space better, use the “Customize” button to configure the bins dimensions. You can change the width and depth, and also the height of the bin, if you want a taller or shorter stackable bin. The size and density of the bottom holes can also be customized.
Since this takes a while to print, make sure your build plate is clean by washing it with some dish detergent to ensure good adhesion. Recommend to print in PETG or another weather resistant filament.
Note, the top cover is slightly larger and overhangs the bins by 6mm on each side. So if you want to use a custom size and maximize your build volume, you should subtract 12mm, in order to accommodate this larger top cover. So for a 256x256 build plate, the max bin size would be 244x244. The bin itself also has small grip handles on two sides, and extend out by 4mm each.
Here's a quick guide on how to compost your kitchen scraps with worms. There are plenty of tutorials online as well!
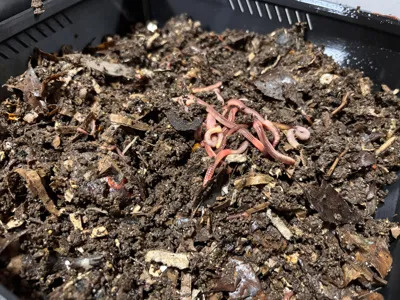
- Source some red wiggler worms. My local PetSmart sells these worms (as bait or for food), but this is a fairly expensive option if you want to get started quickly. If you don't mind waiting a bit and going slow, a small batch of worms should multiply on their own given the right conditions. Otherwise, try searching online or with a local supplier for cheaper options. You could also forge for worms in your own backyard, eg after it rains a bit, but you may get different species of worms.
- Gather up a bunch of carbon materials and moisten it with some water-- it should be damp and not dripping wet. I use a mix of shredded cardboard and leaves.
- To start a new bin, you should only add a small amount of kitchen scraps into a bin. As your bin matures you can start to add more scraps for the worms. If you don't want your compost to smell, make sure to only add veggies and fruit. Meat or dairy scraps will make your compost bin smell bad.
- Add your worms to the bin and wait. Depending on how many worms you have, its not really a very fast process, so be patient!
- Within a few weeks your worms should break down the kitchen scraps. Add more food and carbon as needed. When your bin is full, stack a new bin on top and repeat the process.
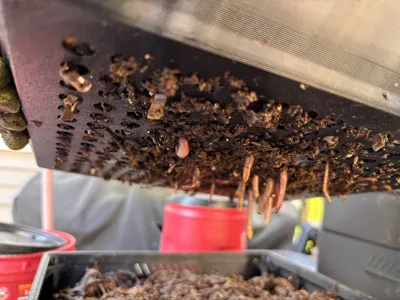
- With a worm tower system, when the worms finish up one bin they should naturally migrate up to the newer bin with the fresher food. At the end of the composting cycle, the bins at the bottom should be mostly broken down into compost and ready to use in your garden, and also relatively free of worms.
- If there are any liquids that drain into the bottom tray, you can use the drain opening to collect and use it for watering your plants. However, I like to just place some dry cardboard at the bottom to soak up any liquids, and then use that for the next batch of compost.
Changelog:
- 2026-03-28: Updated drain plug design. Print it at a 45 degree angle for improved layer strength, to resist twisting forces.
License
You shall not share, sub-license, sell, rent, host, transfer, or distribute in any way the digital or 3D printed versions of this object, nor any other derivative work of this object in its digital or physical format (including - but not limited to - remixes of this object, and hosting on other digital platforms). The objects may not be used without permission in any way whatsoever in which you charge money, or collect fees.
Comment & Rating (35)