Temp Tower For Every Material (A1)


Print Profile(3)
Description
! THIS MODEL IS STILL UNDER CONSTRUCTION, PLEASE BE PATIENT, I WILL ADD MORE MATERIALS AS SOON AS I CAN !
⚠️ IMPORTANT: PRINTING INSTRUCTIONS
To achieve different temperatures in one print, this model uses multiple "Virtual Filaments." When you open the project in Bambu Studio or BambuHandy:
- Do NOT actually load different physical spools.
- Map ALL filament slots in the slicing software to ONE single physical spool (your AMS slot or external spool).
- The different filament profiles in the project are only there to tell the printer: "Change the nozzle temperature at this specific height."
- The filament temperature info was taken from the official BambuLab website. I have added an spreadsheet document with all of the filaments and their print temperature in the description, so you can check that out.
- DO NOT print temp towers with different filament, than the filament of the temp tower. It could damage your printer. Only excemption is, for example printing PLA SILK+ with just a PLA SILK filament, you understand me.
By assigning all virtual slots to your one real filament, the printer will seamlessly transition between temperatures without needing a manual filament change.
Boost Me (for free)
Like the model? Boost me for completely free! It helps a lot, big THX! :)
The Ultimate Temperature Calibration Tower For Every Material
The Evolution of Precision: Why We Use Temp Towers
In the early days of desktop 3D printing (the RepRap era), finding the "sweet spot" for a new spool of filament was mostly guesswork. Makers would print small cubes, tweak the nozzle temperature by 5 degrees, and repeat the process for hours.
The Temperature Tower was born out of a need for efficiency. Instead of multiple separate prints, this "all-in-one" calibration tool allows you to visualize how a single material reacts to a wide range of temperatures within one continuous print. It has become the gold standard for anyone looking to move beyond "standard" profiles and achieve professional-grade results.
What This Model Tests
A temperature tower isn't just about whether the plastic melts; it’s a stress test for several critical printing factors:
- Bridging: How well the filament spans open gaps without sagging.
- Stringing & Oozing: Lower temperatures often reduce "hairy" prints, while too high temperatures can cause excessive leaking during travel moves.
- Overhangs: Tests the cooling efficiency and structural integrity at various angles.
- Surface Finish: High temperatures usually result in a glossier finish (especially with PLA/PETG), while lower temperatures tend to be more matte.
- Layer Adhesion: Crucial for part strength. Higher temperatures generally offer better fusion between layers.
How to Use This Tower
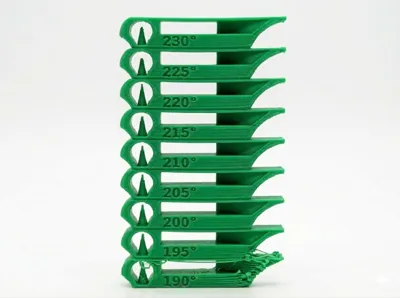
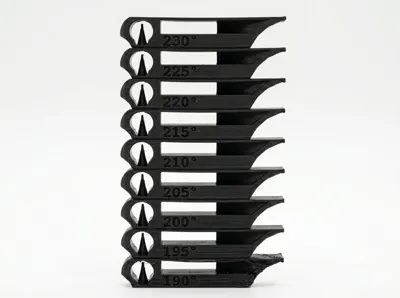
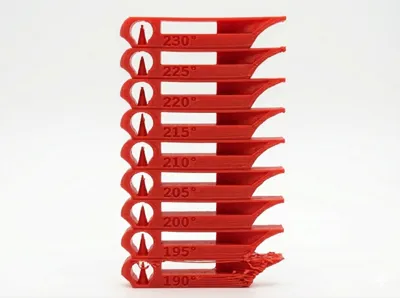
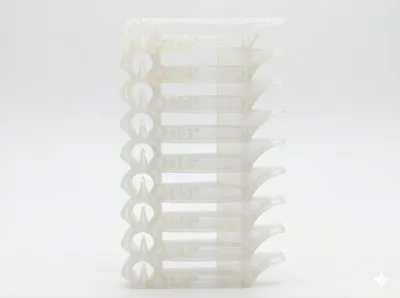
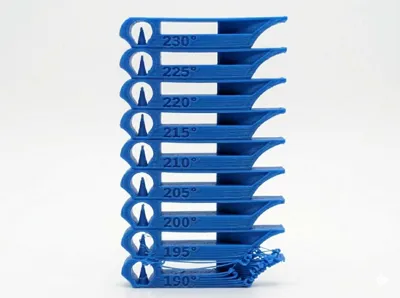
This model is divided into distinct vertical zones. Each zone is designed to be printed at a specific temperature, decreasing (or increasing) as the height of the print progresses.
- Preparation: Ensure your bed is perfectly leveled.
- The Process: As the printer moves from one "block" to the next, the nozzle temperature changes. This creates a physical "map" of your filament’s behavior.
- Observation: Once finished, do not just look at the tower—feel it. Try to break the segments to see where the layer bonding is strongest.
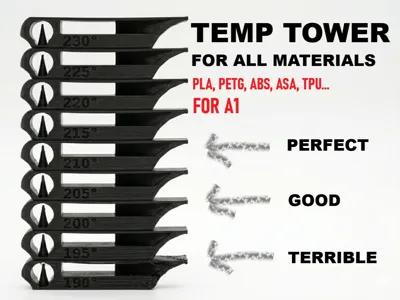
Interpreting Your Results (Feedback Guide)
Once your print is complete, look for the following "Red Flags":
- Drooping Bridges: Your temperature is likely too high, or your cooling fan is insufficient.
- Brittle Layers: If a segment snaps easily between your fingers, that temperature is too low for proper molecular bonding.
- Excessive "Whiskers": If you see fine strings, you might need to lower the temp or tune your retraction.
- The Winner: The best temperature is the one that balances clean overhangs with strong layer adhesion.
Share Your Success!
Calibration is a community effort. If this tower helped you dial in a tricky brand of filament, please:
- Post a Make: Upload a photo of your tower.
- Leave a Comment: Mention which brand and type of filament you used (e.g., "eSUN PLA+ Matte").
- Rate the Profile: Your feedback helps others find the most reliable calibration tools on the platform.
Happy Printing!
Alex
License
You shall not share, sub-license, sell, rent, host, transfer, or distribute in any way the digital or 3D printed versions of this object, nor any other derivative work of this object in its digital or physical format (including - but not limited to - remixes of this object, and hosting on other digital platforms). The objects may not be used without permission in any way whatsoever in which you charge money, or collect fees.
Comment & Rating (0)