RAZE – Sanding Block System with Tensioning Mechanism


Print Profile(11)


Description
Boost Me (for free)
If you like the model or it helped you with your project, please leave a boost! It helps us to continue investing time in high-quality designs and optimizations. Happy printing! 🛠️
Anyone who does a lot of 3D printing or crafting and finishes their parts knows the problem: sandpaper slips, wrinkles, or tears because it simply doesn't sit properly on the sanding block. It was precisely for this problem that we developed the RAZE System. It is not just a sandpaper holder, but a well-designed tool for efficient material removal and perfect surfaces.

----------
The RAZE series consists of two parts
>>> CLICK HERE FOR THE RAZE NANO SERIES (ARC, SPEAR, DOME) <<<
You can also use this URL:
https://makerworld.com/en/models/2690147-raze-nano-sanding-block-system-for-model-making
----------
Important Note on Material and Print Settings
We have optimized the system for Bambu Lab PLA in black and grey (black is best suited). Only with these colors can we guarantee satisfactory dimensional accuracy (for tools, we place great importance on absolute precision fit). A piece of advice from experience: Avoid experimenting with bright colors. In the prototypes, some threaded parts that we printed in various other colors were sometimes too tight due to pigment and shrinkage behavior.
If you want everything to run smoothly, stick to grey or, even better, black and break in the threads before assembly. The threads might be very stiff at first, but that's intended. If the threads are still too tight for you, you can simply select the clamping jaw or the tensioning wheel in Bambu Studio and set the X-Y Hole Compensation to 0.1 mm or 0.15 mm under Objects -> Quality -> Precision. When slicing (unless you are using my print profiles), pay close attention to the layer height (and ensure your printer is well calibrated so that the threads are printed cleanly):
| Threaded parts: | Must be printed with a maximum layer height of 0.12 mm (as also specified in my profiles). Higher layers destroy the precision of the thread flanks. |
| Non-threaded parts: | Here, 0.16 mm is sufficient for an optimal finish. |
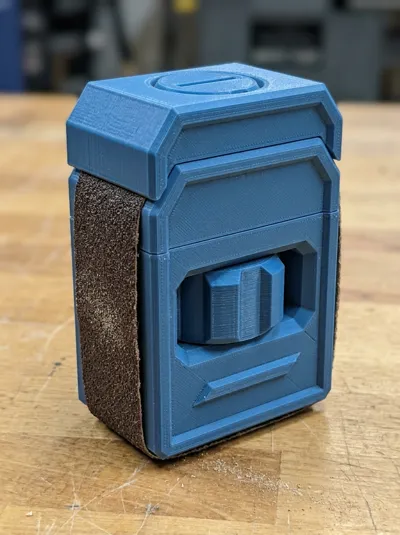
The Revolutionary Clamping Mechanism
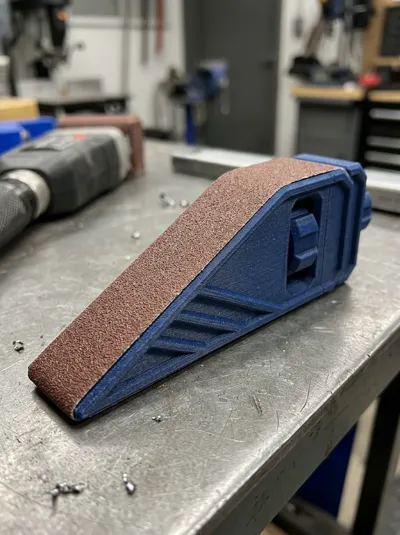
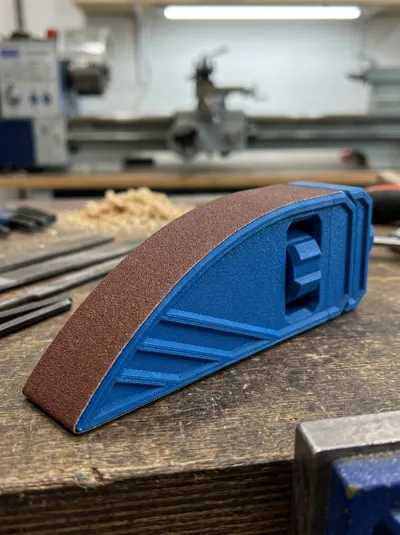
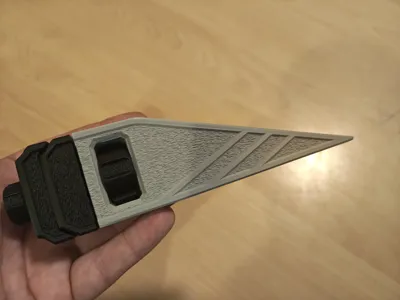
The special feature of RAZE is its specially designed clamping mechanism. The entire system is designed for 25mm wide fabric sanding belt from a roll. Fabric tape is inherently much more tear-resistant and durable than classic paper, but the real advantage of RAZE lies in its fixation. The belt is firmly clamped on the back (you can choose between a hand knob and a recessed screw, which you then secure with a screwdriver) and then tensioned via the integrated tensioning wheel. This pulls the sanding belt tightly over the block and ensures it sits completely without play. Nothing wobbles or slips anymore. The result is consistent resistance during sanding, which gives you full control and prevents you from gouging uneven grooves into the material.
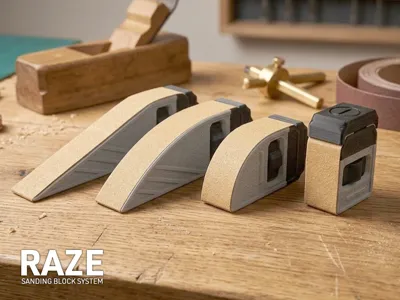
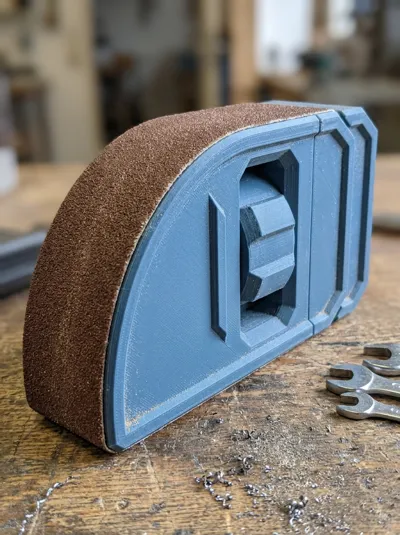
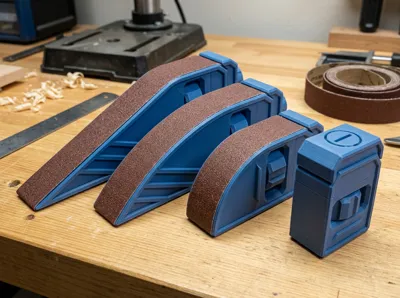
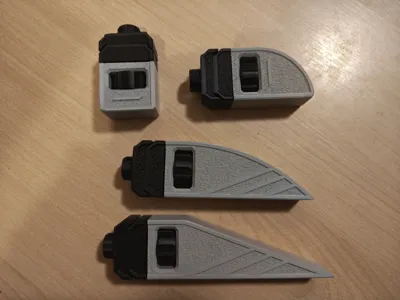
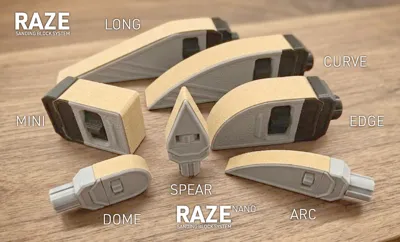
Four Profiles for Every Contour
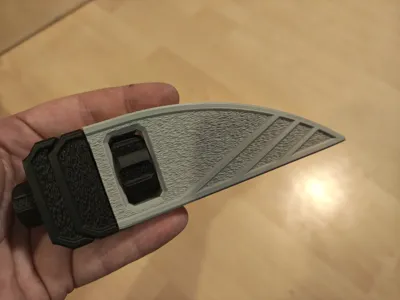
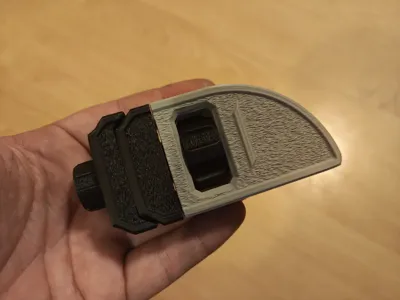
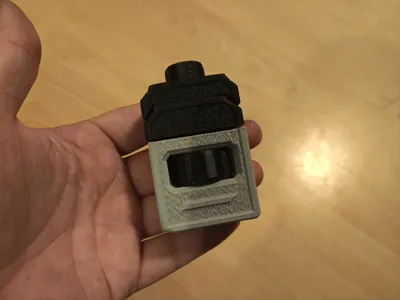
Choose your favorite model from the RAZE family – each model is optimized for a specific application: The RAZE Long is your workhorse for large, flat surfaces where exact flatness is crucial. The RAZE Curve, with its curvature, is ideal for cleanly finishing organic shapes, radii, or concave and convex surfaces. For exact angles, chamfers, and sharp transitions, grab the RAZE Edge, which grips precisely where flat blocks would slip. And when it comes to fiddly corners or small details, the compact RAZE Mini comes into play. If desired, you can print the sanding blocks with or without FUZZY-SKIN - we have print profiles for both variants.
Cost-Efficient and Quick to Use
Since the system uses 25mm standard sanding belt from a roll, you are completely flexible in choosing the grit and save material in the long run. You cut exactly the length you need, clamp it in, and get started. If the belt is worn out, it can be replaced in seconds using the tensioning wheel.
Optimal Sanding Belt Size for Each Model
We've already taken care of the measuring for you :-) Simply cut the exact length from your sanding belt roll for the desired model so it fits perfectly on the block.
MODEL | SANDING BELT LENGTH |
RAZE MINI | 177 x 25 mm |
RAZE EDGE | 210 x 25 mm |
RAZE CURVE | 300 x 25 mm |
RAZE LONG | 325 x 25 mm |
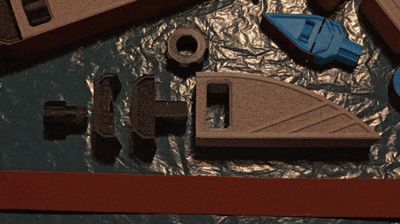
Assembly Instructions (Important!)
Before final assembly:
Screw all threaded parts in dry several times and loosen them again to "break in" the threads.

First, the tensioning wheel is placed centrally into the recess of the sanding block. Then, the clamping jaw (part with the cut thread) is inserted into the rear part of the sanding block, and it is turned downwards with the tensioning wheel. Once the mechanism is in place, the sanding belt is wrapped around the outside of the sanding block. For fixation, the back part is placed onto the clamping jaw (and the sanding belt), the hand knob is guided through the bore, and then screwed firmly into the internal thread of the clamping jaw. To tension the belt, now turn the clamping jaw out with the tensioning wheel until everything is tight.

👍 Free support: A like and a place in your collection show us that the CAD hours were worth it. ☺️
License
You shall not share, sub-license, sell, rent, host, transfer, or distribute in any way the digital or 3D printed versions of this object, nor any other derivative work of this object in its digital or physical format (including - but not limited to - remixes of this object, and hosting on other digital platforms). The objects may not be used without permission in any way whatsoever in which you charge money, or collect fees.
Comment & Rating (222)