


Print Profile(1)

Description

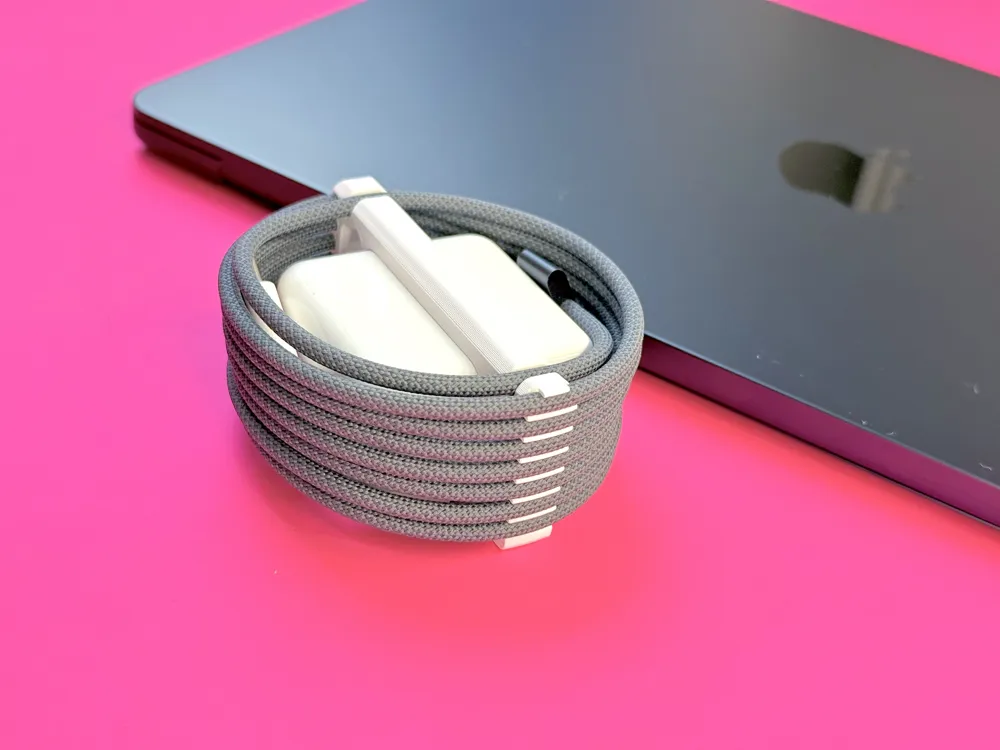
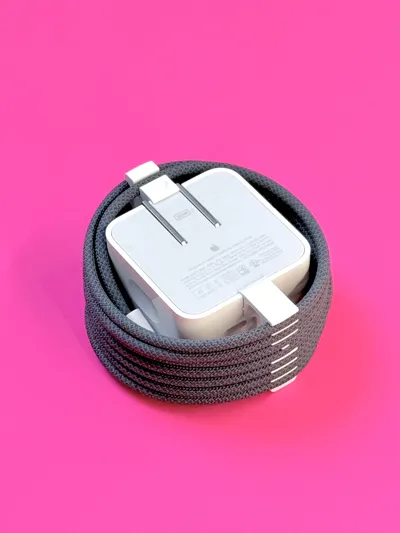
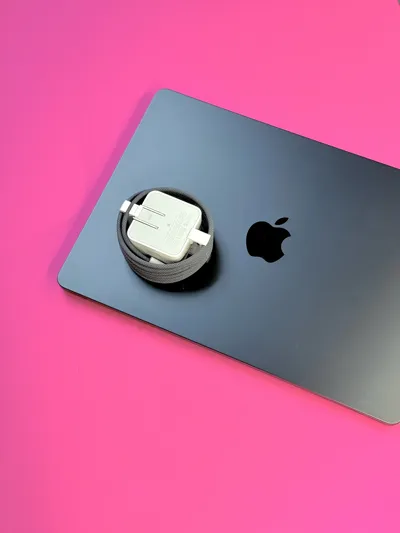
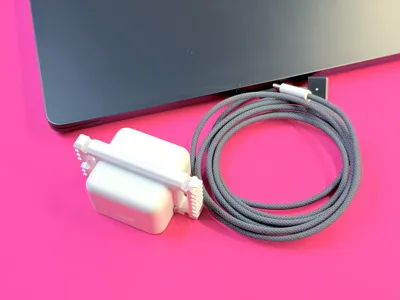
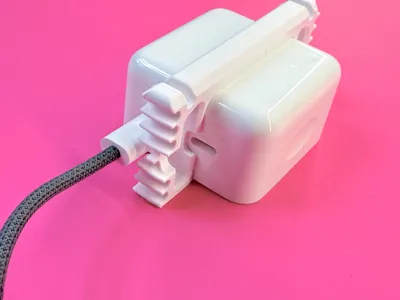
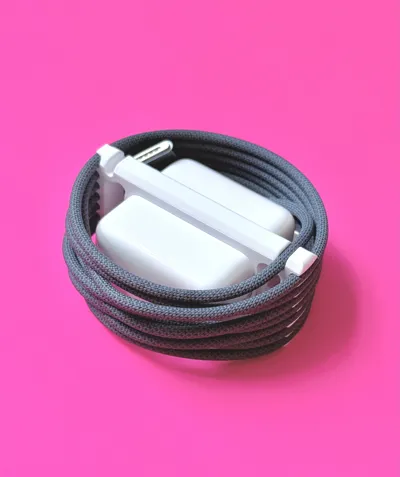
Keep your power cord neatly wrapped around your MacBook Air 35W power adapter.
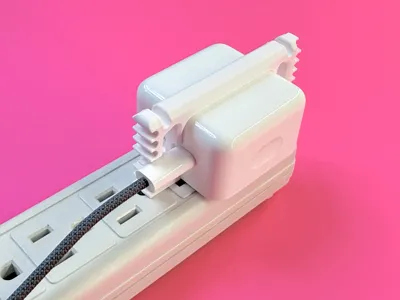
This cable organizer clips to the adapter and can be left on when in use, so it’s right where you need it. No extra clutter for your desk or bag, not another small item to lose, nothing dangling off your cable and getting in the way or getting stepped on.
Features
- Cable wrapping that follows the natural curve of the cable - don’t introduce kinks and bends.
- Flat design - 35 mm thick when in use. Don’t add extra bulk to your bag by winding on another axis.
- Directional winding - each notch is on a slight angle and offset from the opposite side, designed for the spiral of a coiled cable.
- Soft but firm grip on the cable - properly sized cable notches securely hold your power cord without excessive resistance when winding/unwinding.
- "Proper” over-under cable coiling method compatible but not required.
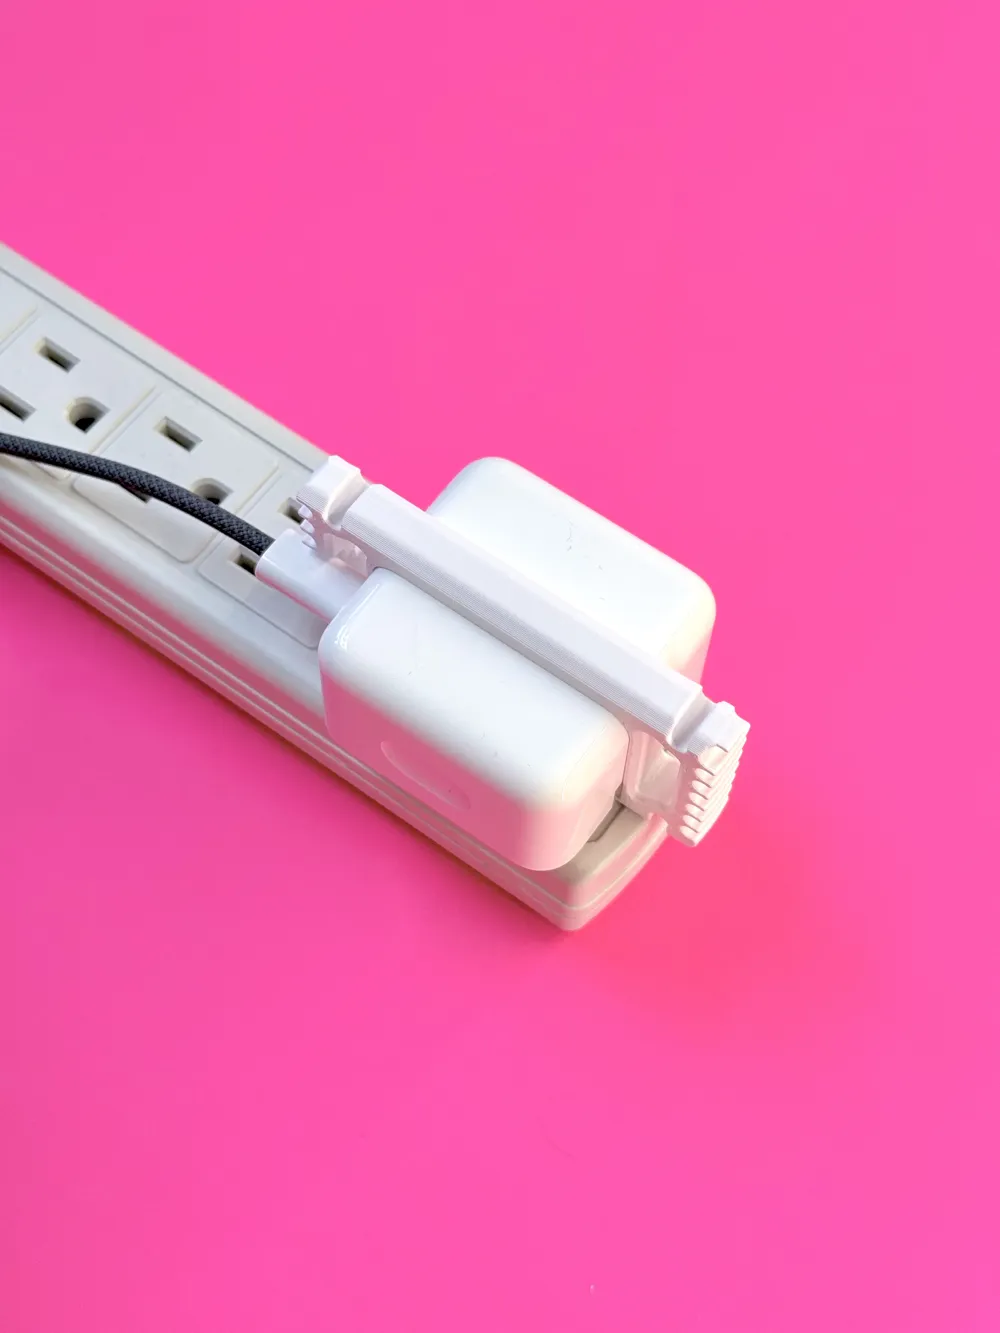
- Clip onto adapter horizontally or vertically - whatever the orientation of your plugs, clip it on without blocking other plugs.
- Snug fit on adapter - uses a small compliant mechanism to grip the adapter, so that it doesn’t accidentally slide off when not secured by a cable or prongs.
- Generous cutouts for USB-C ports - with the clip attached vertically, use both USB-C ports without obstruction.
Compatibility
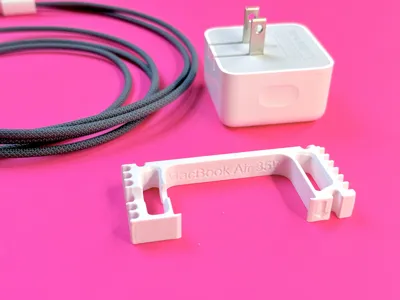
This is designed to fit on the Apple 35W Dual USB-C Port Compact Power Adapter. This has a type A plug (Canada, USA, Mexico, Japan.)
It is designed to accommodate the length and diameter of the 2m long USB-C to MagSafe 3 braided cable.
Both the cable and adapter came with the Apple MacBook Air, purchased in North America in early 2026. This power adapter is also compatible with other Apple devices.
Dimensions
Power adapter dimensions: 49.5 x 49.5 x 28 mm
Cable length: 2 m
Cable diameter: 3.5 mm
Cable clip width: 10 mm
Depth: 35 mm
Length: 79 mm
When assembled and in use the diameter of the bundle is about 80 mm.
Use
Slide onto the power adapter. If orienting vertically, open the plug prongs to position the clip between them, then fold them back up into the storage position.
Wind cable - basic
Place the adapter face down. Starting from the back, you will be winding clockwise.
Place the USB-C connector beside the adapter where it will be tucked when fully wound (around 9 o’clock). Press the cord into the single notch on the back of the clip, above the arrow (12 o’clock).
Loosely coil the cable clockwise, following its natural curve, and press it into the first notch on the bottom clip (6 o’clock) and then back around to the notch on the arrow end (12 o’clock). Continue coiling, pressing the cable into each notch to secure it. Use the notches on the front of the clip to secure the other end of the cable and tuck the end between the adapter and coil.
Wind cable - over-under
If you're not familiar with the over-under method, this one-minute Youtube video is a good demonstration.
Place the adapter face down. Starting from the back, you will be winding clockwise.
Place the USB-C connector beside the adapter where it will be tucked when fully wound (around 9 o’clock). Press the cord into the single notch on the back of the clip, above the arrow (12 o’clock). Loosely coil the cable clockwise, following its natural curve, and press it into the first notch on the bottom clip (6 o’clock) and then back around to the notch on the arrow end (12 o’clock). You now have your first “over” loop.
Pick up the adapter in your left hand with the arrow pointing towards yourself. Hold it with your thumb on the notches at the top and fingers on the notches at the bottom. With your right hand, make your first “under” loop, adjusting the size. Press the cable into the bottom notch with your fingers and the top notch with your thumb. The cable should cross itself on the side of the adapter facing you. (Around 2 o’clock if you look at it from the back.) Press the cable into the notches with your left thumb and finger.
Make an “over” loop and press into the notches at the top and bottom. Repeat until you run out of cable.
Uncoiling over-under
Again, holding the adapter in your left hand. Untuck the cable end from the front of the adapter. Pop the cable out of the notches and uncoil your “over” loop. When you get to your first “under” loop, use your index finger to lift the cable out of two notches at the top, then grab the loop to pull it out of the bottom notch. Repeat with each over and under loop.
If you’re familiar with over-under this should all feel pretty easy and intuitive.
Print in PETG or another material that has some flexibility and will not drift. This print is not suitable for PLA. Supports are required for the US-C cutout and one cable notch.
Recommended print settings
Start with the standard 0.2 mm print profile for a 0.4 mm nozzle.
- Wall generator: Arachne
- Bridge flow: 1.5
- Speed: Bridge 10mm/s
- Sparse infill
- Density: 10%
- Pattern: Adaptive cubic
- Enable support
- Type: Normal (auto)

I welcome your comments and feedback! I'm new to 3d printing and modelling. Your input helps me improve.
If you print it and find it useful, please rate! I would also love to see your photos!
Boost Me (for free)
If you found this well constructed and it solved a problem for you, you can Boost me for free! Boosts are a great motivation to keep sharing functional prints to make your life a little easier and contribute to the community. Thanks!

Check out my collections of other models:


License
You may create derivative works based on this object, provided that all such derivative works are published exclusively on the MakerWorld platform and include proper attribution to the original creator. You may not share, upload, host, distribute, or publish this object—or any derivative work of this object—on any other digital platform, marketplace, or distribution channel. Commercial use of this object and any derivative works is strictly prohibited. This includes, but is not limited to, selling, renting, sublicensing, or using the object in any context in which you receive monetary compensation or other financial benefits.
Comment & Rating (3)