
Modular Honeycomb Wall Organizer
Print Profile(1)
Bill of Materials



- Wall Anchors x 4: if you want to mount permanently on the wall
Description
Description
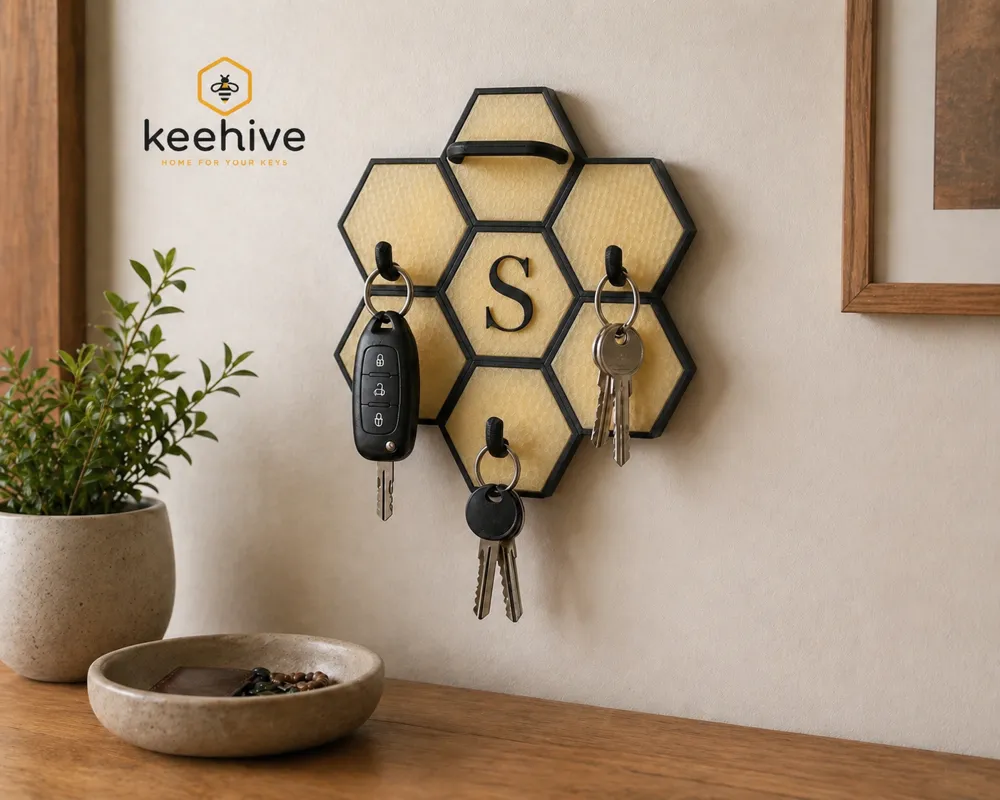
A clean, expandable hex wall system for organizing everyday items.
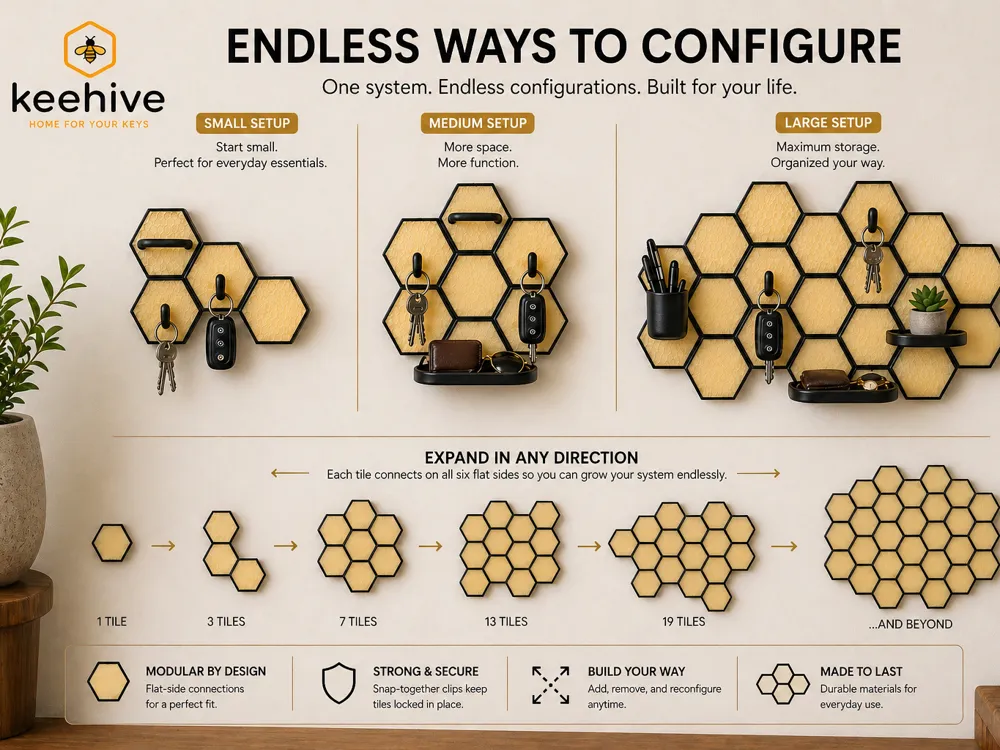
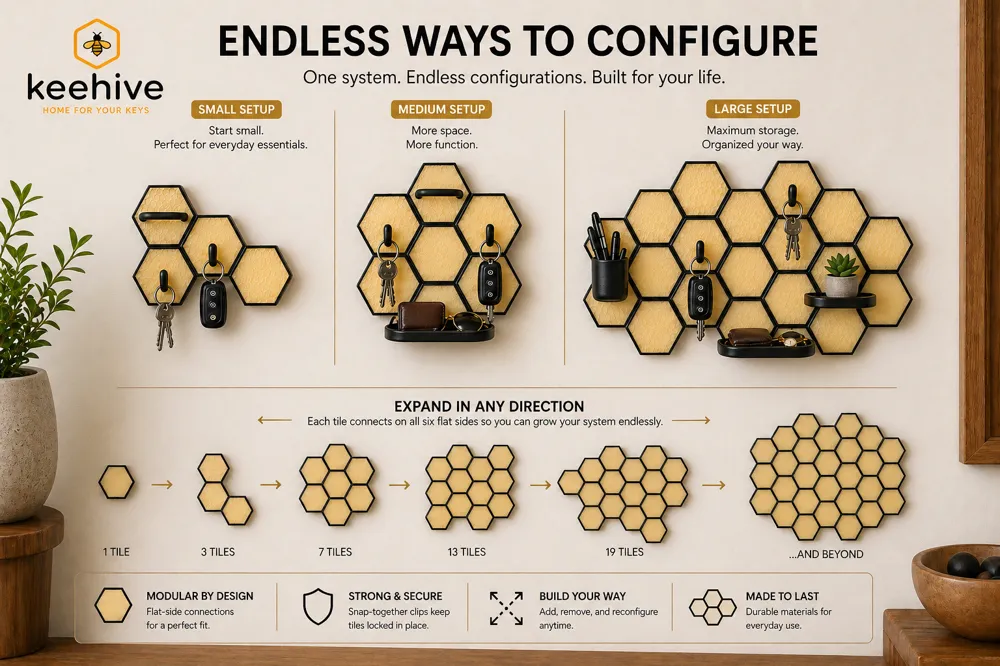
Keehive uses a clip-together design with magnetic inserts, so you can build your layout, change it anytime, and keep everything looking sharp.
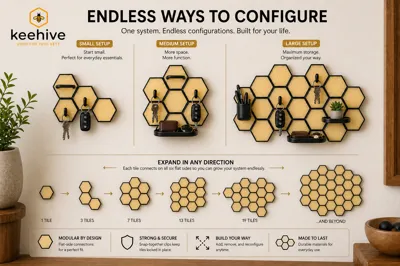
Start with one tile or build out a full wall. It grows with you.
Why People Download This
- Modular honeycomb design
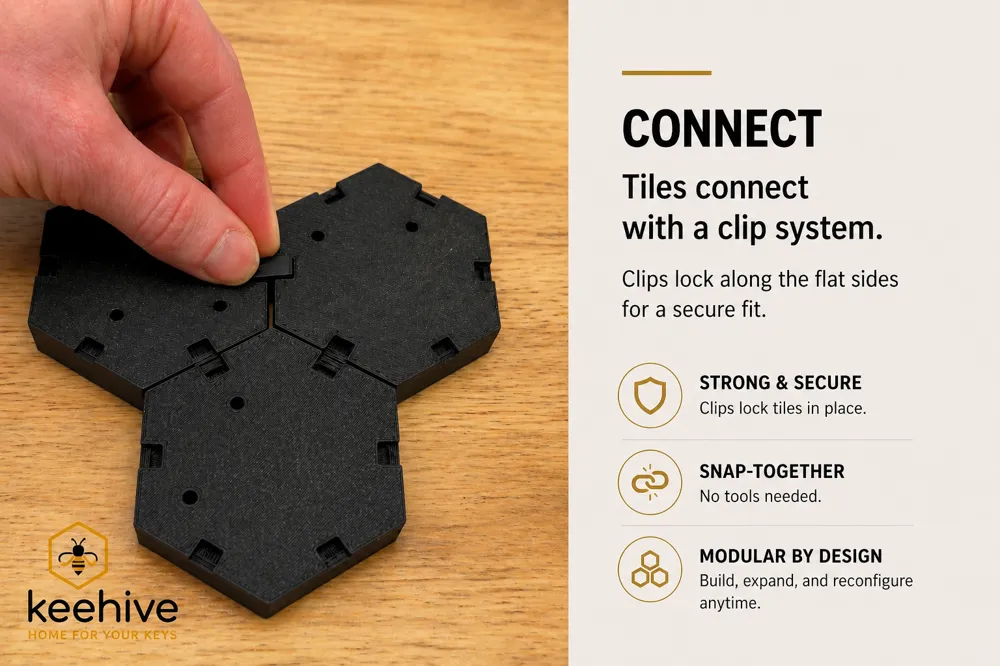
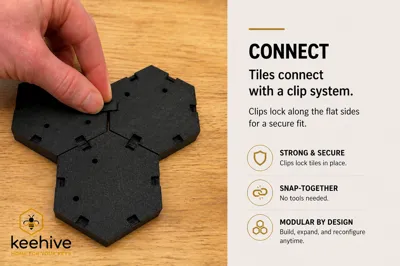
- Snaps together with a clip system (no glue)
- Magnetic inserts for quick swaps
- Fully customizable layout
- Clean, modern look on the wall
- Designed for easy Bambu printing
How It Works
Each hex tile connects on the flat sides only using small clips.
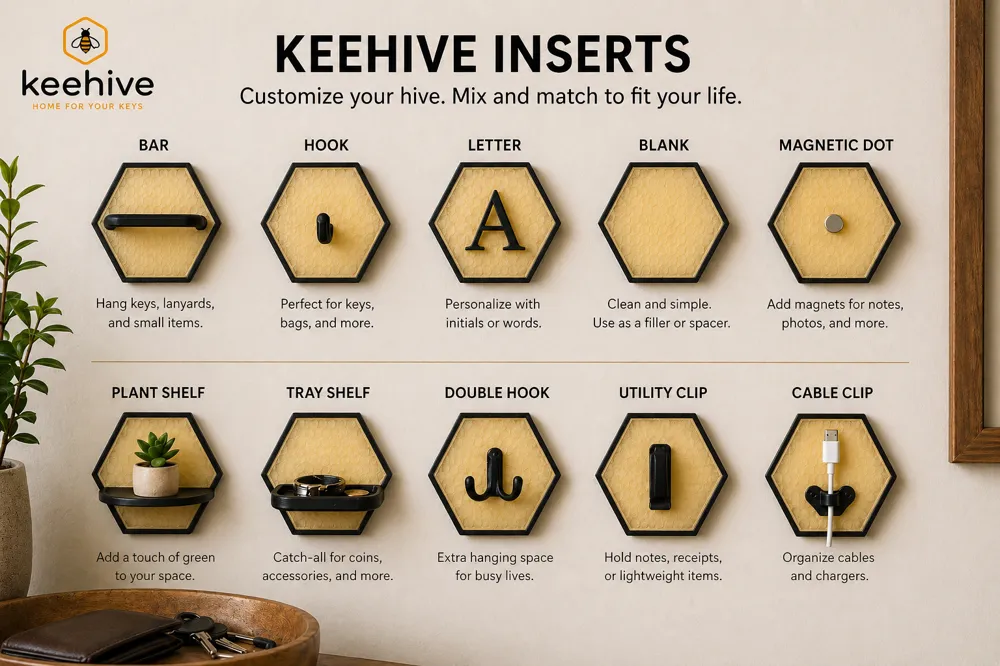
Inserts attach using hidden 10mm magnets that are embedded during printing.
You can:
- Expand in any direction
- Swap inserts anytime
- Reconfigure your layout in minutes
Assembly (Simple Workflow)
1. Customize Your Print
Open the file and adjust as needed:
- Duplicate tiles
- Change letters
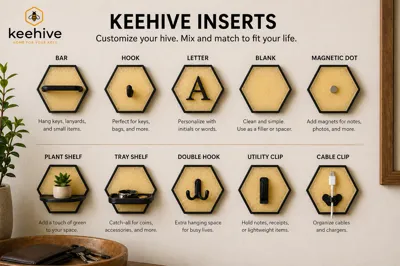
- Choose inserts
Send to your Bambu printer.
2. Insert Magnets (Pause Step)
The print will pause mid-print.
- Drop in 10mm magnets
- Keep polarity consistent
- Resume print
Magnets will be sealed inside the part.
3. Build Your Layout
Lay out your tiles before mounting.
- Only connect on flat edges
- Keep alignment tight for a clean honeycomb
4. Snap Tiles Together
Insert clips between tiles.
- Press until fully seated
- Locks tiles into one solid structure
5. Add Inserts
Drop in your inserts.
- Magnetic connection
- Easy to swap or reposition
6. Mount to Wall
- Hold layout in place
- Mark holes
- Add anchors if needed
- Screw into wall
7. Done
Start using it.
Add more tiles anytime.
Included Parts
- Hex tiles (base units)
- Clip connectors
- Inserts (bar, hook, letter, blank, etc.)
- 10mm magnet slots (pause-to-insert)
Use Cases
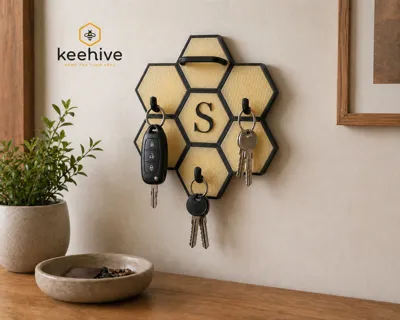
- Key holder
- Entryway organizer
- Desk wall setup
- Cable management
- Mail + notes
- Minimal decor
- Custom name displays
Important Notes
- Designed for light items only
- Not for heavy loads (bags, large gear, etc.)
- Best results with proper wall anchors
Print Tips (Bambu Optimized)
- No supports needed
- Print face-down for best surface
- Use pause at magnet layer (already set if included)
- PLA or PETG both work well
- Use a brim if needed for adhesion
License

You may create derivative works based on this object, provided that all such derivative works are published exclusively on the MakerWorld platform and include proper attribution to the original creator. You may not share, upload, host, distribute, or publish this object—or any derivative work of this object—on any other digital platform, marketplace, or distribution channel. Commercial use of this object and any derivative works is strictly prohibited. This includes, but is not limited to, selling, renting, sublicensing, or using the object in any context in which you receive monetary compensation or other financial benefits.


Comment & Rating (1)