P2S Hotend Fan Duct Upgrade


Print Profile(5)
Description
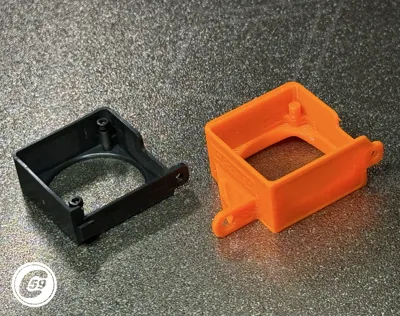
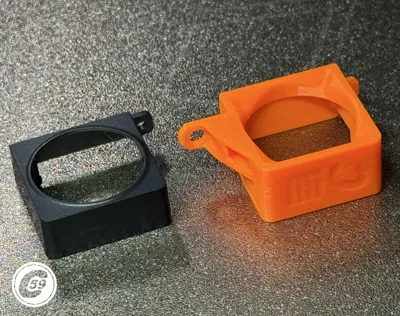
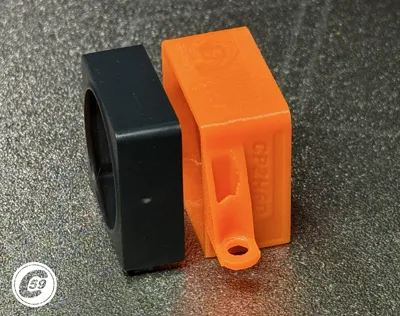
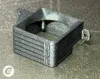
P2S Hotend Duct Upgrade (CP2HFD)
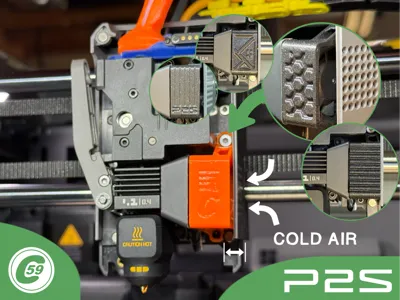
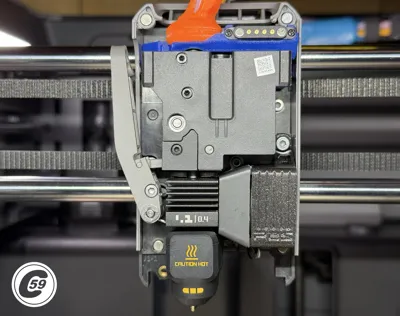
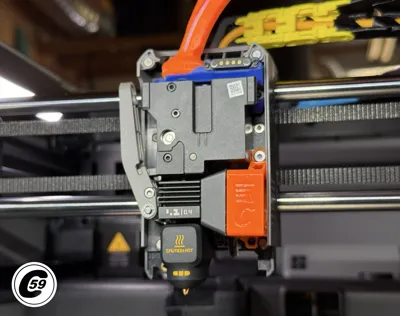
Draw air through the intended port with this upgraded fan duct, featuring a dual-screw mounting for unmatched retention strength on the toolhead.
This duct redirects cooler air from outside the toolhead directly toward the nozzle while also reinforcing the toolhead fan cover.
Features
- Draws cold air from outside the toolhead
- Reinforced dual-screw mounting
- Helps retain and stabilize the toolhead cover
- Improved airflow direction toward the nozzle
Made to Compliment but not limited to:
- Wireless Toolhead Fan Cover Mods
- Proven Toolhead Guide 3.3
Both Available here: XPTG 3.3 P2S
Quick Install/ Action Shorts: Duct-it!
At C59, we believe small details make a big difference.
Compatibility
Compatible with Bambu Lab P2S only.
Requirements
- Hot glue, silicone, or preferred adhesive
Installation Instructions
- Remove the toolhead cover.
- Remove the original fan duct lower hex screw.
- Pull the duct downward to disengage the upper clip and remove it.
- Remove both hex screws holding the fan.
- Remove the original duct.
- Install the new duct onto the fan properly, then add two small dabs of hot glue (or preferred adhesive such as silicone) to secure it.
- Remove the right lower extruder hex screw.
- Insert the new assembly while engaging the wire into the groove at the bottom of the toolhead.
- Reinstall both screws snugly and secure them properly.
- Reinstall the toolhead cover and enjoy coooool air!
Enjoy this DIY 3D-printed upgrade and improved cooling performance!
v1.0 Stripe Specifications
Material: PETG
Printer Settings:
- Profile: Standard
- Layer Height: 0.20 mm
- Mode: CERTIFIED LUDICROUS
- Infill: 25% Gyroid
- Walls: 3
- Bottom Layers: 3
- Top Layers: 5
Printing Details:
- Supports: Required & Brim
- Print Time: 18m43s
- Filament Usage: 0.12 oz
- Estimated Cost: ~$0.11 (based on a $26 PETG spool)
Boost Me (for free)
🚀 Boost Your Project! 🚀 If you love what I'm working on, hit the Boost button! Your support helps me continue to create, improve, and share even more exciting designs. Thank you for being part of this journey!
Enjoy your printing journey, and remember—keep your fingers away from the poop chute, she's angry!
"I’ll be sure to keep you updated with any future developments. If you come across any issues or need assistance, don’t hesitate to reach out—I’m here to help!"
You shall not share, sub-license, sell, rent, host, transfer, or distribute in any way the digital or 3D printed versions of this object, nor any other derivative work of this object in its digital or physical format (including - but not limited to - remixes of this object, and hosting on other digital platforms). The objects may not be used without permission in any way whatsoever in which you charge money, or collect fees.
Current ver.1.0_05/11/2026
© 2026 C59 Design Lab. All rights reserved.
License
You shall not share, sub-license, sell, rent, host, transfer, or distribute in any way the digital or 3D printed versions of this object, nor any other derivative work of this object in its digital or physical format (including - but not limited to - remixes of this object, and hosting on other digital platforms). The objects may not be used without permission in any way whatsoever in which you charge money, or collect fees.
Comment & Rating (13)