Cabinet Back Panel Saver and Fixer


Print Profile(2)
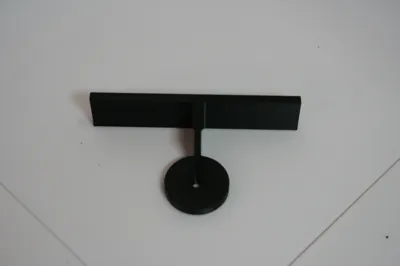
Bill of Materials
Description
Boost Me (for free)
if you like my work, please boost me
your Print Oma
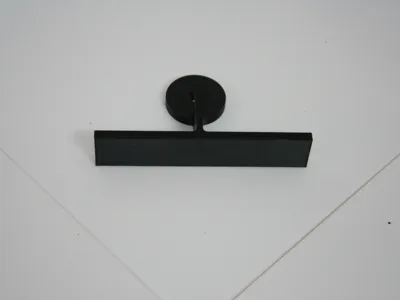
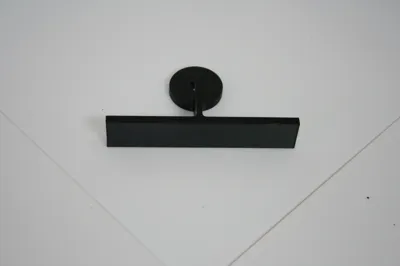
Cabinet Back Panel Fixer – Repair From the Inside, Without Moving the Cabinet
The Problem
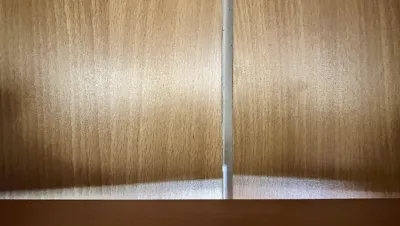
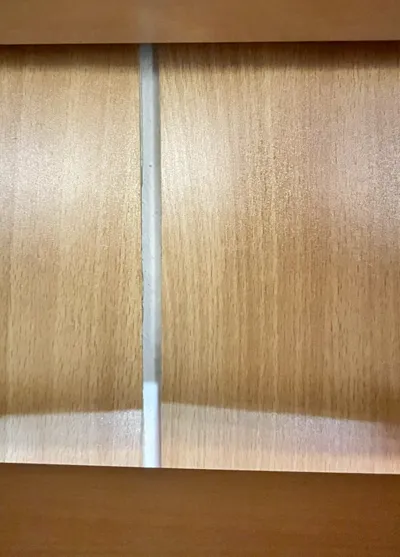
We all know it: the back panel of a cabinet has come loose – it wobbles, sags, or has popped out at one corner. The real headache: cabinet back panels are almost always screwed or nailed in from the outside. To reattach them properly, you would normally have to:
- completely empty the cabinet,
- pull it away from the wall,
- refasten the back panel,
- put everything back inside.
With full wardrobes, built-in cabinets, or heavy furniture, that's half a day of work – or simply impossible.
The Solution
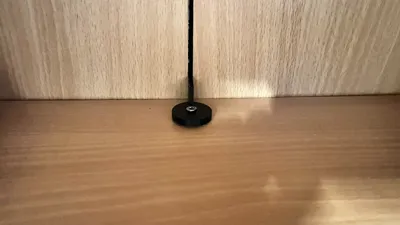
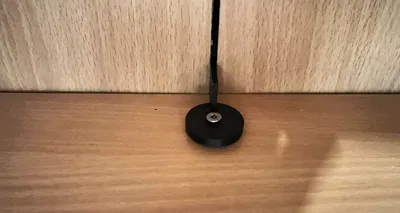
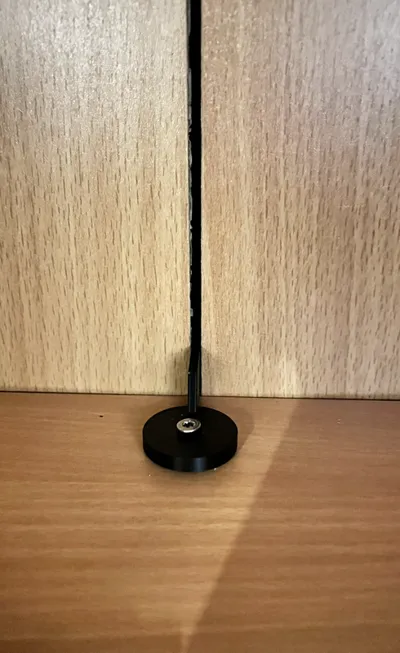
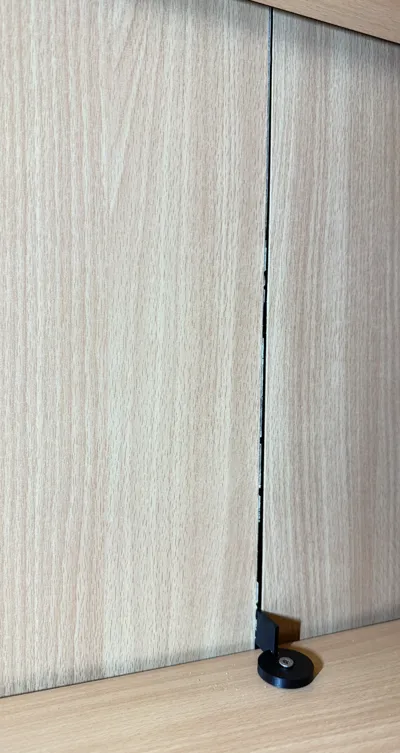
This fixer is installed entirely from the inside. The flat bar is pushed through a small gap behind the back panel. Then simply pull the bar back toward you from the inside – the back panel is pressed firmly and permanently against the cabinet body. Finally, secure it with your screw.
Result: The cabinet stays in place, the contents stay inside, and the back panel sits rock solid again.
Use Cases
- Wardrobes and living room cabinets standing against a wall
- Built-in cabinets that cannot be pulled out at all
- Upper kitchen cabinets (accessible from the inside)
- Sideboards, dressers, display cabinets
- In general: anywhere the back side is not accessible
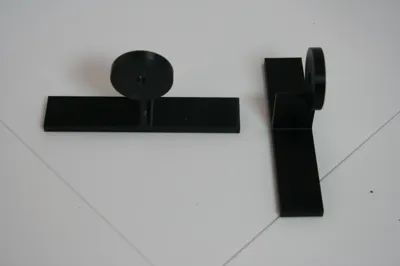
Installation
- Depending on the installation situation, it may be a good idea to pre-drill the hole where the screw will be inserted using a thin drill bit
- Push the bar behind the back panel (through an existing gap or a suitable drilled hole)
- Pull the back panel toward you using the bar
- Secure with the screw
- Done
Depending on the size of the loose area, 1–3 fixers per affected section are recommended.
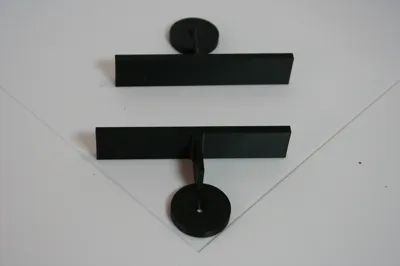
What You Need
- 1× printed fixer
- 1× countersunk screw, approx 10 mm length (diameter depending on the thickness of the panel it's being fastened to)
Print Settings
- Material: PETG (recommended, due to tensile load and long-term stability) or ABS. PLA works but may creep under sustained load.
- Layer height: 0.2 mm
- Walls / perimeters: at least 4
- Infill: ≥ 40 %, Gyroid or Cubic
- Orientation: print the bar lying flat, so that the layer lines run perpendicular to the pulling direction
- Supports: no supports
Notes
- The pressure plate distributes the clamping force over a wide area – the inside of the cabinet is not damaged.
- The fixer is reversible: simply loosen the screw and pull the bar back out.
Why This Model
We did extensive research and could not find a comparable solution for this very common problem – neither on MakerWorld nor on other 3D model platforms. The design is intentionally minimalistic: every element serves a clear mechanical function, with no unnecessary material.
What Sets This Model Apart From Existing Solutions
Existing 3D models for cabinet back panels (back panel connectors, corner brackets, replacement original clips) all assume that the cabinet is either being assembled, disassembled, or accessible from the back. Classic furniture hardware such as back panel connectors from Hettich or Häfele are installed during initial assembly. For the very common case of a loose back panel in a fully loaded, firmly positioned cabinet, no ready-made solution has existed so far – neither in the hardware trade nor on 3D model platforms, only DIY tips in home improvement forums. This fixer closes exactly that gap.
License
You shall not share, sub-license, sell, rent, host, transfer, or distribute in any way the digital or 3D printed versions of this object, nor any other derivative work of this object in its digital or physical format (including - but not limited to - remixes of this object, and hosting on other digital platforms). The objects may not be used without permission in any way whatsoever in which you charge money, or collect fees.
Comment & Rating (0)