
Modular Desktop Riser Charging Station
Print Profile(6)
Description
07-06-2026 Update:
Based on feedback, new versions of each module have been added: hollow on both sides, hollow on the left side, and hollow on the right side, please print as needed
Added a single drawer module (you can print this if you don't have that external hard drive, but I haven't printed it myself yet, please give me feedback if there are any issues)
Initial Version:
First, thanks to @迪伦的创造日记 for the inspiration
A few months ago, I was inspired after seeing a video on Bilibili by this creator making a modular desktop charging station, so I decided to create my own version using the equipment I already had. Many Bilibili users might have already seen my work in HBS official account's updates and in the comments sections of some content creators' videos. Honestly, I didn't expect such a great response, so I decided to make this model open source. Disclaimer: I am currently a novice in 3D modeling, so please forgive any unreasonable design choices. Below is the material list and some notes:
The currently updated modules do not require any hardware, simply insert the corresponding items into place according to my pictures. The 4 retractable cables and side magnets might be a bit tight when inserting. Please feel free to arrange the internal wiring as you see fit. For reference, I currently have two retractable cables connected to the C3 and C4 ports of the HBS 380W charging station, and the other two retractable cables and the Apple MagSafe wireless charger connected to the C1, C2, and C3 ports of the Sharge 140W charger. Therefore, the C1, C2, C5, C6, A1, and A2 ports of the HBS 380W charging station are empty. How you connect the wires will affect the maximum output power when all 4 retractable cables are used simultaneously. With my setup, the maximum output power when all four are used simultaneously is 100W + 100W + 100W/67W + 30W/67W
1. HBS 380W Charging Station 1 unit
2. HBS 100W Single Ret retractable Cable (actually supports 240W) 4 pieces
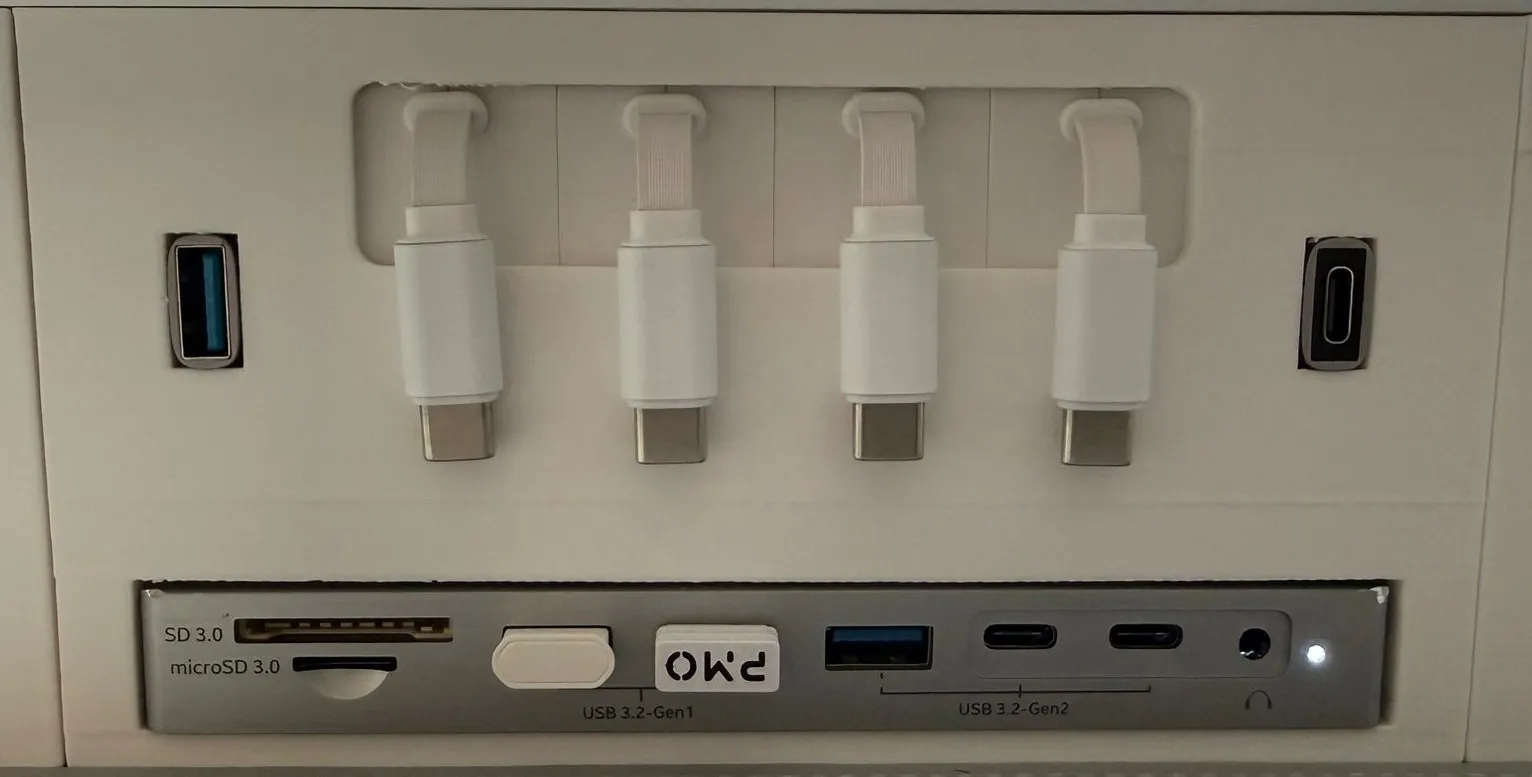
3. LANSOR 14-in-1 Docking Station 1 unit (this docking station has an annoying point, please check the notes below)
4. Sharge 140W Dot Matrix Display Charger 1 unit
5. HBS C to C L-shaped Side Bend Adapter 3 pieces (for the Sharge 140W module)
6. HBS C to A Adapter 2 pieces
7. Z-LAB Z3Pro Slide Rail Riser 1 unit
8. WD_BLACK D10 8TB 1 unit
This is equipment I already own, not very useful, you can skip this. However, it's integrated with the drawer, so the drawer and external hard drive modules don't need to be printed. I might design a separate drawer module later
9. DesignNest PowerCube 1 unit
Can be replaced by any domestic cube power strip, or a regular power strip (The one I bought is enormous, and the European standard plugs are also too large, but it can still fit into the space behind the retractable cable module. If you don't use that external hard drive, you'll only need to plug in two connectors, so I believe a smaller power strip bought domestically can fit into the space behind the module, or you can just not hide the wires and place a power strip directly behind the riser, as it won't be visible from the front anyway, please feel free to improvise)
10. 1-meter AC Extension Cable 1 piece (for the Sharge 140W module)
11. Round Magnets 8x2mm (buy more, for connecting the sides of each module, please pay attention to the polarity!)
12. Round Anti-slip Feet Stickers 8x2mm (buy more, if you are using the slide rail riser, you don't need these)
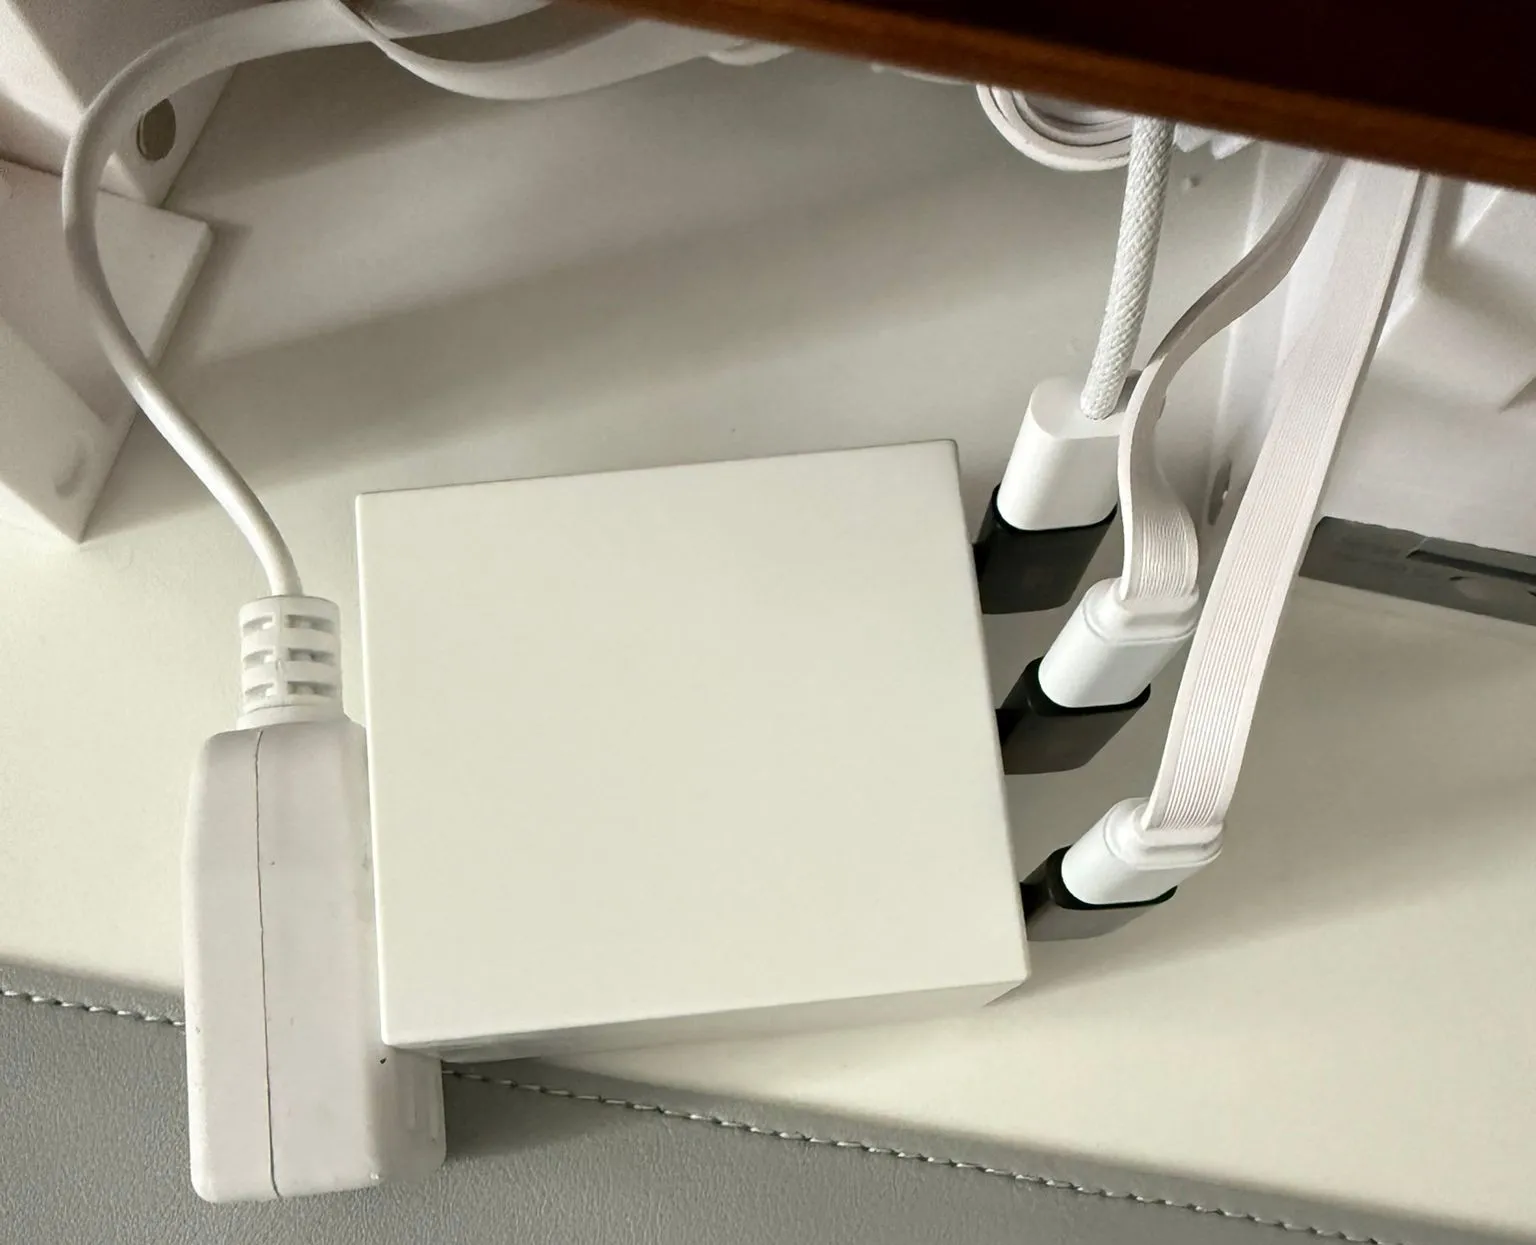
Sharge 140W Installation Diagram
Notes:
1. Each module uses magnets for side connections. Please pay attention to the polarity of the magnets. Since the openings are designed for 8mm, they are quite tight, and once a magnet is inserted, it's very difficult to remove
2. I have reserved many holes for anti-slip stickers at the bottom. If you use my print profile, these holes will be covered by small supports. Please remove the supports if you need to apply anti-slip stickers
3. One annoying point about the docking station I chose is that every time the computer is completely powered off, you have to press the power button on the side of the docking station to restart it. Therefore, if you use this docking station, it is recommended to enable the "keep USB power on after shutdown" function in the BIOS. However, I have also designed an opening on the side, so you can still press it after sliding the module if it accidentally loses power
4. Another thing to note in this work is the HBS C to A adapter. The C port needs to be connected towards the computer/docking station, so normally, it should be placed in the direction shown on the left in the image below (with the A port facing outwards). Then, connect the other end to the A port at the back of the docking station with an A to C data cable. So why is the C port on my right adapter facing outwards? This is because of the WD_BLACK D10 8TB external hard drive on my desk. This hard drive requires both an AC power connection and a connection to the computer to start. So when I need to use it, I just need to connect a short C to C cable between this right adapter and one of the C ports on the front of the docking station, as shown in the picture below
License

You shall not share, sub-license, sell, rent, host, transfer, or distribute in any way the digital or 3D printed versions of this object, nor any other derivative work of this object in its digital or physical format (including, but not limited to, publishing derivative works outside the Makerworld platform or hosting on other digital platforms). The objects may not be used without permission in any way whatsoever in which you charge money or collect fees. Subject to the above restrictions, derivative works may be published only within the Makerworld platform, and all such derivative works must be licensed under the same SDFL‑C license, without modification or additional terms. You may download the digital versions of this object, 3D print it, and display images, videos, or usage demonstrations of 3D printed versions of the object on personal social media platforms or Makerworld official channels, provided that no digital versions of the object are shared or distributed.


Comment & Rating (4)