
ID4 Magsafe Charger
Print Profile(1)
Description
If you own an iPhone with MagSafe and a Volkswagen ID.4, you probably know this annoying message by heart:
"The mobile device currently cannot be charged. Please remove all other objects from the phone compartment."

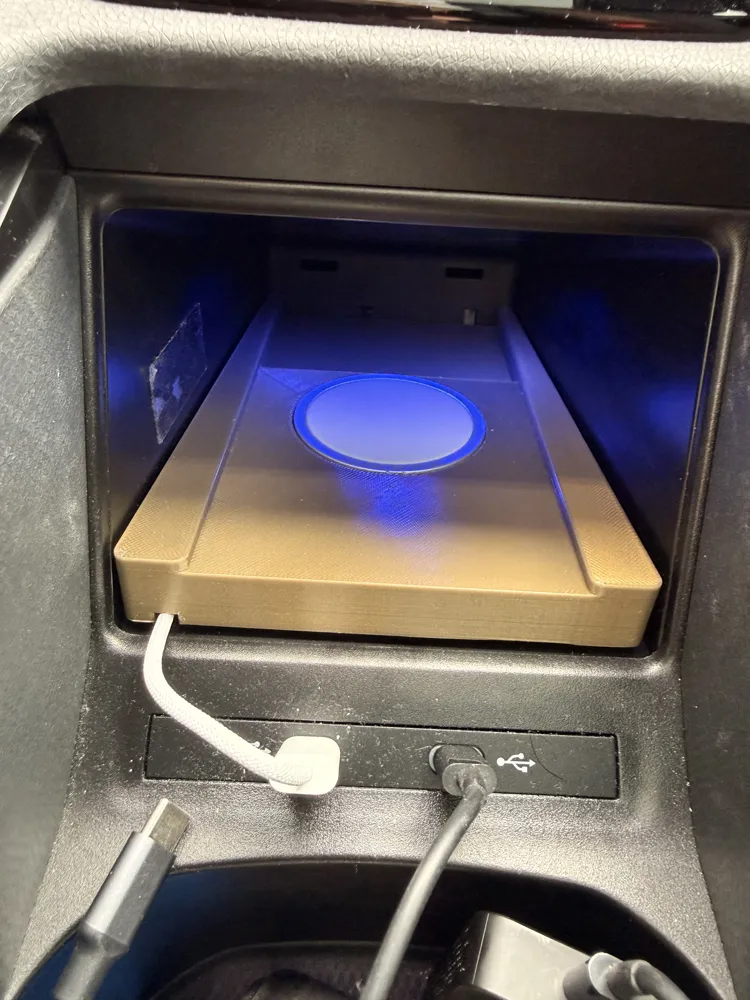

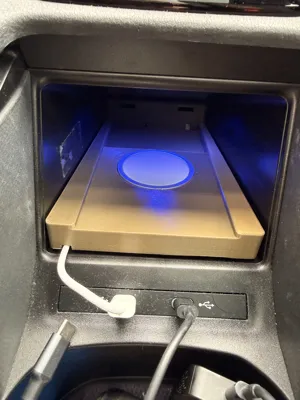
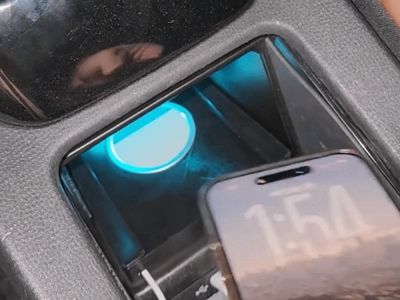
The car's built-in wireless charger detects the MagSafe magnets on the back of the iPhone as a foreign object, causing the charging to fail completely. To solve this frustrating issue, I designed this custom insert that replaces the factory silicone pad and securely holds an official Apple MagSafe Charger.
Boost Me (for free)
⚠️ IMPORTANT: MagSafe Generation Compatibility This model is specifically designed based on the exact dimensions of the 2nd Generation Apple MagSafe Charger (Fabric Cable) (Models A2580 / A3250).
- Gen 1 (Silicone Cable - A2140): The older puck is actually slightly smaller in diameter (55.38mm) but slightly thicker (4.53mm).
- Gen 2 (Fabric Cable - A2580/A3250): The newer puck is slightly wider (55.5mm) but thinner (4.45mm). While the differences are minimal, I cannot guarantee a perfect friction fit for the 1st Gen charger. I highly recommend using the 2nd Gen charger for this print.
✨ Key Design Features
- Camera Bump Clearance: Designed with plenty of room to accommodate large camera modules.
- Anti-Slip Stoppers: I added stoppers on the left and right sides to prevent the phone (and charger) from sliding out during hard cornering or high lateral G-forces.
- Max Size Ready: The dimensions were built around an iPhone 16 Pro Max with a case. While I haven't tested it on a smaller 'Pro' or standard model, the generous camera cutout means smaller phones should fit without any issues. (If you test it with a smaller phone, please let me know in the comments!)
🌡️ Material Recommendation & A Little Confession...
Okay, full disclosure: The print profile provided and the actual model shown in the photos are printed in PLA. I fully intended to reprint it in ABS for my car, but honestly... I was feeling a bit lazy, so I just left the PLA version in there! 😅
I live in South Korea, a country with four very distinct seasons. Even with the weather getting noticeably hotter recently, my PLA print is surprisingly holding up perfectly fine with zero issues so far.
HOWEVER, since car interiors can reach extreme temperatures under the summer sun, I still highly recommend printing this in ABS or ASA if you want it to last forever without warping. Print in PLA at your own risk!
🖨️ Printing & Design Compromises (Read Before Printing)
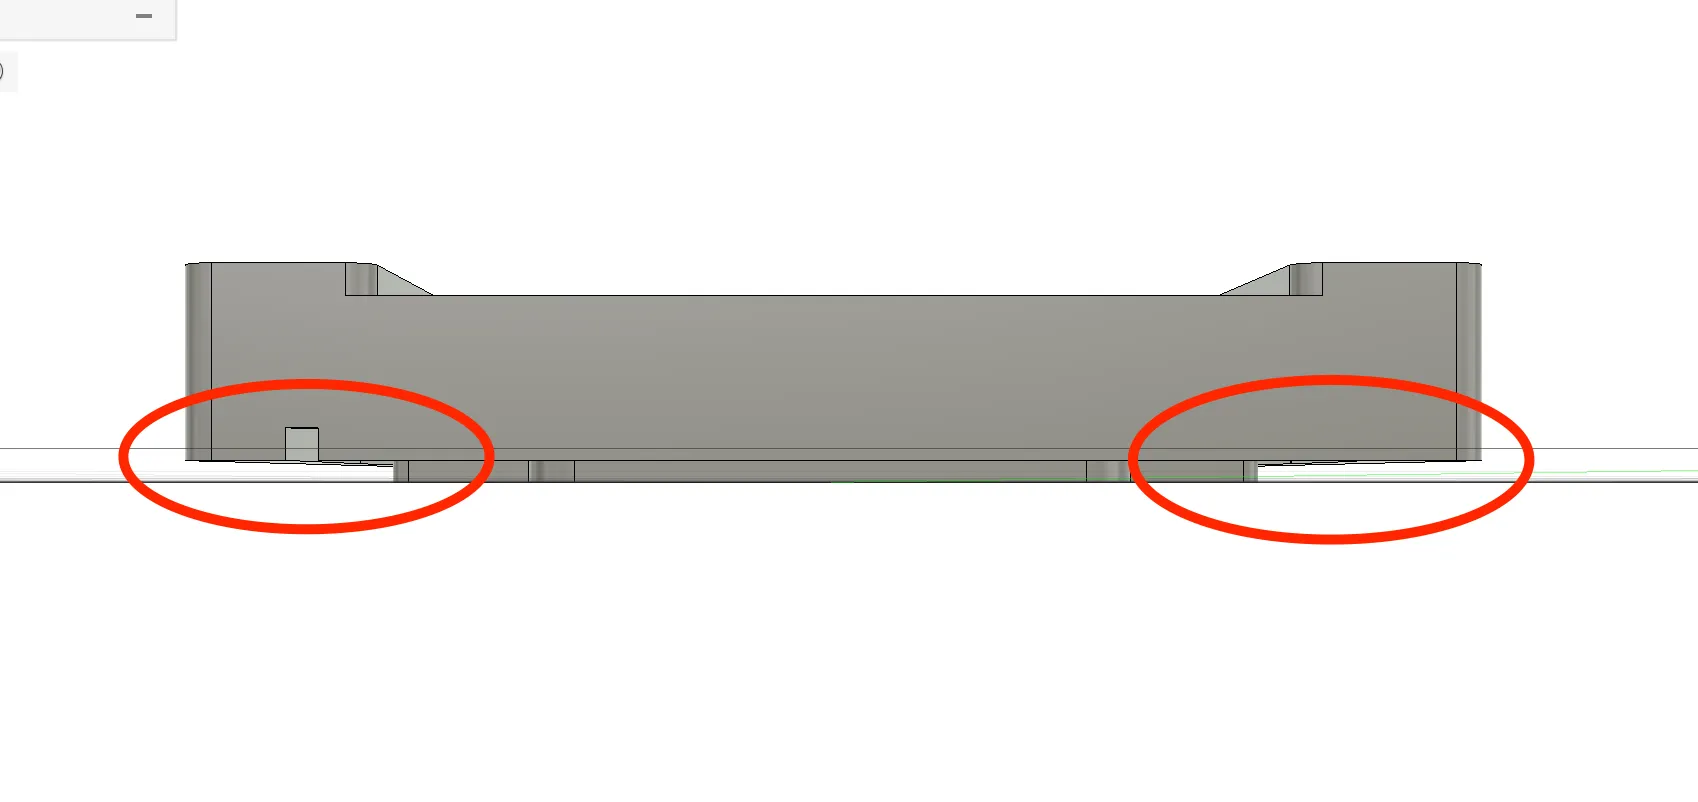
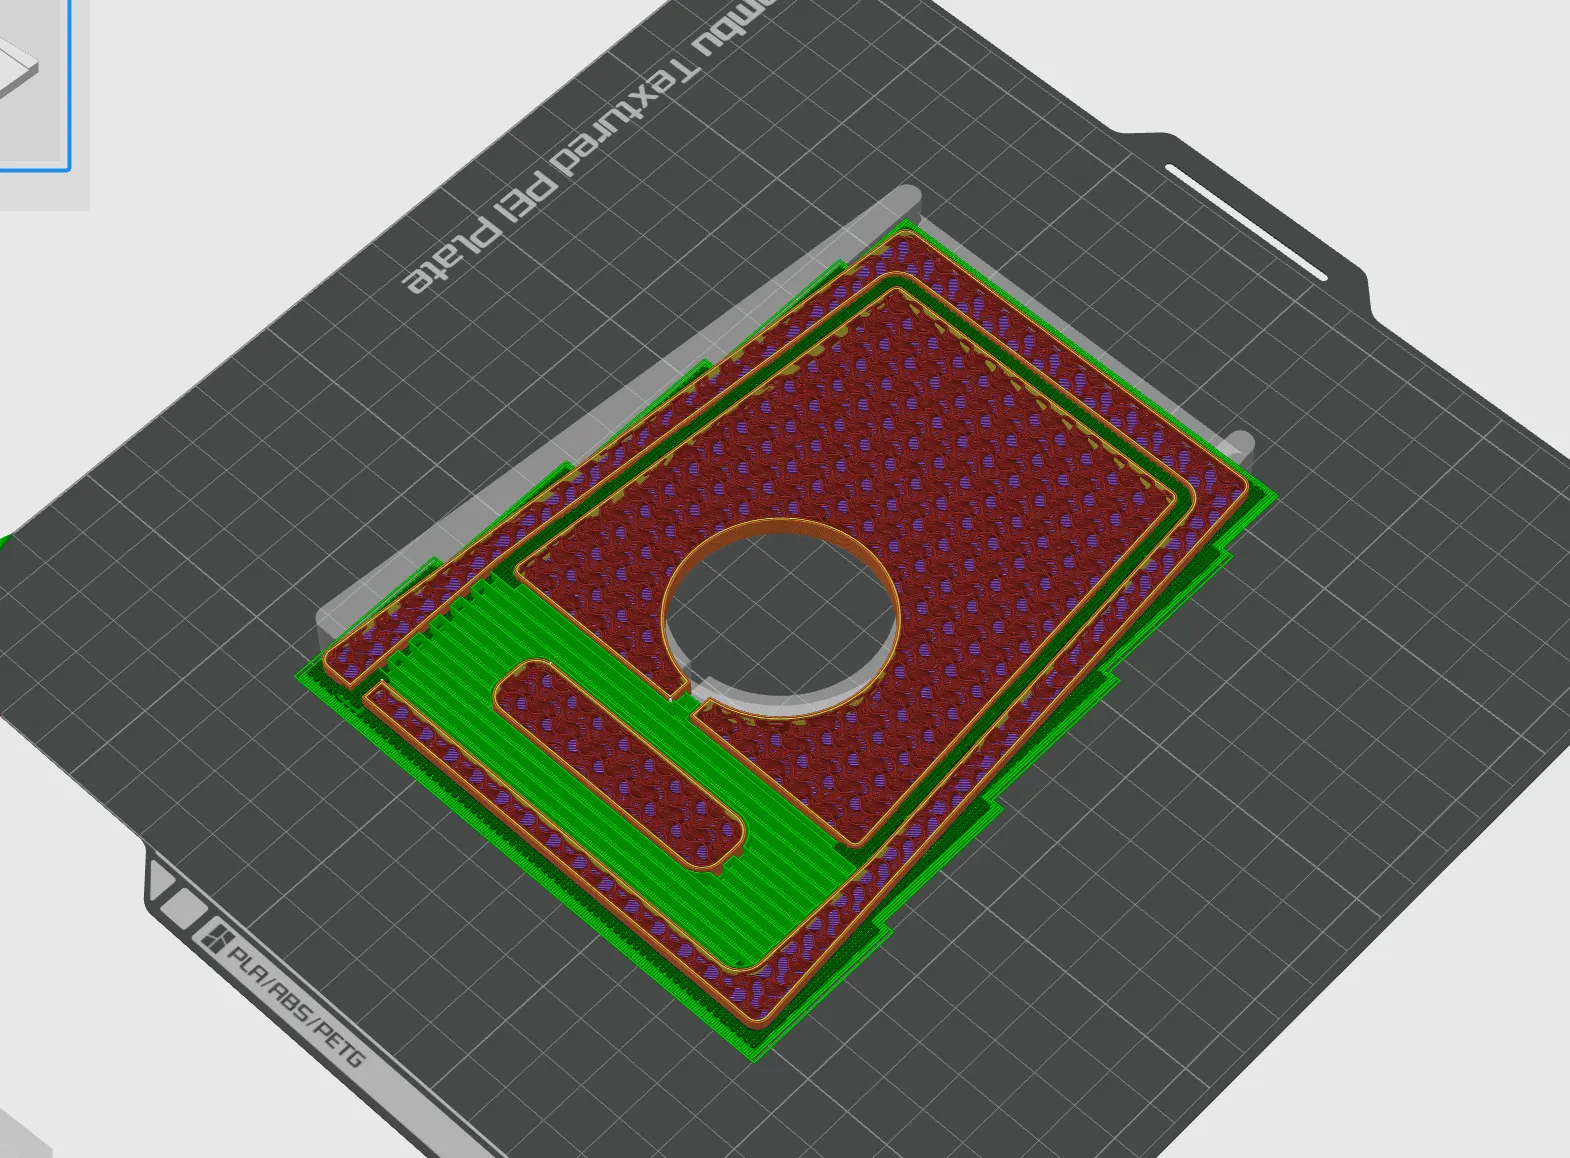
I usually hate using supports, so I originally designed this to sit completely flat. However, I discovered that even with thick 3M double-sided tape, a flat back wouldn't adhere properly to the curved surface of the ID.4's charging bay. Therefore, I had to redesign the back to be slightly elevated to match the car's contours. This means you MUST use supports for the bottom. It requires a bit of cleanup, but it's a necessary compromise for a secure installation.
🛠️ Installation Guide
- Print & Clean: Print the model and carefully remove all bottom supports.
- Insert Charger: Press your Apple MagSafe charger into the dock. Route the cable through the dedicated cable tunnel I designed for a clean look.
- Note on Fitment: Depending on your filament (PLA, ABS, PETG) and its shrinkage, the charger might fit a little loose. If so, simply apply a small piece of double-sided tape to the three circular points indicated in the images to secure the puck.
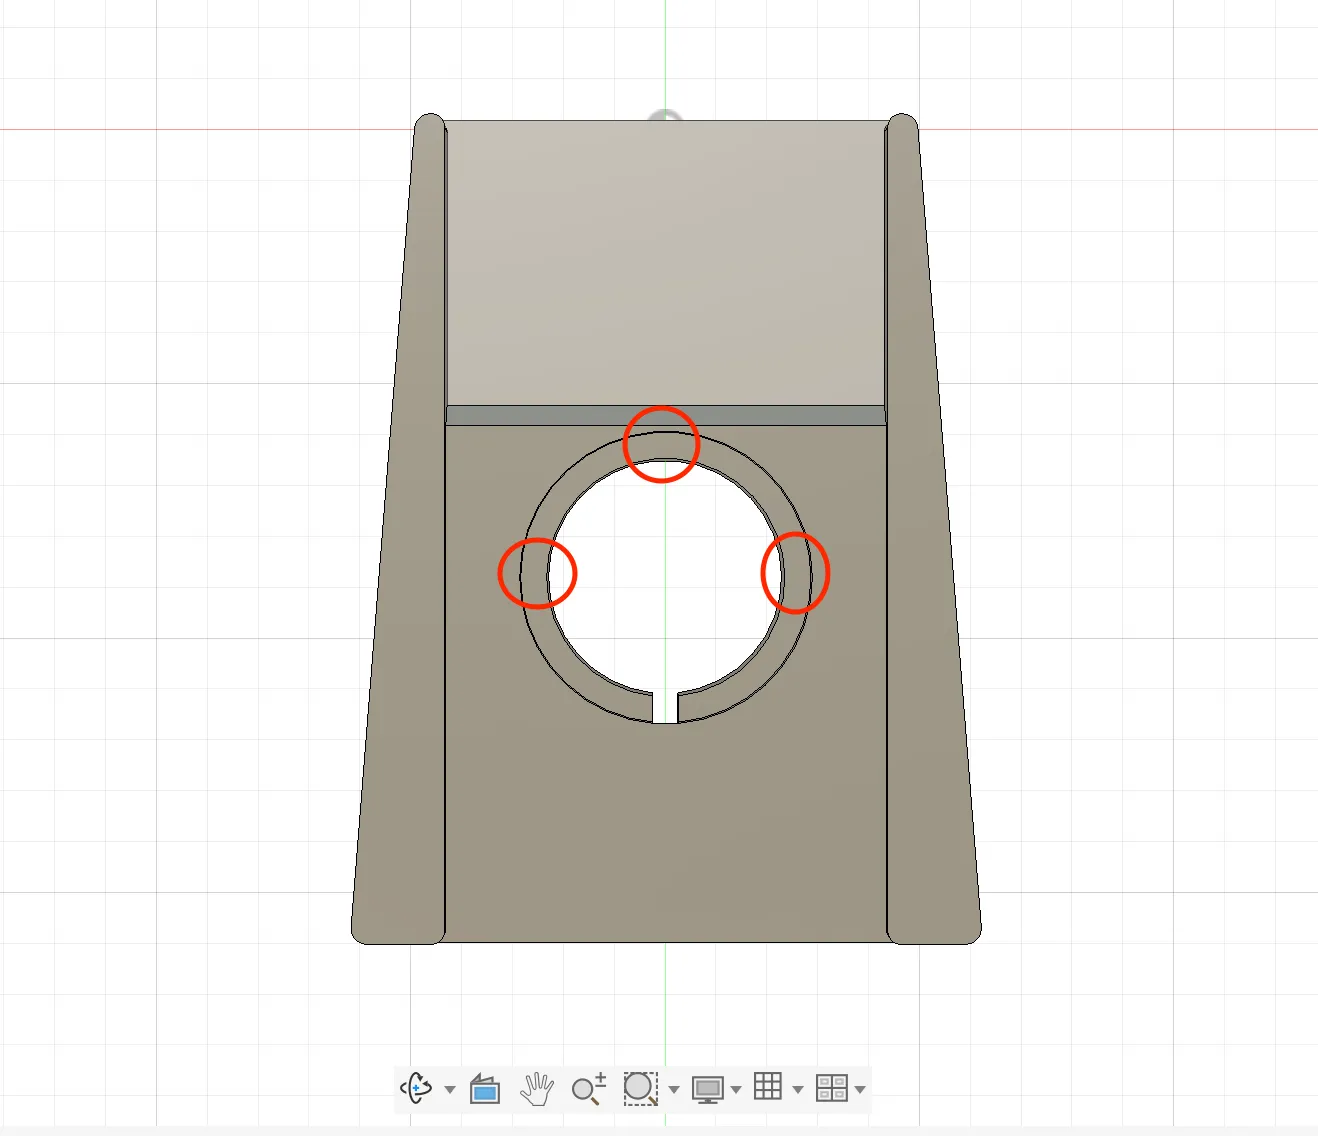
3. Tape & Mount: Apply thick 3M double-sided tape to the circular areas only on the bottom of the printed part.
- Warning: I Do not recommend to apply tape to the large rectangular flat areas. While it will stick very well, it will be a nightmare to remove if you ever want to uninstall it! (Don't ask me how I know)
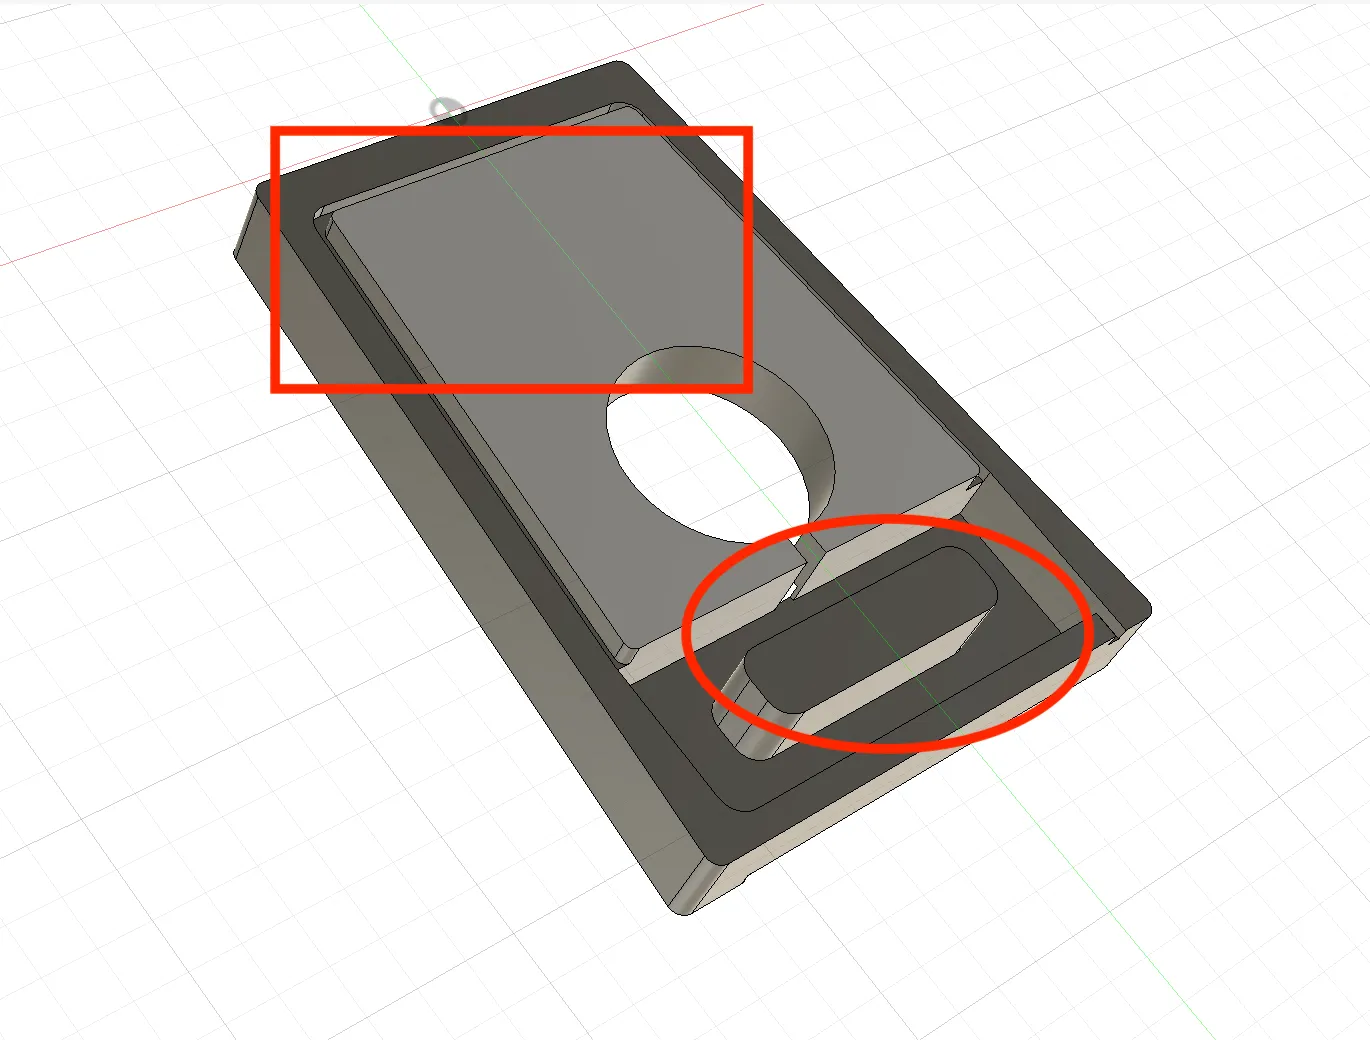
4. Install: Remove the original rubber/silicone pad from your ID.4's phone compartment, route your USB-C cable, and stick the new dock firmly in place.
- Enjoy charging!
Happy Printing, and enjoy actually being able to charge your phone in your ID.4!
License

You may create derivative works based on this object, provided that all such derivative works are published exclusively on the MakerWorld platform and include proper attribution to the original creator. You may not share, upload, host, distribute, or publish this object—or any derivative work of this object—on any other digital platform, marketplace, or distribution channel. Commercial use of this object and any derivative works is strictly prohibited. This includes, but is not limited to, selling, renting, sublicensing, or using the object in any context in which you receive monetary compensation or other financial benefits.


Comment & Rating (0)