


Print Profile(2)
Bill of Materials

Description
Boost Me (for free)
Every model takes hours of designing, testing and tweaking. If you like what you see, a boost costs nothing but helps more than you think
The story behind the design
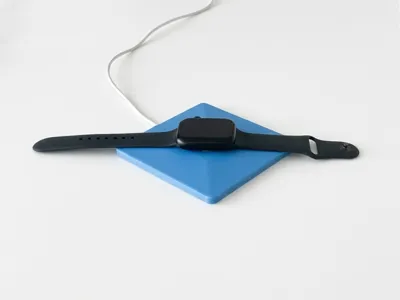
Every time I wanted to charge my Apple Watch, the charger kept flipping over. Super inconvenient - and honestly, a problem a lot of Apple Watch users run into. That's why I designed this Apple Watch Charging Pad: a simple, effective solution that holds the charger firmly in place so it stops rotating while you're trying to charge your watch.
Features
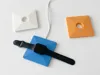
- Compatible with all Apple Watch models and the original charging cable
- Keeps the charger stable and in place - no more flipping
- Tight fit for the cable, so everything stays neat and tucked away
- Two designated spots for Adhesive Foam Sponge strips (8 cm / ~3.15 inch) to prevent the pad from sliding around on your nightstand or desk
- Clean, minimalist design that blends into any interior
Assembly Tutorial
What you'll need:
- The printed Apple Watch Charging Pad
- Your original Apple Watch charging cable
- Optional: 2 strips of Adhesive Foam Sponge (8 cm / ~3.15 inch each) - available from the Bambu EU store
Steps:
- Feed the cable through – Push the charging cable all the way through the pad until it comes out on the correct side.
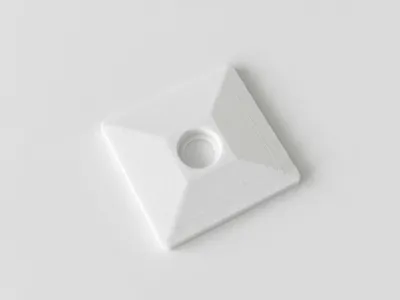
- Position the charger head – Line up the round charging head with its designated opening. Start by inserting the wire side of the round head into the slot first.
- Press down – Firmly press the round charging head into the recess. It's a tight fit, so apply steady pressure until it clicks into place.
- Tuck in the cable – Push the remaining cable fully into the cable channel/groove along the pad so it sits flush and stays in place.
- (Optional) Add the foam strips – Take the Adhesive Foam Sponge Strip Roll from the Bambu EU store, cut two strips at exactly 8 cm (~3.15 inch) each, and stick them onto the two designated spots on the bottom of the pad. This keeps the charging pad firmly planted on any surface.
Want to print and sell my designs for profit?
Grab a commercial license on Patreon and get full rights to all my models.

Just want to support my work?
Join as a Supporter and help me keep creating new designs. Every bit counts!

License
You shall not share, sub-license, sell, rent, host, transfer, or distribute in any way the digital or 3D printed versions of this object, nor any other derivative work of this object in its digital or physical format (including - but not limited to - remixes of this object, and hosting on other digital platforms). The objects may not be used without permission in any way whatsoever in which you charge money, or collect fees.
Comment & Rating (0)