Water Spout for Rain Barrel and Watering Can


Print Profile(11)

Description
Support me if you like my design. Thank you very much!
Boost Me (for free)
1 Boost = ~40g Filament :)
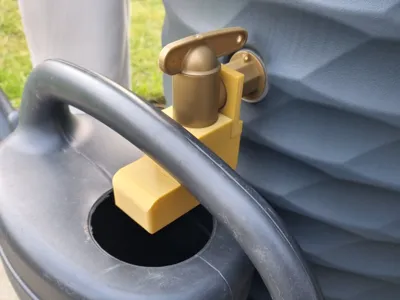
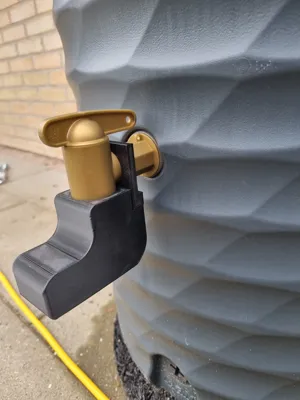
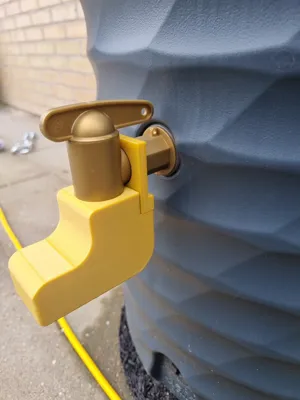
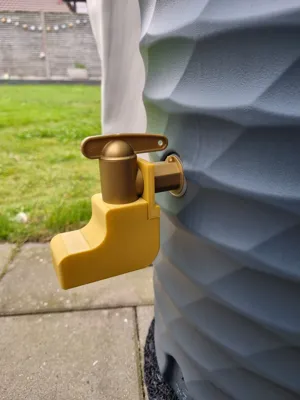
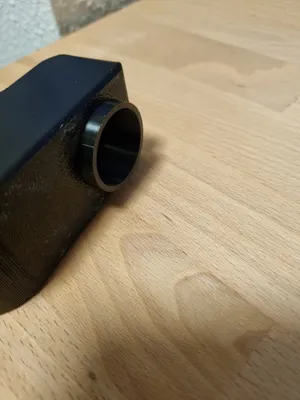
Do you know the problem that the watering can doesn't fit under the rain barrel because the tap is too short?
Here you have the solution.
The holder is designed for a tap up to 30mm in diameter (upper wide dimension). This corresponds to the standard tap with a ¾ inch thread.
- Update from 05/30/2026: There is a new print profile for the base, which was created for a tap of 26.7mm.
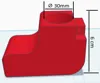
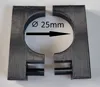
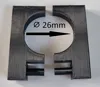
The attachment (see other print profiles) is available in various sizes:
- 23mm (especially for the 'Basic-Line' rain barrel from Toom hardware store)
- 25mm
- 26mm
- 28mm
To attach the extension to the rain barrel, simply slide it over the tap from below. The attachments are then inserted from the outside.
Adhesive should not be necessary with a good filament. If it is, simply apply a drop of adhesive to the pegs of the attachments.
- All print profiles have also been tested with PLA.
- Should you require other dimensions, please contact me, and I can develop a profile for them if necessary.
++++++++++++++++++++++++++++++++++++++++++++++++++++++++++++++++++++++++++++++++++++++++++++++
Updates:
- I have added a longer base part. This is a total of 7.5cm high.
- There are now outlets (5mm, 50mm, and 100mm) that are simply inserted (see print profiles).
- Make sure to insert the notch in the ring towards the rain barrel (where the water comes from). However, you can also orient yourself by the Z-seam here. This is located in the middle of the notch.
- You may need to glue in the outlet
- Simply insert it all the way until it stops, as there is an edge inside.
- There is a new base part for a narrower tap (26.7mm)
- For this tap, there is now also an attachment for 28mm diameter.
- A new base part has been added, especially for the 'Basic-Line' rain barrel from Toom hardware store (26mm)
- For this tap, there is now also an attachment for 23mm diameter.
++++++++++++++++++++++++++++++++++++++++++++++++++++++++++++++++++++++++++++++++++++++++++++++
License
You shall not share, sub-license, sell, rent, host, transfer, or distribute in any way the digital or 3D printed versions of this object, nor any other derivative work of this object in its digital or physical format (including - but not limited to - remixes of this object, and hosting on other digital platforms). The objects may not be used without permission in any way whatsoever in which you charge money, or collect fees.
Comment & Rating (76)