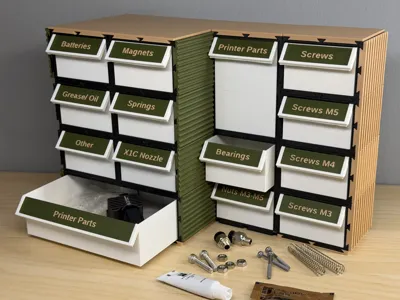
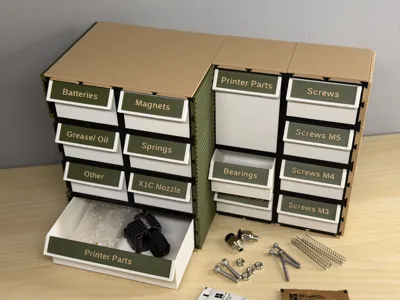
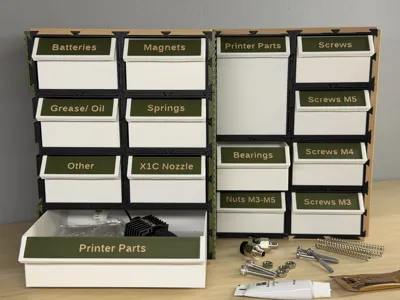
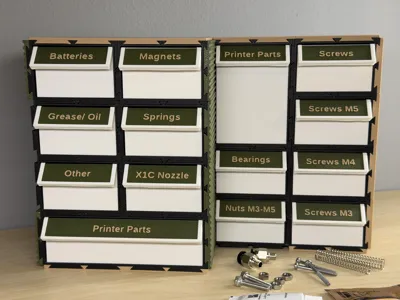
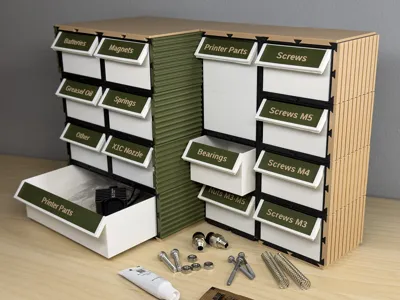
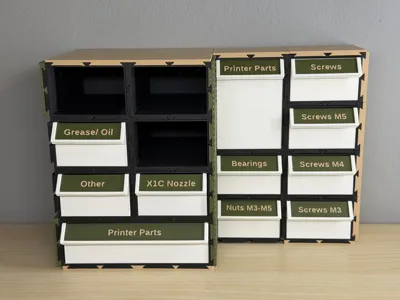
COREsort - Modular Interlocking Drawer Organizer


Print Profile(1)


Description
Support my work by purchasing filament or accessories via the affiliate links in the Bill of Material (BOM). All filament colors and accessories shown are included in the BOM.
Boost Me (for free)
Thank you for your feedback and boost. :)

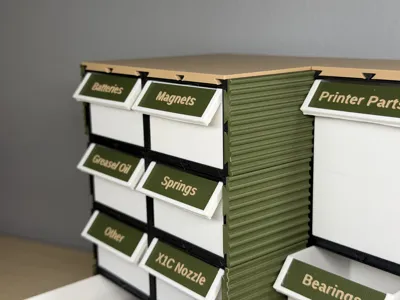
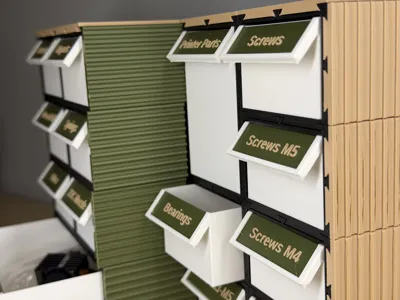
 Scalable Layouts
Designed to grow with your collection. Start with a single unit and expand infinitely across your workspace or wall.
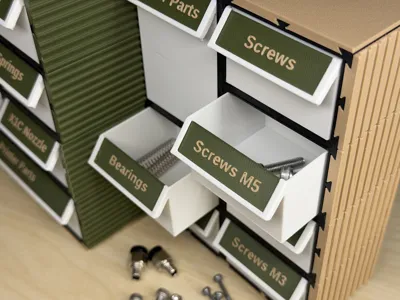
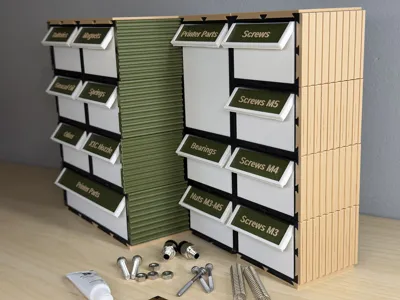
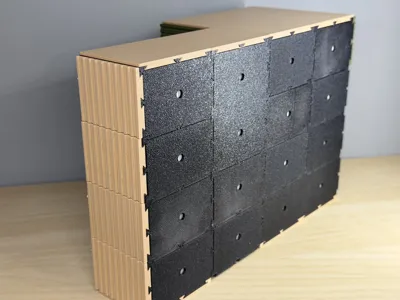
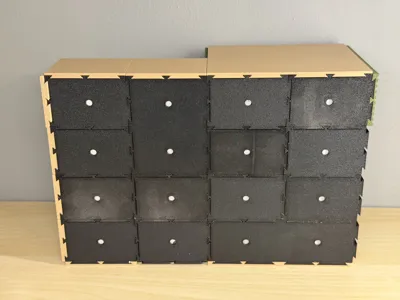
Interlocking Stability
Proprietary dovetail locking mechanisms ensure that stacked units act as a single, rigid monolithic structure.
Tool-Free Assembly
No screws or glue required for the core structure. Components slide into place with satisfying precision.
Zero Waste Design
Optimized for FDM 3D printing with minimal supports, reducing material waste and print time significantly.
 |  |  |
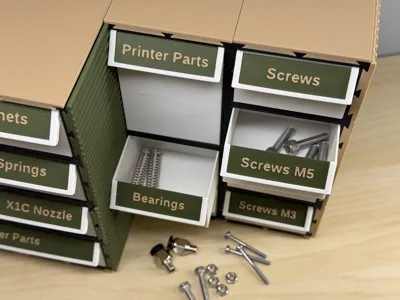
Precision Frames | Smart Drawers | Label Logic |
| High-strength outer shells with integrated interlocking geometry for multi-axis stacking. | Smooth-glide internal bins with ergonomic pull-handles and optional internal dividers. | Standardized label slots for 12mm tapes or custom 3D-printed identifier tags. |

3 Critical Variables
To ensure all components function as a single unit, you must remember and reuse these specific values throughout every file generation in the Bambu Lab Parametric Model Maker.
| Grid X | Grid Y | TotalDepth |

Step 1 - The COREsort Main Frame
Begin by printing the COREsort Main Frame. This is the skeleton that dictates the overall footprint of your sorting system.
- Define your global Grid X & Y

Set your target unit depth
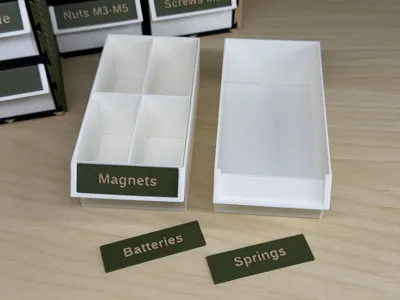
Step 2 - Drawer Box
The Drawer Box is the primary containment unit. It must slide freely into the COREsort frame.
All necessary tolerances have already been factored in.

Step 3 - Drawer Box Label
Identity is key to organization. Print the custom labels to slide onto the front face of your drawer boxes.
Tip: Use a contrasting color for the label text to make hardware categories instantly recognizable.

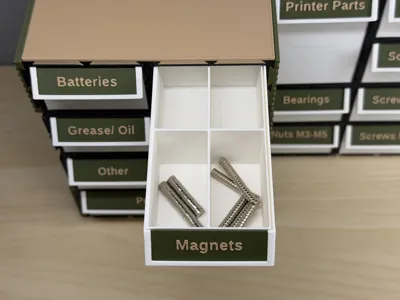
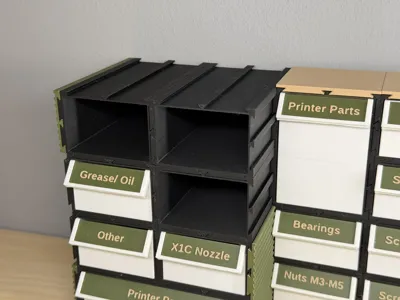
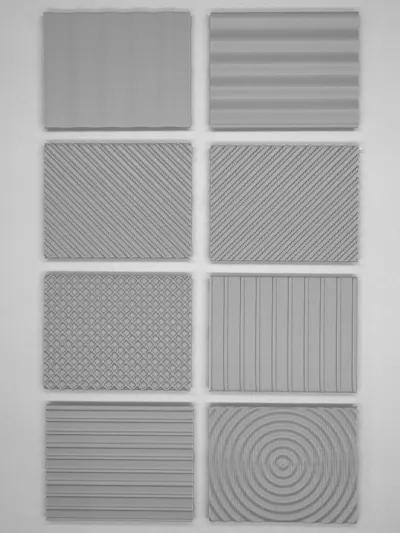
Step 4 & 5 - Customization (Optional)
Side Parts: Functional enclosures or aesthetic panels that warp around the cabinet. Choose between eight different patterns.
Internal Inserts: Micro-compartments for small screws or electronic components.
The Manufacturing Sequence
1. Frame  2. Box 3. Label 4. Sides 5. Insert
Tips and Tricks
- The standard TotelDepth is 50,75mm and 101,5mm (see pictures for reference).
- For normal hardware organization I recommend Grid_X=1, Grid_Y=1 and TotalDepth=101,5mm
- Needed filament for above recommendation per unit: ~73g (no side panels and no inserts)
- Please turn on the support for the drawer box. Use tree (auto) and “on build plate only”
The shown example is available from inside the provided print profile. No need to use the Parametric Model Maker.
Remember: Always use the previously defined values when using the Parametric Model Maker.
For questions, feedback or help, don't hesitate to write me a message or comment below. Thanks.
Interested in more Gridfinity, printer accessories or clock designs?
Please check out my collections or my profile.


Boost Me (for free)
Thank you for your boost :)
Membership
Documentation (1)
License
You shall not share, sub-license, sell, rent, host, transfer, or distribute in any way the digital or 3D printed versions of this object, nor any other derivative work of this object in its digital or physical format (including - but not limited to - remixes of this object, and hosting on other digital platforms). The objects may not be used without permission in any way whatsoever in which you charge money, or collect fees.
Comment & Rating (0)