

Print Profile(4)
Description
Please read the instructions before printing:
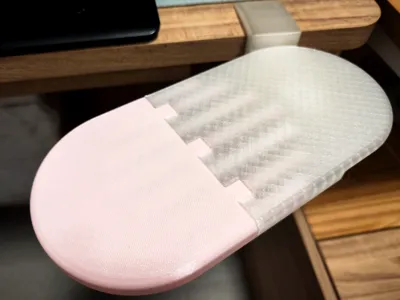
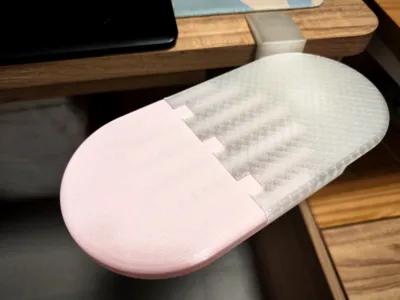
This model is suitable for printing with an A1 mini or for friends who need a multi-color effect
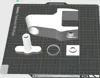
If you need to print the one-piece version, please go to
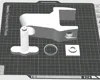
I. Model Description:
1. The tray is level with the desktop for comfortable use
2. The tray has a limit design to prevent accidental rotation during use
3. Gently lift to rotate, press above the pivot to lock the position
II. Printing Parameters:
1. For strength, please use PETG
2. The printing parameters for each part are pre-set. If you need to modify them, ensure the clamp body uses Strength mode (6 walls)
3. Assemble the parts after they have completely cooled, otherwise, they may be difficult to insert
III. Model Selection:
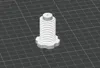
1. Screw length selection:
a. If your desktop thickness is greater than 2cm, choose the short screw
b. If your desktop thickness is less than 2cm, be sure to choose the long screw
c. If your desktop thickness is greater than 2cm and there is a drawer under the desktop, you can try choosing the 4cm ultra-short screw
IV. Installation Instructions:
1. Tray pivot reinforcement:
a. Since the pivot is printed vertically, a reinforcement design was made due to concerns about insufficient strength. (The concern seems a bit redundant)
b. Drip a small amount of glue into the square hole of the pivot, and insert the rectangular chamfer facing down. (The rectangular block has a hollow in the middle for air exhaust during insertion, making it smoother)

2. Pass the seven connecting rods through the square adapter tool one by one
Note 1: Due to printing accuracy issues, the connecting rods may not slide smoothly into the horizontal plate directly, so it is highly recommended to print this square adapter tool
Note 2: This square adapter tool is only temporary and will no longer be needed once the armrest is assembled

3. To avoid assembly misalignment, it is recommended to arrange the connecting rods in the following order first

4. Apply glue to the triangular holes in the horizontal plate, and insert the connecting rods one by one until they reach the bottom. (A small hammer can be used to assist)

5. Apply glue to the holes and connecting surfaces of the other horizontal plate
Then join the two parts of the horizontal plate together

6. Clamp limit ring installation:
a. To prevent accidental rotation of the tray during use, a serrated limit design was implemented
b. Place the clamp facing upwards, with the limit ring installation position left at the upper end of the hole. After dripping glue, press the limit ring all the way down

7. Screw installation:
a. The threaded part of the clamp generally does not require supports for printing. However, different filaments and printers may vary, so if you use supports, try to remove them completely
b. The screw threads have been slightly adjusted. If you still cannot screw them in smoothly, do not use excessive force. After printing, let the parts cool completely for a while. Alternatively, lubricating with soap shavings or WD-40 will make screwing much easier

8. Anti-slip pad usage:
a. If the desktop is very smooth, it is recommended to place an anti-slip pad of any material for better clamping effect

License
You shall not share, sub-license, sell, rent, host, transfer, or distribute in any way the digital or 3D printed versions of this object, nor any other derivative work of this object in its digital or physical format (including - but not limited to - remixes of this object, and hosting on other digital platforms). The objects may not be used without permission in any way whatsoever in which you charge money, or collect fees.
Comment & Rating (0)