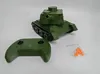
Shootable Fully Articulated CyberBrick RC Tank


Print Profile(1)
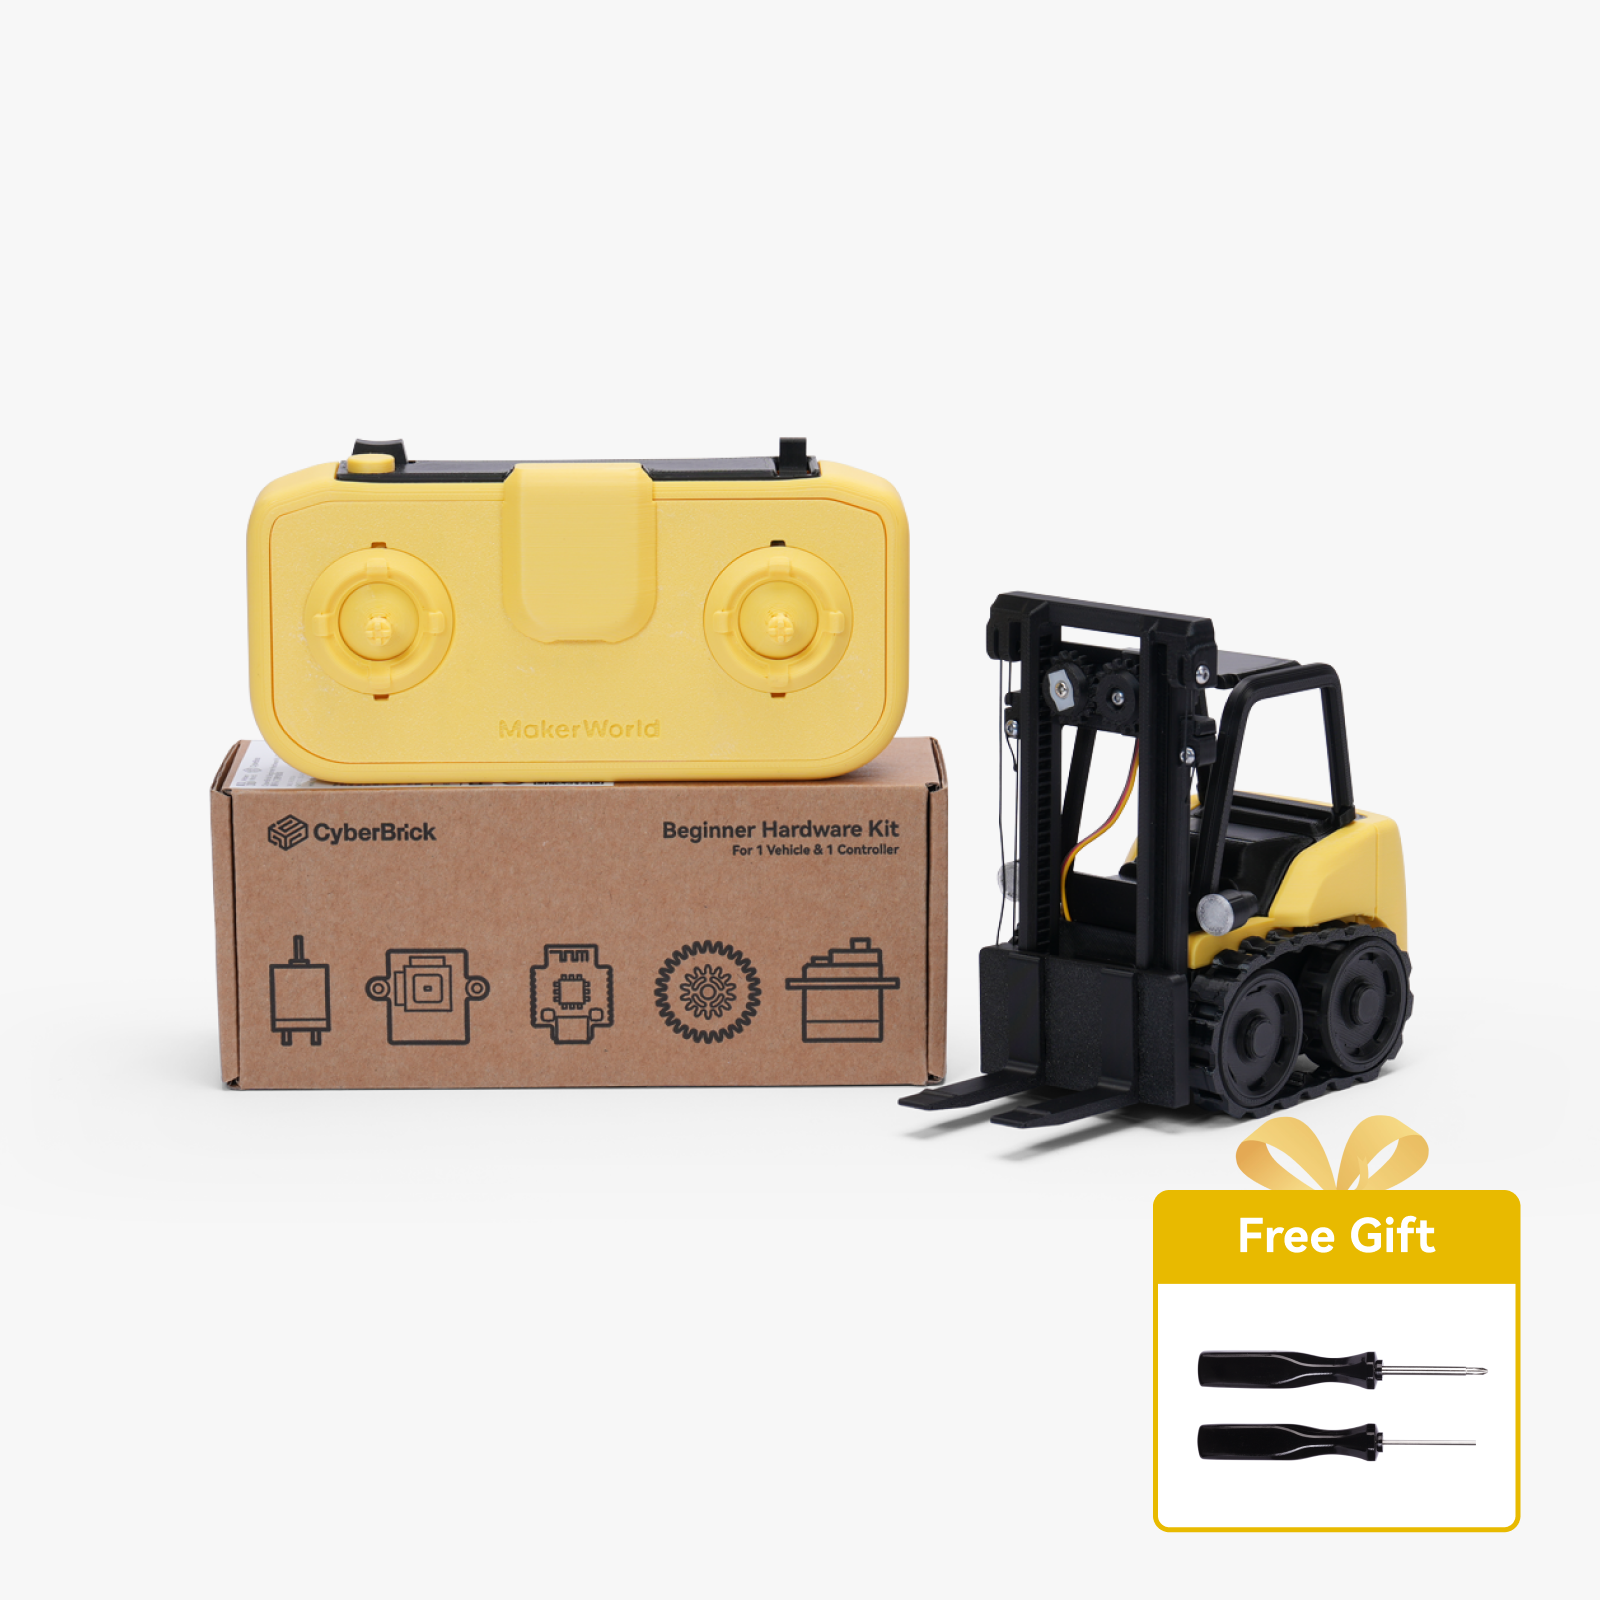
Bill of Materials


Description
Boost Me (for free)
Development took two and a half weeks, used two and a half spools of material, please boost!!!

Specifications
Model Number: CYB-90
Total Combat Weight: 0.000905t
Maximum Speed: 0.72km/h
Main Gun Caliber: 9mm
Muzzle Velocity: 3m/s
Maximum Rate of Fire: 56 rounds/min
Ammunition Capacity: 9 rounds
Ammunition Type: 8mm regular PETG beads, 8mm glow-in-the-dark PETG beads
Protection Capability: Equivalent to approximately 2mm homogeneous PETG
Remote Control Range: 12m
Advantages and Innovations
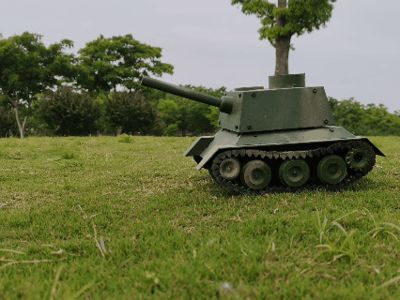
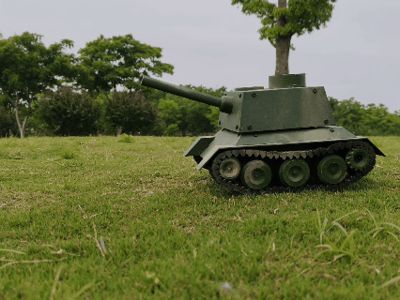
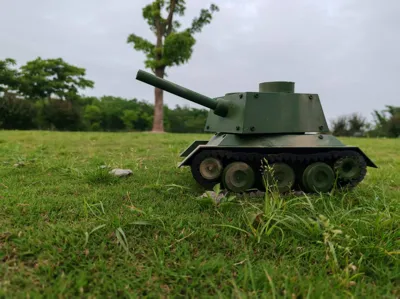
Its form and structure are simulated, making it closer to a tank than existing articulated models. It can fire plastic projectiles, boasting a large range-to-vehicle-length ratio and low kinetic energy, ensuring safety while adding fun. It creatively incorporates two modes: semi-automatic single shot and fully automatic continuous fire, providing stronger "firepower". As a tracked vehicle, it has strong off-road capabilities and can drive freely on grass.
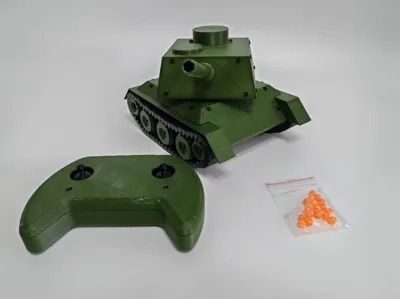
The remote control is ergonomically designed for a better feel, easy operation, and is beginner-friendly.
It features low printing difficulty, strong model compatibility, and is beginner-friendly. The tracks are Print in Place, eliminating the need for tedious assembly, saving time and effort.
Development Journey
Having some prior experience with electronics, Cyberbrick wasn't too difficult for me. However, as a beginner in mechanics, building a drivable vehicle was quite challenging. After reviewing the competition requirements, both wheeled and tracked designs were allowed. The Cyberbrick kit includes wheels but no tracks. Printing tracks myself seemed very difficult, but if I were to build a wheeled vehicle, I would also need to make a differential and steering assembly, which would be even harder. So, I ultimately opted for a tracked design.
This was my first attempt at printing tracks. I saw two types of tracks made by others: one was Print in Place, and the other was assembled segment by segment. The assembled ones were too cumbersome, so it seemed I had to challenge myself with Print in Place. Given my previous experience designing Print in Place hinges, I brainstormed how to arrange the hinge structure into a ring using a circular array. I first printed a small section, and it moved! Without further ado, I printed for four straight hours and produced an entire spool of tracks. Immediately after, I designed the track drive wheels. On a side note, my tracks have teeth on both sides for a tighter and more stable grip. After making special wheels for my tracks, I arranged them in a trapezoidal shape. Although the shape was somewhat indescribably strange, it definitely resembled a tank.
Before this, I tried using a brushed DC motor to directly drive the wheels, making a two-wheeled car move, which, despite not being very fast, was considered a success. So, this time I still planned for direct drive, but unfortunately, things didn't go as planned; it wouldn't turn at all. It was probably due to slipping. I switched to a servo with geared shafts, and it barely turned.
Long story short, the chassis was done; it was time to build the launcher.
This launcher involved a trick. I had previously made a ball-serving machine that used a motor rotating clockwise. It would turn halfway, pull a rubber band, continue turning, the rubber band would recoil, and serve the ball. That was the process, but there was a big problem: it had to turn to the exact right position every time—not too much, not too little. But I only had 360-degree continuous rotation servos and 180-degree angular servos. I'd have to combine two of them to achieve the functionality I needed. Reluctantly, precision was essential, but for infinite rotation, I decided to ignore it for now and use the 180-degree one.
Once I built the ejector based on my previous experience, I realized that the servo rotated back and forth. Wouldn't it be blocked on the way back? How to fix that? After half a day of researching one-way motion mechanisms, I finally took a simple and crude approach: using the material's own elasticity, I made an arrow-shaped hook. Problem solved!
The original plan was to load from top to bottom, like a rifle, with cylindrical projectiles. However, frequent jamming issues left me speechless. I settled for a compromise: using gravity for natural descent and switching to spherical projectiles, which perfectly solved the jamming problem.
I originally thought things would progress smoothly from there, but I found that the servo-driven tracks frequently jammed. Moreover, to be compatible with the beginner kit, I had to remove one servo. Alas, this became a headache.
I had to look into speed reduction and torque multiplication mechanisms. Cyberbrick comes with a gearbox kit, so I didn't need to make the gears myself. However, seeing other people's gearboxes made me itch to try, so I couldn't resist making my own set. And honestly, the shape turned out pretty good.
With the tank's skeleton in place, what about its appearance? I had watched The T-34 and was very impressed by the T-34, so I decided to copy it. The result was a bizarre mix. After a night of research, I finally realized the cannon barrel was positioned too high. After adjusting the layout of the magazine and launcher, it was finally capped off successfully. Since I made the gearbox myself, there was no need to use someone else's remote control, right? Striking while the iron was hot, I made a game-controller-like one. And with that, the project was complete!

Note: Accessories required: 1 set of Cyberbrick beginner hardware kit, 90 Maker's Supply BT2.6*8, 1 rubber band. Directly using the .json configuration cannot achieve fast or continuous firing. To use this function, modifications must be made according to the advanced gameplay instructions at the end of the assembly guide.
Documentation (3)

License
You shall not share, sub-license, sell, rent, host, transfer, or distribute in any way the digital or 3D printed versions of this object, nor any other derivative work of this object in its digital or physical format (including - but not limited to - remixes of this object, and hosting on other digital platforms). The objects may not be used without permission in any way whatsoever in which you charge money, or collect fees.
Comment & Rating (2)