
Parametric Sleeve Tube Coupler – Metric Version
Print Profile(1)
Description
Boost Me (for free)
If this parametric sleeve connector helped you solve a real tube connection problem, a boost would be greatly appreciated. It helps support more practical, functional and customizable maker tools.
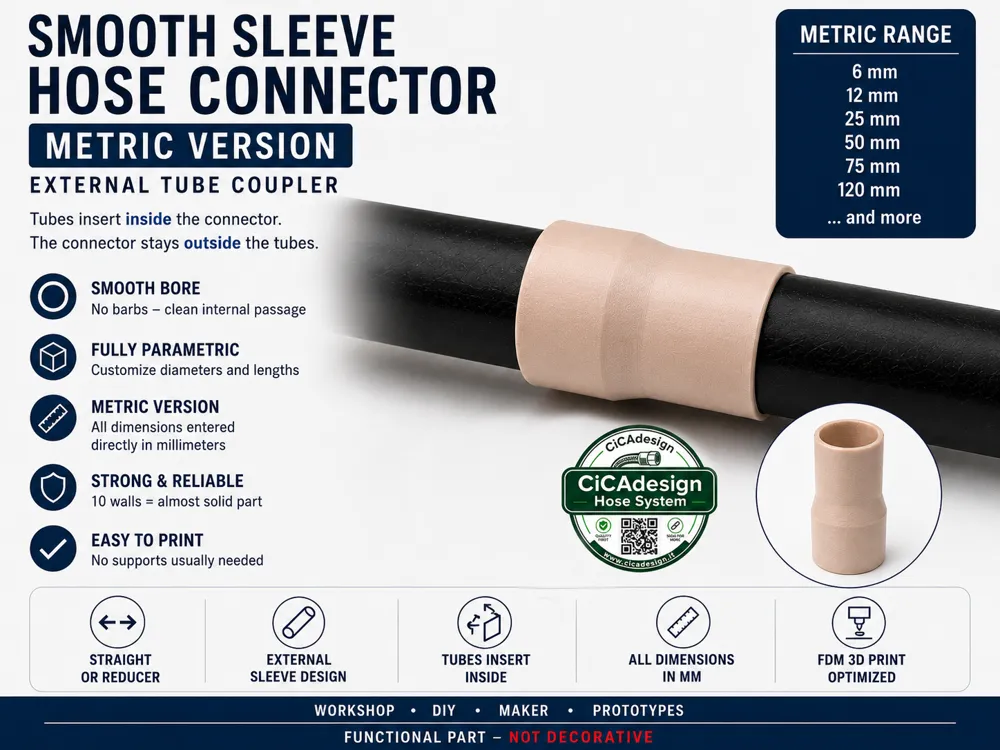
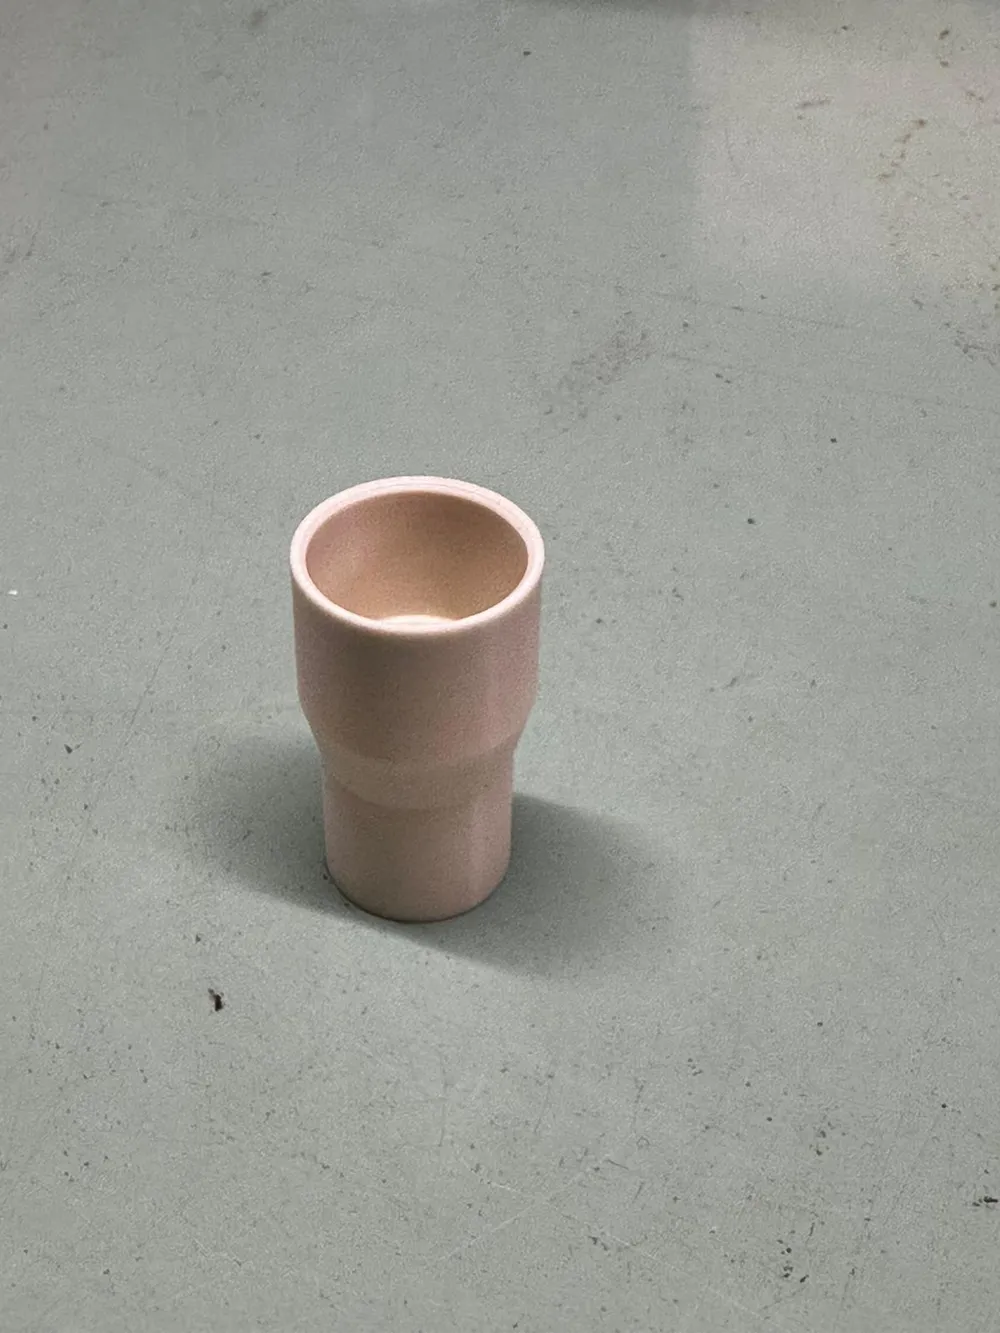
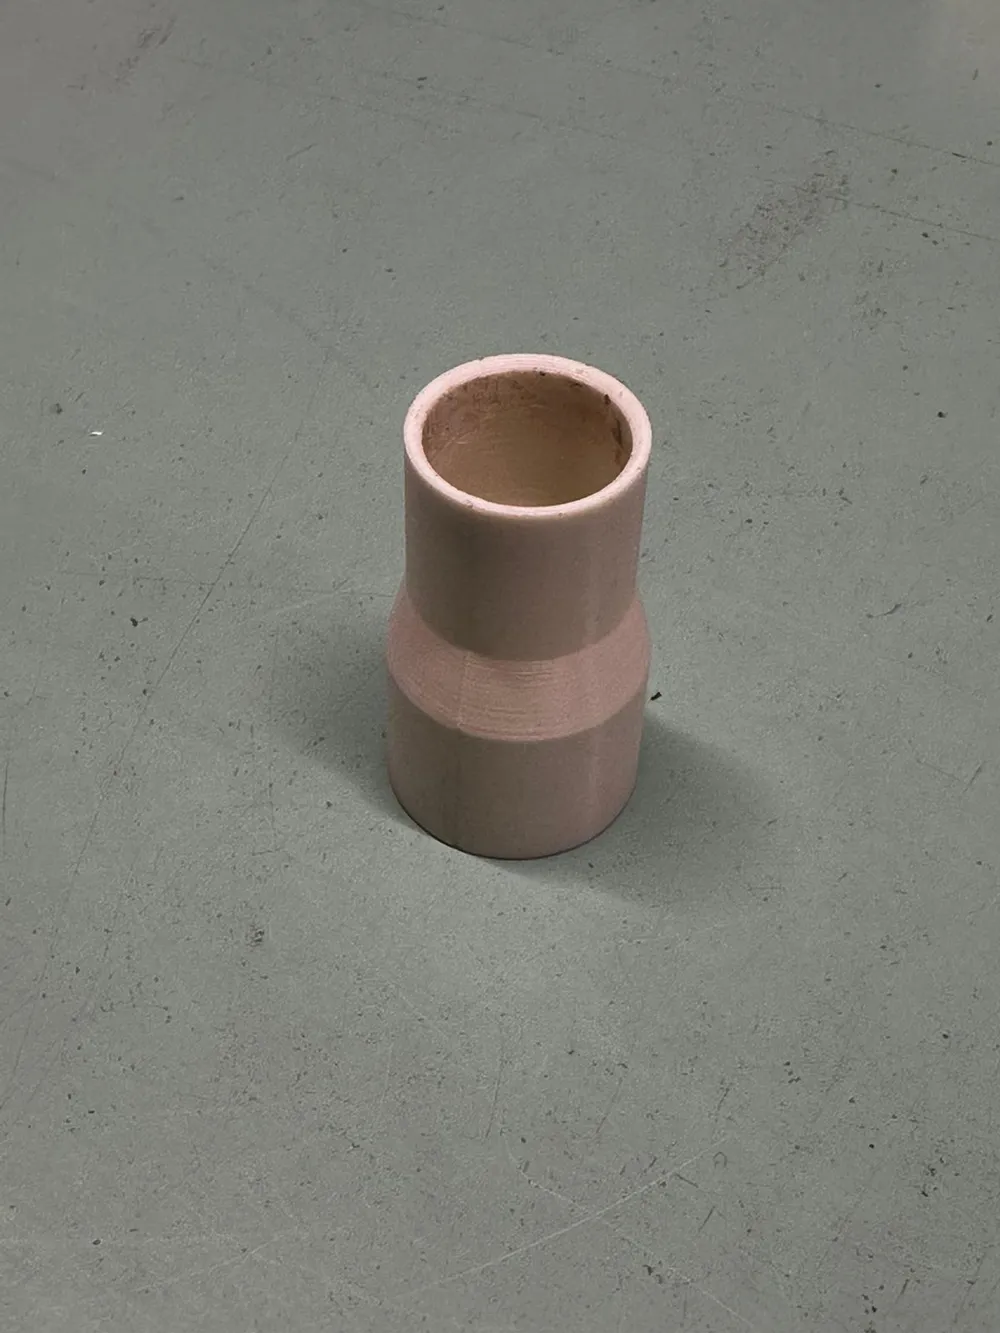
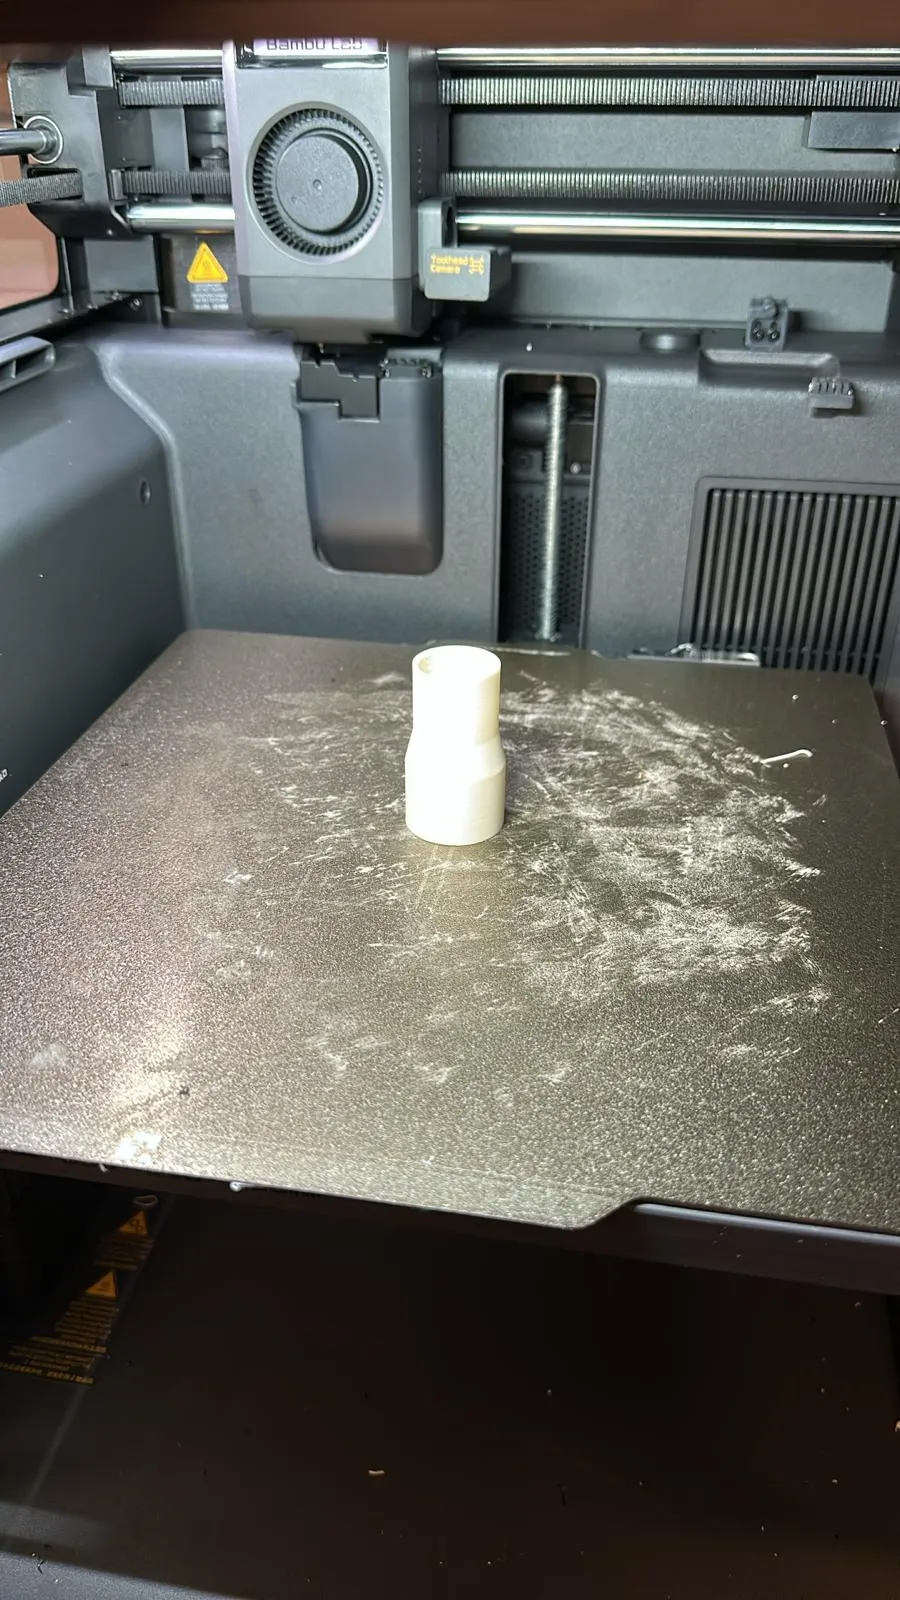
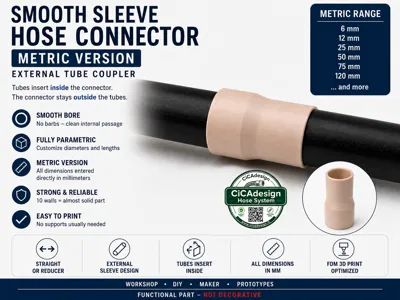
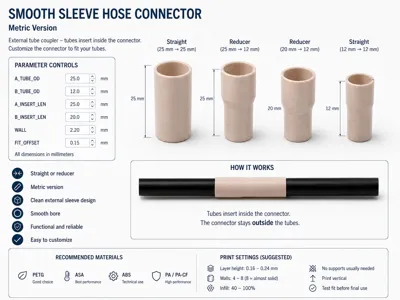
Smooth Sleeve Tube Connector – Metric Version
This is a fully parametric smooth sleeve tube connector designed for flexible, semi-rigid and rigid tubes with outside diameters from 6 mm up to 120 mm.
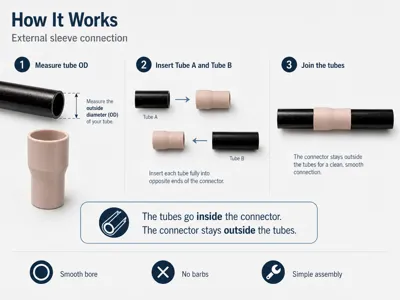
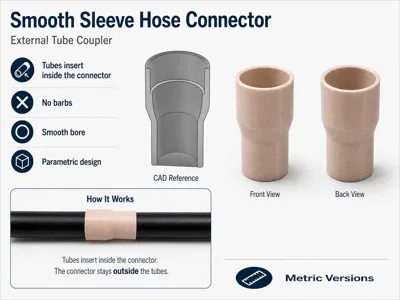
Unlike a traditional barbed hose adapter, this connector is not inserted inside the hose.
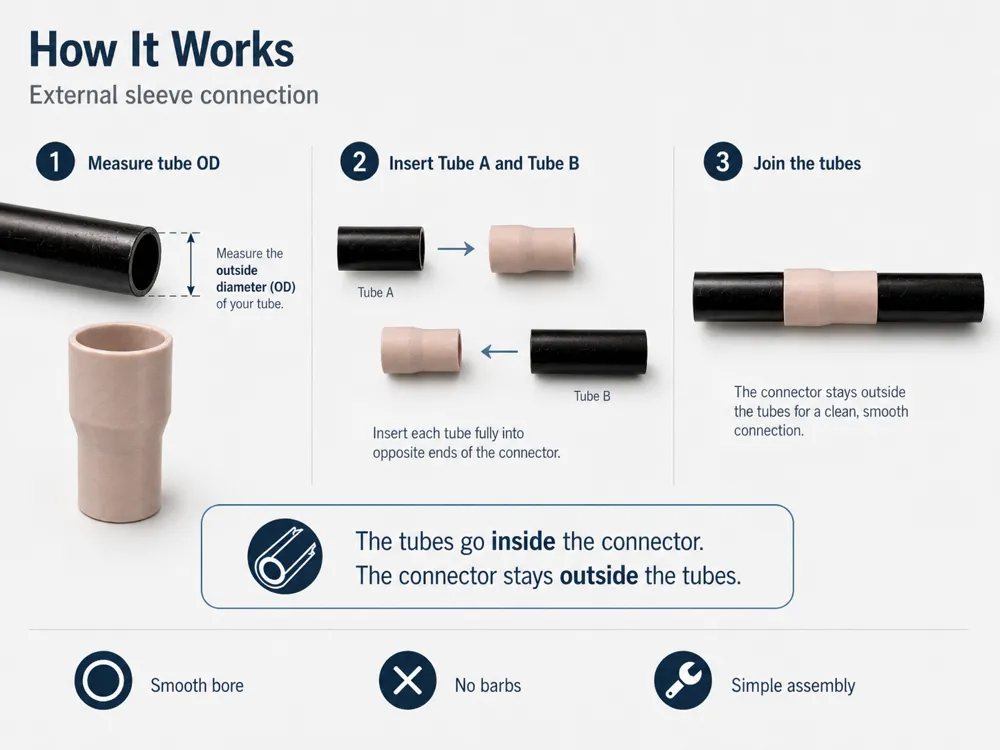
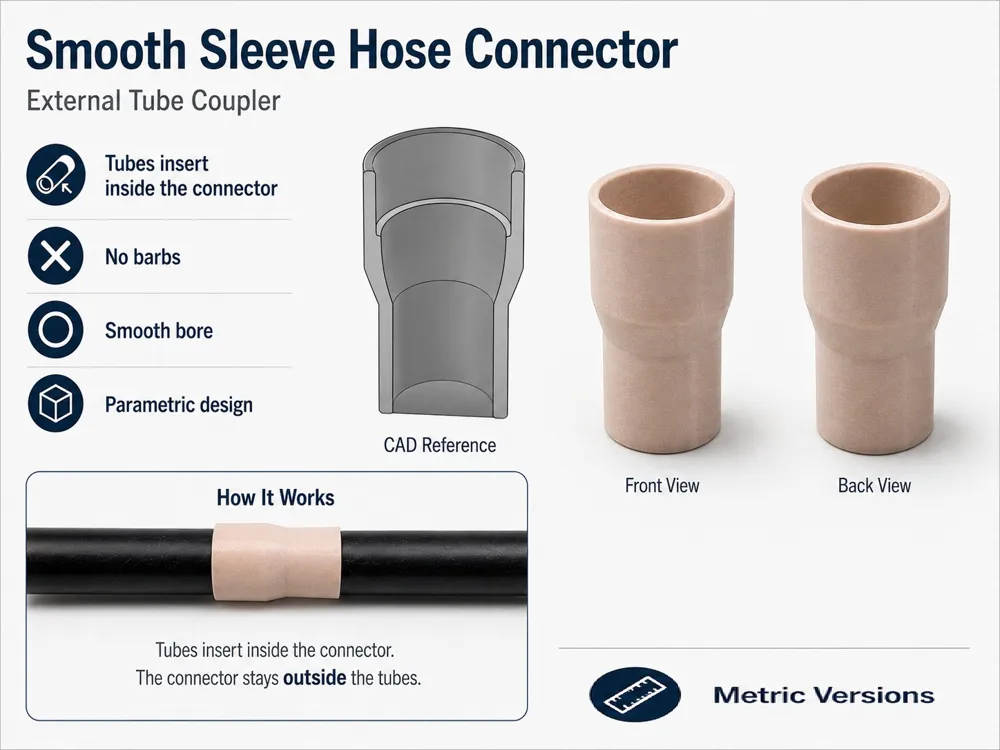
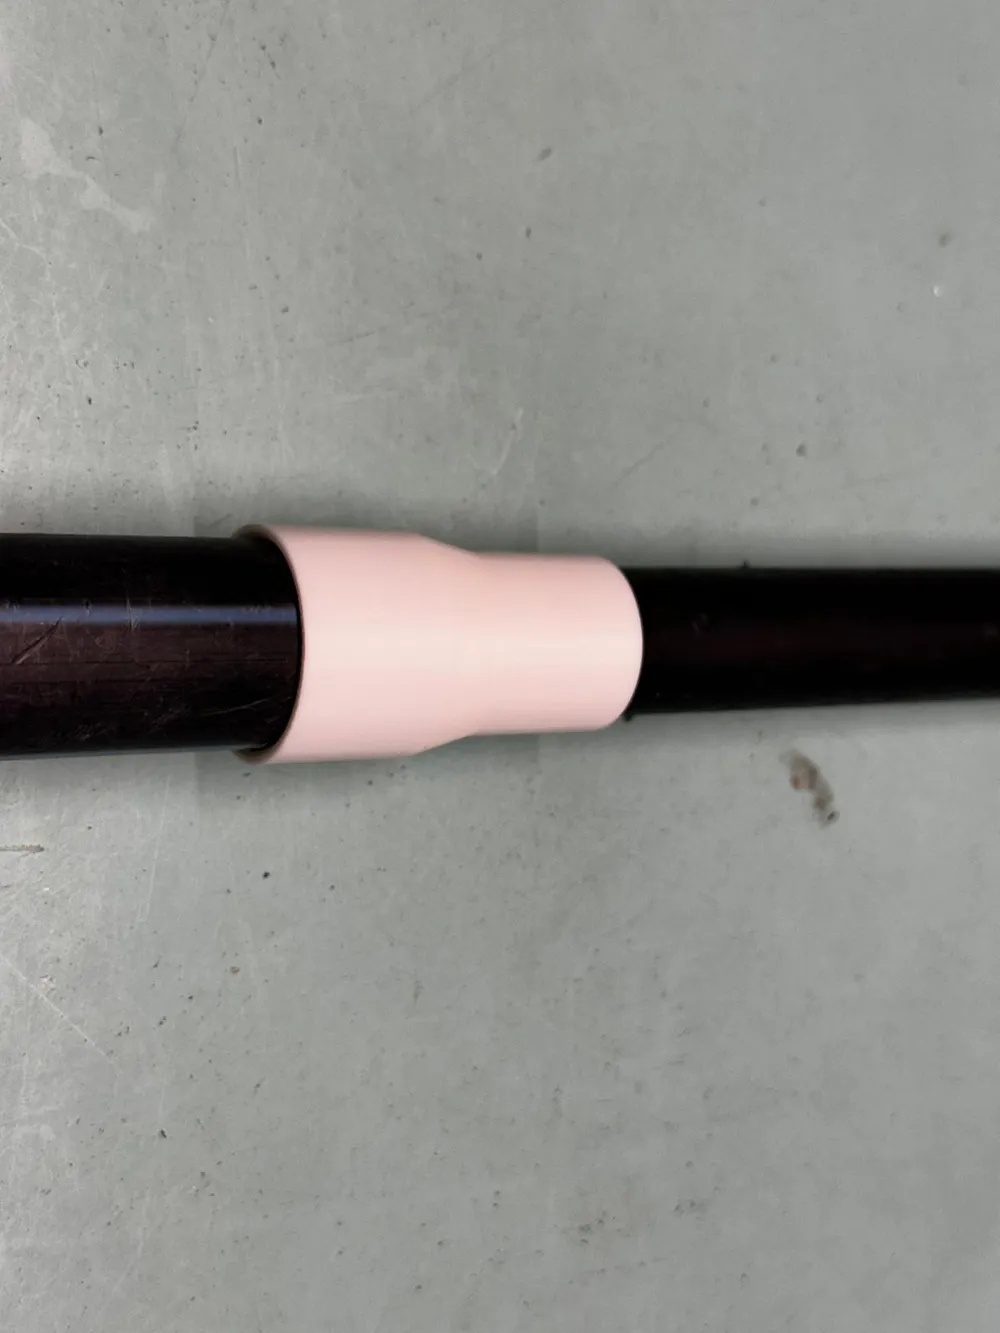
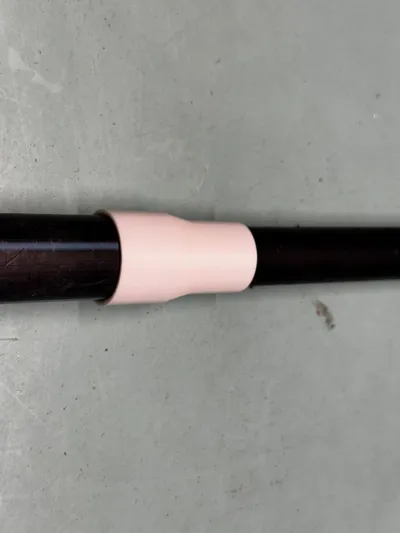
Instead, both tubes are inserted inside the printed connector, while the connector remains externally visible around the tubes.
The model can be customized directly in Fusion 360 or MakerWorld Customizer to create:
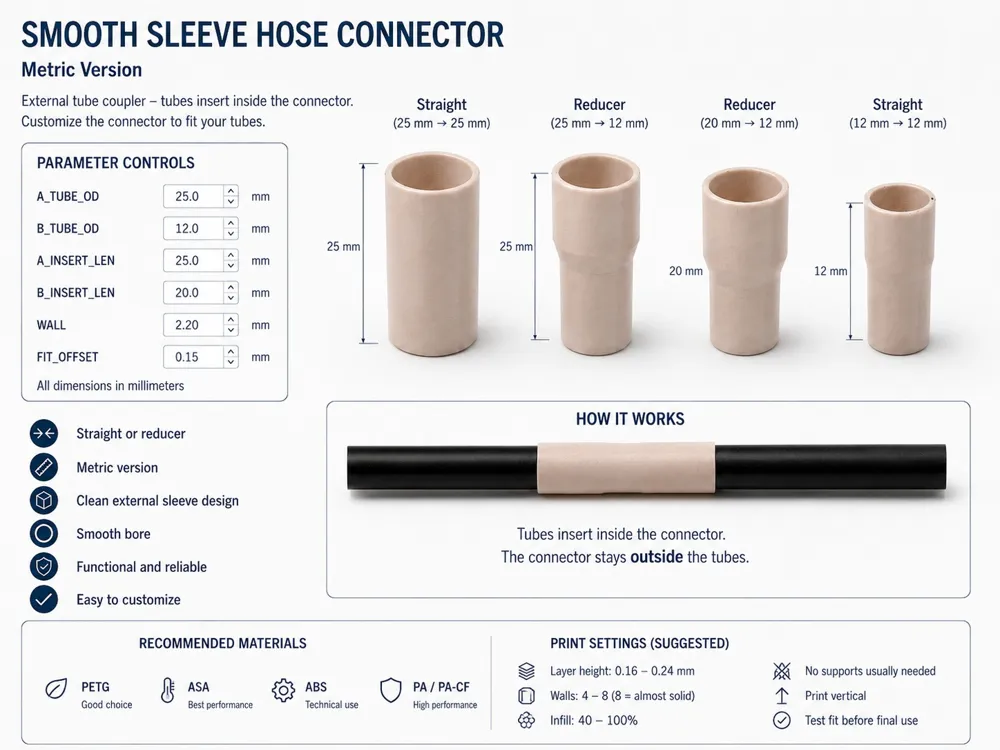
· straight tube couplers;
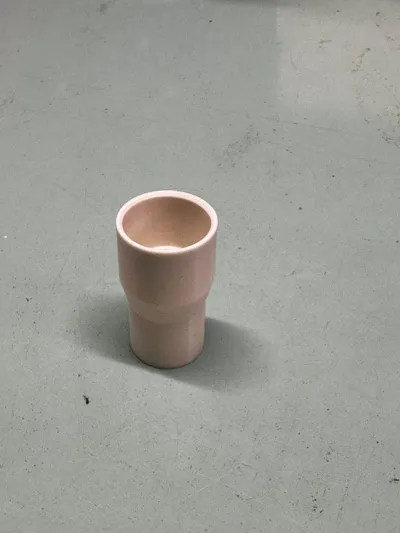
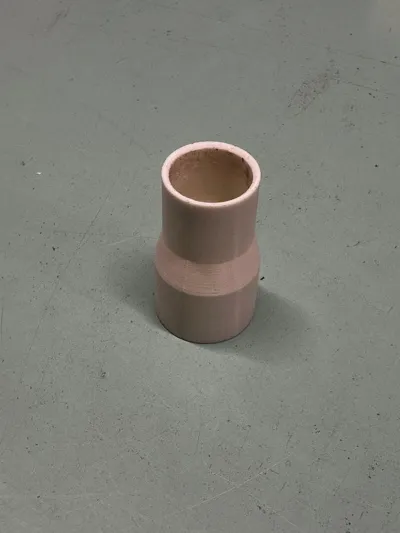
· reducers between different tube diameters;
· external sleeve adapters;
· tube alignment sleeves;
· repair couplers;
· workshop and prototype connections.
The internal diameter of each side is generated from the selected tube outside diameter and the adjustable FIT_OFFSET parameter.
This allows the user to create a tighter fit, a sliding fit or additional clearance for adhesive and sealant.
The supported tube outside diameter range extends from:
6 mm
up to:
120 mm
All dimensions are entered directly in millimeters.
Important Measurement Note
Always measure the real outside diameter of the tube before generating the connector.
Do not rely only on the nominal commercial tube or hose size.
A tube sold under a nominal dimension may have a different real outside diameter depending on:
· manufacturer;
· material;
· wall thickness;
· reinforcement layers;
· production tolerances;
· tube construction.
For the best result, measure the tube with a caliper and enter the real measured value in A_TUBE_OD and B_TUBE_OD.
Part of the CiCadesign Parametric Hose Connector System
This model is part of a growing collection of functional and customizable hose and tube adapters designed for workshop, DIY, prototyping, light-duty routing and experimental setups.
Other connector variants are available on my profile, including:
· straight barbed adapters;
· smooth sleeve connectors;
· reducers;
· angled connectors;
· T connectors;
· Y connectors;
· Metric versions;
· Inch Preset versions.
The complete system is designed around practical customization instead of fixed-size STL files.
Main Features
· Fully parametric design
· Tube outside diameter range from 6 to 120 mm
· External sleeve-style connection
· Tubes are inserted inside the printed connector
· Connector remains outside the tubes
· No barbs
· No grip teeth
· Smooth internal bore
· Independent side A and side B diameters
· Independent side A and side B insertion lengths
· Suitable for straight couplers and reducers
· Adjustable wall thickness
· Adjustable fit offset
· Optional internal center stop
· Adjustable center stop thickness
· Internal lead-in chamfers
· Clean external geometry
· Metric dimensions entered directly in millimeters
· No supports normally required when printed vertically
· Suitable for small tubing and large utility pipes
· Designed for functional FDM printing
Important Design Concept
This is not a traditional barbed hose adapter.
With a barbed adapter, the printed fitting is inserted inside the hose.
With this smooth sleeve connector, the tube is inserted inside the printed fitting.
The connector remains outside the tubes and acts as an external joining and alignment sleeve.
This design may be useful when:
· the tube wall is too thick for an internal barbed fitting;
· the internal tube passage should remain unobstructed;
· a cleaner external connection is preferred;
· two tube ends need to be aligned;
· a reducer between different outside diameters is required;
· barbs are unsuitable for the tube material;
· adhesive or sealant will be used;
· a temporary workshop coupler is needed;
· a custom commercial connector is unavailable.
Retention and sealing depend on:
· tube flexibility;
· selected fit tolerance;
· tube and connector materials;
· printer dimensional accuracy;
· layer adhesion;
· assembly method.
For greater retention or sealing, use an appropriate:
· adhesive;
· silicone sealant;
· retaining compound;
· external clamp;
· mechanical locking system.
Recommended Parameters
| Parameter | Description |
|---|---|
| A_TUBE_OD | Actual outside diameter of tube A |
| B_TUBE_OD | Actual outside diameter of tube B |
| A_INSERT_LEN | Tube insertion depth on side A |
| B_INSERT_LEN | Tube insertion depth on side B |
| WALL | Connector wall thickness |
| FIT_OFFSET | Diameter adjustment for tighter or looser tube fit |
| CENTER_STOP | Enables or disables the internal center stop |
| STOP_THICKNESS | Thickness of the internal center stop |
| INNER_CHAMFER | Internal lead-in chamfer for easier tube insertion |
| OUTER_CHAMFER | External edge chamfer |
Recommended Parameter Limits
| Parameter | Recommended Range | Suggested Default |
|---|---|---|
| A_TUBE_OD | 6–120 mm | 25 mm |
| B_TUBE_OD | 6–120 mm | 20 mm |
| A_INSERT_LEN | 10–150 mm | 25 mm |
| B_INSERT_LEN | 10–150 mm | 25 mm |
| WALL | 1.6–12 mm | 2.4 mm |
| FIT_OFFSET | -0.20 to +0.80 mm | +0.20 mm |
| CENTER_STOP | 0 / 1 | 1 |
| STOP_THICKNESS | 1–8 mm | 2 mm |
| INNER_CHAMFER | 0–5 mm | 1 mm |
| OUTER_CHAMFER | 0–5 mm | 1 mm |
The exact usable values depend on the selected tube diameter, tube material and intended application.
For larger connectors, especially above approximately 50 mm, increase the wall thickness and insertion length according to the required rigidity.
Diameter and Wall Thickness Guide
Suggested starting wall thicknesses:
| Tube Outside Diameter | Suggested WALL |
|---|---|
| 6–15 mm | 1.6–2.4 mm |
| 15–30 mm | 2.0–3.0 mm |
| 30–50 mm | 2.4–4.0 mm |
| 50–75 mm | 3.0–5.0 mm |
| 75–100 mm | 4.0–7.0 mm |
| 100–120 mm | 5.0–10.0 mm |
These values are general starting points only.
Increase wall thickness when:
· greater rigidity is required;
· the connector will be handled frequently;
· the tubes are heavy;
· the connector is long;
· clamps will be applied;
· the printed material is relatively flexible;
· the part may be exposed to bending or impact.
Insertion Length Guide
Suggested starting insertion lengths for each side:
| Tube Outside Diameter | Suggested Insertion Length |
|---|---|
| 6–15 mm | 10–20 mm |
| 15–30 mm | 15–30 mm |
| 30–50 mm | 25–45 mm |
| 50–75 mm | 35–60 mm |
| 75–100 mm | 45–80 mm |
| 100–120 mm | 60–120 mm |
Longer insertion sections generally improve tube alignment and distribute loads over a larger area.
However, they also increase material use and printing time.
Fit Offset Guide
The internal diameter of each connector side is calculated from the selected tube outside diameter plus the FIT_OFFSET.
Negative values reduce the internal diameter and create a tighter fit.
Positive values increase the internal diameter and create a looser fit.
Suggested starting values:
| Fit Type | Suggested FIT_OFFSET |
|---|---|
| Tight or light press fit | -0.10 to 0.00 mm |
| Close sliding fit | +0.10 to +0.25 mm |
| Easy sliding fit | +0.25 to +0.40 mm |
| Adhesive gap | +0.30 to +0.50 mm |
| Sealant gap | +0.50 mm or more |
For soft silicone or rubber tubes, values between 0.00 and +0.20 mm may work well.
For rigid tubes, large diameters or glued connections, a positive clearance is normally safer.
For glued or sealed connections, leave enough clearance for the selected adhesive or sealant layer.
Large-diameter printed parts may show greater dimensional variation because of:
· material shrinkage;
· bed calibration;
· extrusion flow;
· warping;
· first-layer expansion;
· printer dimensional accuracy.
Always print a short test ring or reduced-length connector before printing a large final part.
Printing Recommendations
Recommended Materials
| Material | Recommendation |
|---|---|
| ASA | Excellent for stronger, outdoor and more heat-resistant parts |
| PETG | Good general-purpose option with relatively easy printing |
| ABS | Good technical option when printed in a controlled enclosure |
| PA / PA-CF | Excellent for demanding workshop parts |
| PLA | Only for indoor, low-temperature and light-duty use |
| TPU | Possible for flexible sleeves, but dimensional precision is lower |
Suggested Print Settings
| Setting | Recommendation |
|---|---|
| Layer height | 0.16–0.28 mm |
| Walls/perimeters | 10 |
| Top/bottom layers | 5–8 |
| Infill | 100% |
| Material | ASA or PETG recommended |
| Supports | Normally not required |
| Brim | Recommended for ASA and large diameters |
| Orientation | Vertical |
| Seam position | Away from the most critical fitting surface when possible |
The supplied functional profile uses:
10 walls and 100% infill
This creates a dense functional part with high rigidity and no lightweight internal structure.
Depending on the selected connector wall thickness and slicer extrusion width, the entire wall may be generated almost completely from perimeters.
For stronger functional parts:
· use ASA, PETG, PA or PA-CF;
· use multiple walls;
· increase the geometric WALL parameter for larger diameters;
· use sufficient top and bottom layers;
· avoid thin connector walls on heavy tubes;
· print within the safe higher temperature range of the material for improved layer adhesion;
· use a brim with ASA, ABS and other warp-prone materials;
· verify the internal dimensions after printing;
· test the fit before final assembly.
Vertical printing normally provides:
· the cleanest internal bore;
· the simplest support-free setup;
· better circular accuracy;
· cleaner tube insertion surfaces.
For small diameters or unusually high mechanical stress, angled printing may improve resistance across some layer transitions.
However, vertical printing is generally recommended for dimensional accuracy and clean internal surfaces.
Large-Diameter Printing Notes
Connectors between approximately 75 and 120 mm require more attention than small tube fittings.
For large sizes:
· increase wall thickness;
· increase insertion length;
· use a brim;
· verify first-layer adhesion carefully;
· reduce warping with an enclosed printer when using ASA or ABS;
· use enough walls to prevent local flexing;
· check printer dimensional accuracy;
· print a short test section first;
· consider material shrinkage when selecting FIT_OFFSET;
· confirm that the generated model fits inside the printer build volume.
Large parts require considerably more material and printing time.
The 120 mm maximum range provides design flexibility, but final suitability depends on the printer, material and intended mechanical load.
Suggested Use
- Measure the real outside diameter of tube A with a caliper.
- Measure the real outside diameter of tube B.
- Enter the measured values in A_TUBE_OD and B_TUBE_OD.
- Select suitable insertion lengths for both sides.
- Select a wall thickness appropriate for the connector diameter.
- Start with a small positive FIT_OFFSET.
- Generate the connector.
- Print a short test ring or reduced-length test connector.
- Check whether the fit is too tight or too loose.
- Adjust FIT_OFFSET if necessary.
- Print the final connector.
- Use adhesive, sealant or clamps when required.
Example Metric Presets
| Preset | Side A Tube OD | Side B Tube OD | Suggested Use |
|---|---|---|---|
| 8 → 8 mm | 8 mm | 8 mm | Small silicone tube connector |
| 10 → 10 mm | 10 mm | 10 mm | Small utility tube coupler |
| 12 → 12 mm | 12 mm | 12 mm | General small tube connector |
| 16 → 12 mm | 16 mm | 12 mm | Small reducer |
| 20 → 16 mm | 20 mm | 16 mm | Medium tube reducer |
| 25 → 20 mm | 25 mm | 20 mm | Workshop tube adapter |
| 32 → 25 mm | 32 mm | 25 mm | Larger utility reducer |
| 40 → 32 mm | 40 mm | 32 mm | Larger sleeve reducer |
| 50 → 40 mm | 50 mm | 40 mm | Medium pipe reducer |
| 60 → 50 mm | 60 mm | 50 mm | Workshop duct adapter |
| 75 → 60 mm | 75 mm | 60 mm | Large external sleeve reducer |
| 80 → 75 mm | 80 mm | 75 mm | Large tube coupler |
| 100 → 80 mm | 100 mm | 80 mm | Large prototype duct adapter |
| 110 → 100 mm | 110 mm | 100 mm | Large utility reducer |
| 120 → 100 mm | 120 mm | 100 mm | Maximum-range reducer |
These presets are examples only.
Always enter the real measured tube outside diameter.
Important Safety Notes
This model is intended for non-critical, light-duty, workshop, maker and hobby use only.
Do not use this printed part for:
· high-pressure systems;
· safety-critical compressed air systems;
· fuel lines;
· brake lines;
· hydraulic systems;
· certified drinking-water systems;
· food-contact applications;
· medical applications;
· hot or pressurized fluids;
· toxic or hazardous chemicals;
· structural load-bearing connections;
· any application where failure could cause injury, serious damage or dangerous leakage.
Large diameter does not imply pressure capability.
Increasing the diameter can significantly increase the forces acting on the connector when internal pressure is present.
3D-printed parts can fail depending on:
· material;
· layer adhesion;
· print orientation;
· wall thickness;
· infill;
· temperature;
· chemical exposure;
· UV exposure;
· mechanical stress;
· tube stiffness;
· assembly method.
Always test the connector carefully before use.
Use suitable clamps, adhesives or sealants when required.
The designer is not responsible for misuse, unsuitable material selection or damage caused by improper application.
Print Profile Note
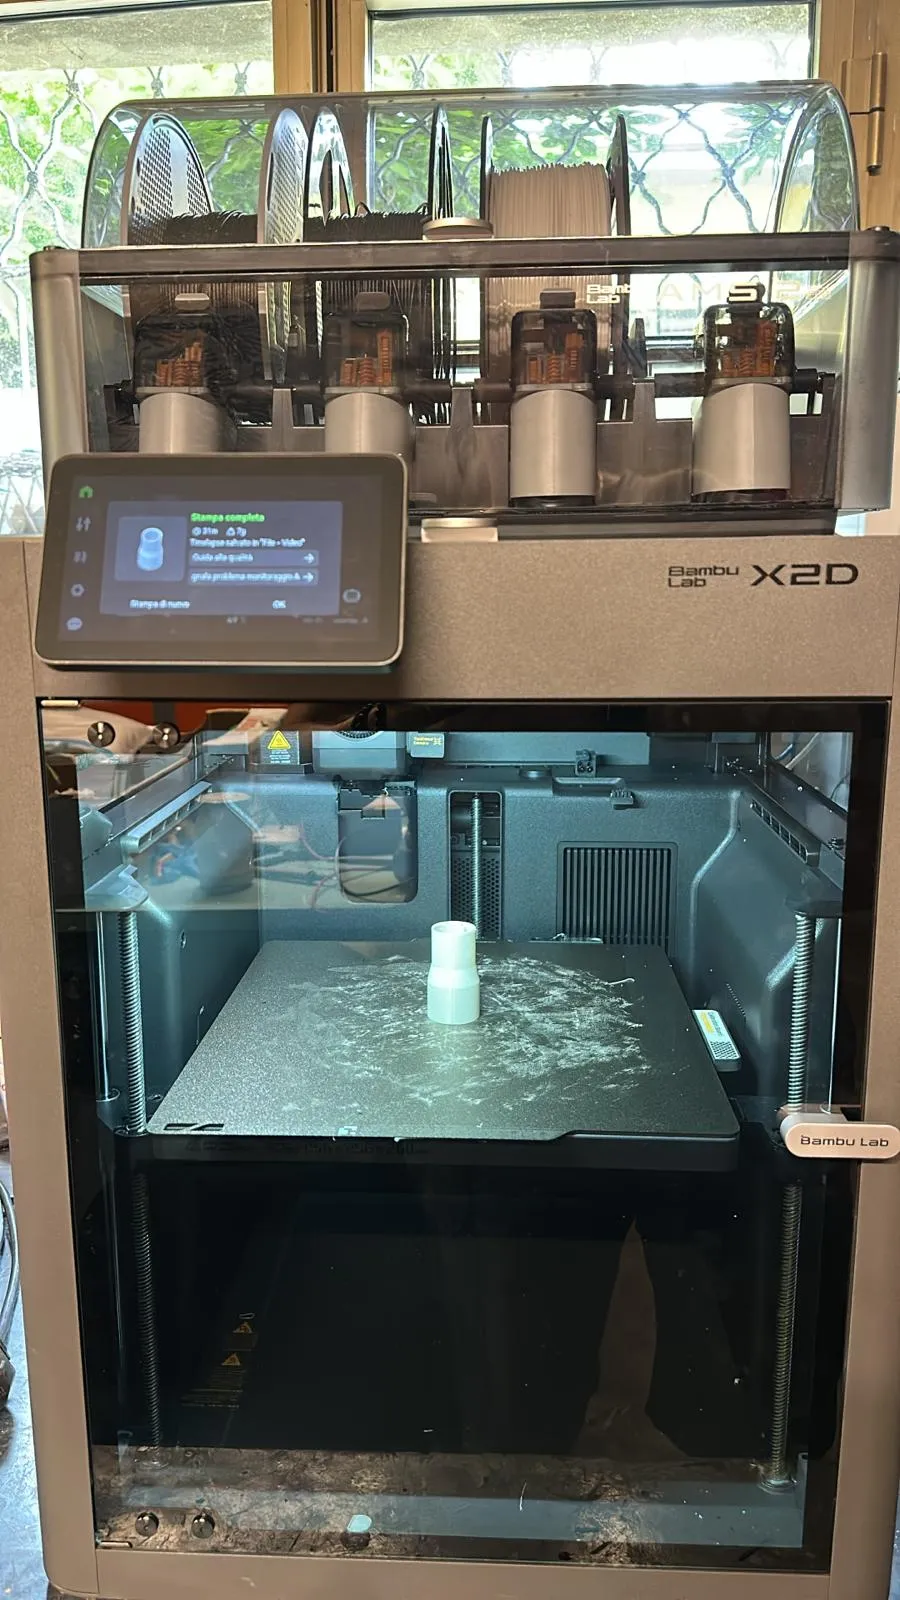
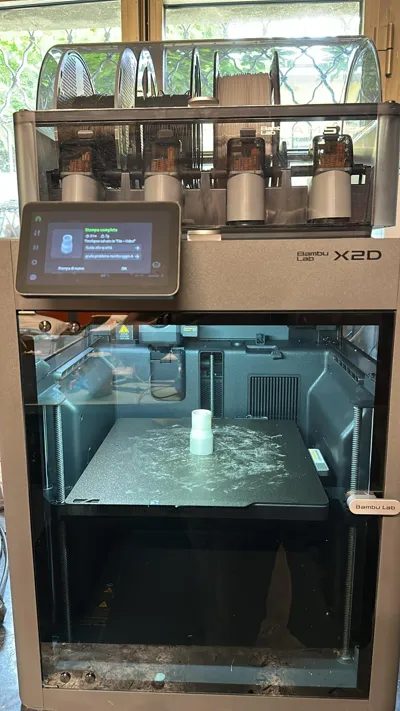
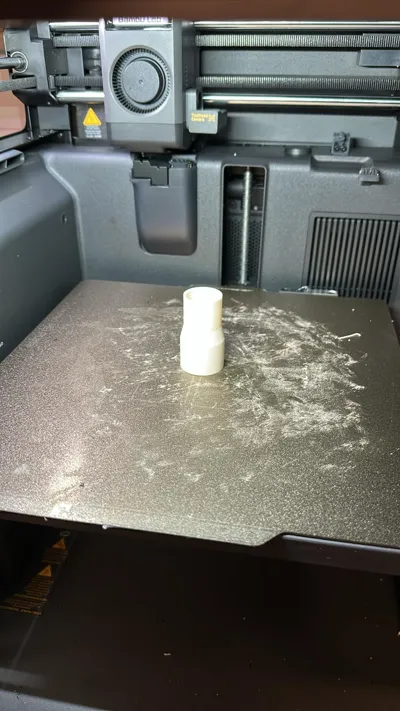
This model includes Bambu Lab X2D print profiles personally prepared and tested.
The supplied functional profile uses:
· 10 walls;
· 100% infill;
· vertical orientation;
· no supports under normal conditions.
This creates a dense and rigid functional connector intended for practical use rather than lightweight decorative printing.
Because this is a parametric model with diameters extending up to 120 mm, always review the sliced result after customization.
Large customized models may require:
· increased wall thickness;
· a brim;
· longer printing time;
· considerably more material;
· adjusted temperature and cooling settings;
· additional dimensional compensation.
The model is designed to be easy to slice on any well-calibrated FDM printer.
Verified community profiles for other Bambu Lab printers are welcome and appreciated.
Customizer Note
The parametric version is intended to be edited through Fusion 360 or MakerWorld Customizer on the PC version.
Bambu Handy is mainly intended for direct printing from ready-made print profiles and may not provide complete access to the editable parametric source geometry.
After changing the parameters, always inspect the generated geometry and sliced preview before printing.
License

You shall not share, sub-license, sell, rent, host, transfer, or distribute in any way the digital or 3D printed versions of this object, nor any other derivative work of this object in its digital or physical format (including - but not limited to - remixes of this object, and hosting on other digital platforms). The objects may not be used without permission in any way whatsoever in which you charge money, or collect fees.


Comment & Rating (3)