Search models, users, collections, and posts
LED Pocket Flashlight
IP Report


Print Profile(1)
0.2mm layer, 6 walls, 25% infill
Designer
1.1 h
1 plate
Open in Bambu Studio
Boost
1
2
0
0
1
0
Released
Description
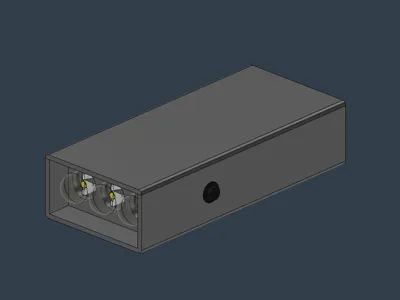
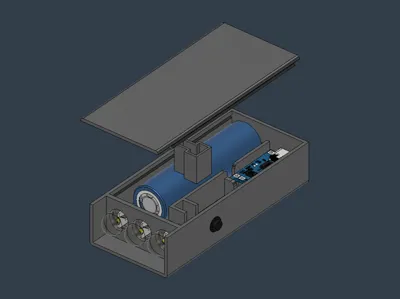
3-LED Pocket Flashlight (18650 & TP4056)
Looking for a highly practical, ultra-bright 3D print to use up an extra 18650 cell? This compact, rugged pocket flashlight is the perfect weekend project! It features a minimalist, box-style design that houses three powerful 10mm LEDs, a rechargeable battery setup, and a simple push-button switch.
Whether you need a reliable emergency light, a bedside torch, or a handy light for your workshop, this print is durable, easy to assemble, and fully rechargeable.
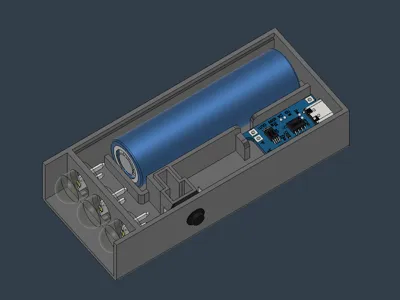
🛠️ Hardware & Components Needed
To fully assemble this model, you will need the following electronics:
- LEDs: 3x 10mm White LEDs (Provides a wide, bright beam)
- Battery: 1x 18650 Lithium-Ion Battery (For long-lasting capacity)
- Charging Module: 1x TP4056 USB-C Charging Board (Includes overcharge protection)
- Switch: 1x Push On/Off Switch (Latch style)
- Note: Depending on your specific LEDs, you may also want to include a small resistor (e.g., 1Ω to 10Ω) to protect the LEDs from the direct 3.7V–4.2V current of the 18650 battery.
🖨️ Print Settings & Recommendations
- Material: PLA works perfectly, but PETG or ASA is recommended if you plan to keep it in a hot car or use it ruggedly outdoors.
- Infill: 15% – 20% (Gyroid or Grid for structure).
- Walls/Perimeters: 3 walls for extra durability around the switch and LED friction-fit zones.
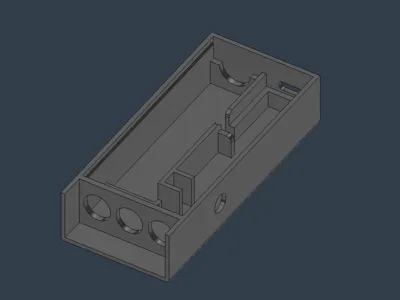
- Supports: No supports required if printed vertically on its solid back end!
🔧 Assembly Quick-Tips
- LED Wiring: Wire the three 10mm LEDs in parallel so they all receive the same voltage from the battery.
- Fitting: The LEDs and the push button are designed to be a snug friction-fit, but a drop of hot glue or superglue inside the housing will keep everything permanently locked in place.
- Charging Access: Ensure you line up the TP4056 module correctly with the rear cutout so you can easily plug in your charging cable.
License
This user content is licensed under a
Creative Commons Attribution-Noncommercial-Share Alike
Comment & Rating (0)