


Print Profile(7)

Description
Boost Me (for free)
Boost me, if you like my High Density Infinite Skadis Board design.
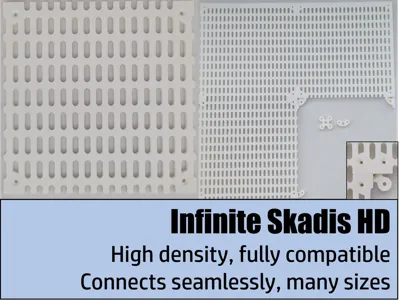
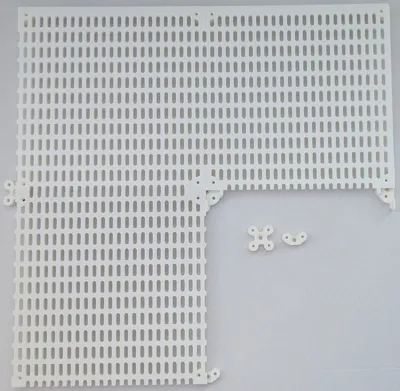
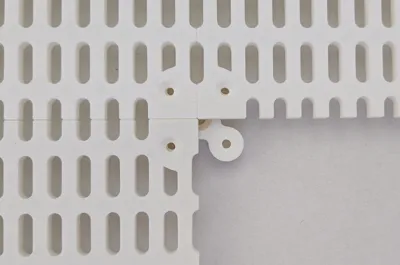
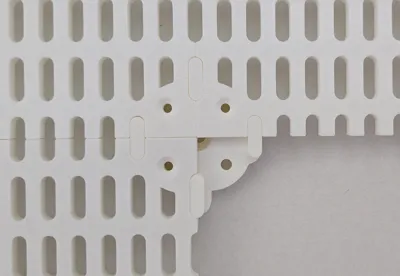
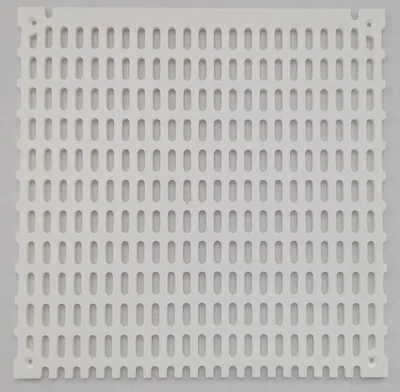
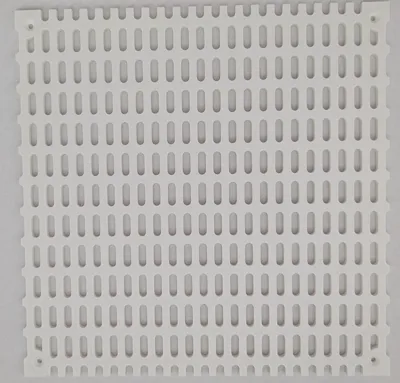
High density pegboards compatible with the Ikea Skadis system. The size and distance of the holes are identical to the Skadis system, so all items designed for Skadis boards can be used. The higher density of these boards provides unmatched flexibility! These boards can be linked seamlessly. No space is wasted between the separate boards.
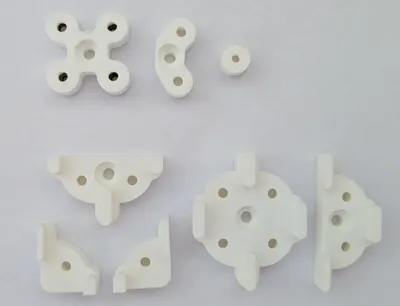
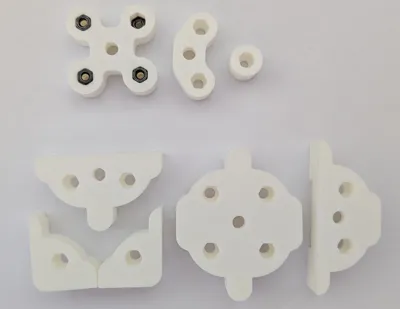
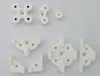
There are two types of connectors, small and large. You connect the boards to the connectors using M3 screws with length between 10 and 14 mm and a hex nut. The small connectors use less space and do not block additional holes. The large ones are somewhat easier to install but block a few of the Skadis holes.
The connectors can be mounted to the wall with separate mounting holes. Alternatively, the holes intended for the M3 screws can be used for wall mounting.
There are boards for each size of Bambu printers:
- 180x180 mm for A1 mini
- 250x220 mm for P1S, P1P, X1C, X1E
- 250x240 mm for A1, P2S, X2D
- 300x320 mm for H2C, H2D
- 330x320 mm for A2L
- 340x320 mm for H2S
If you want to print the 250 x 240 mm boards with a P1/X1 printer, you need to change the stock settings of the printer. First, you need to click on your printer model “Click to edit preset”:

This will open the “Printer settings”. You need to delete the default values for “Bed exclude area”. Just delete the values in the red box in the picture below. Then save the profile under a new name by clicking on the small disk icon. To print the 240x240 mm boards, you have to use the printer profile you just saved.

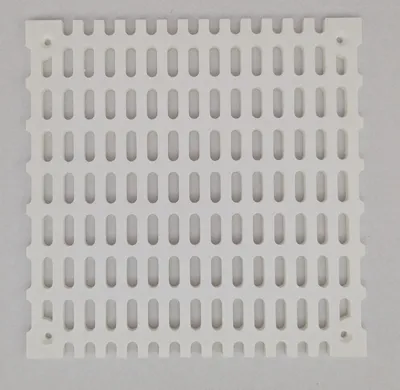
For better appearance there are also end pieces with a straight edge without cutouts, which you can find in the same profiles.
If you are looking for additional models, please leave a comment and I will look into it.
License
You shall not share, sub-license, sell, rent, host, transfer, or distribute in any way the digital or 3D printed versions of this object, nor any other derivative work of this object in its digital or physical format (including - but not limited to - remixes of this object, and hosting on other digital platforms). The objects may not be used without permission in any way whatsoever in which you charge money, or collect fees.
Comment & Rating (0)