ESP-DeskDeck

Print Profile(0)
Bill of Materials


Description
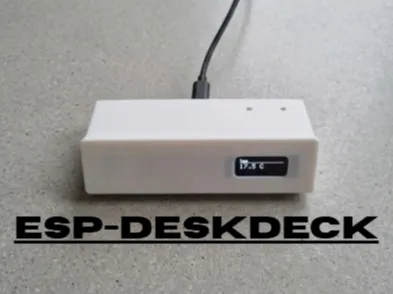
ESP-DeskDeck is a compact, DIY alternative to commercial macro keypads. Based on an ESP32-C3 Mini, it functions as both an environmental information display and a 4-key wireless macro keypad. It retrieves real-time weather data for a configured city and displays it on an OLED screen, while simultaneously sending commands via the local Wi-Fi network to a host PC.
The device is fully configurable through a modern web interface hosted directly on the ESP32.
Features
- Environmental Information Display :
- Retrieves and displays real-time weather data (temperature, conditions, wind, humidity, visibility) from the free Open-Meteo API.
- Allows switching between displaying weather forecasts and the current time on a 128x32 pixel OLED screen.
- Wireless Macro Pad :
- Features four physical buttons configurable to perform various actions on the PC.
- Communicates with the host computer via Wi-Fi, eliminating the need for a USB cable.
- Web Interface Configuration :
- Hosts a standalone web server for configuration.
- A responsive weather dashboard to view current conditions, with animated backgrounds that adapt to the weather (sun, rain, clouds, snow, etc.).
- An intuitive "Configure Keys" page to assign different actions to each button.
- PC Control Script :
- A complementary Python script that automatically detects the ESP-DeskDeck on the local network.
- Listens for button press events and executes configured commands.
- Supports media controls, keyboard shortcuts, and opening websites.
Hardware Components
- ESP32-C3 Mini board (or a similar ESP32 board, pins may require adjustments)
- SSD1306 128x32 I2C OLED display
- 4 tactile buttons
- Breadboard and Dupont wires
Setup and Installation
The setup procedure involves two main phases: uploading the firmware to the ESP32 and running the control script on the PC.
1. ESP32 Firmware
Prerequisites
- Arduino IDE
- ESP32 board support in the Arduino IDE
- The following Arduino libraries installed via the Library Manager:
- WebServer
- HTTPClient
- ArduinoJson
- Adafruit GFX Library
- Adafruit SSD1306
Wiring
Connect the components to the ESP32 board following the diagram below:
| Component | ESP32 Pin |
|---|---|
| OLED Display SDA | GPIO 8 |
| OLED Display SCL | GPIO 9 |
| Button 1 | GPIO 0 |
| Button 2 | GPIO 1 |
| Button 3 | GPIO 2 |
| Button 4 | GPIO 3 |
Note: The buttons must be wired to connect the GPIO pin to GND when pressed.
Flashing
- Open the ESP32_Meteo_C3_IP_Version9.inofile in the Arduino IDE.
Modify the Wi-Fi credentials at the beginning of the file to match your network:
const char* ssid_casa = "YOUR_WIFI_SSID"; const char* pass_casa = "YOUR_WIFI_PASSWORD";
- Select your ESP32-C3 board from the Tools > Boardmenu.
- Select the correct COM port.
- Upload the sketch to your board. On the first boot, the device will connect to your Wi-Fi network and display its IP address on the OLED screen.
2. PC Control Script
The Python script listens for commands from the ESP32 and executes them on your computer.
Prerequisites
- Python 3.x
The following Python packages:
pip install requests pyautogui keyboard
Note: On some operating systems, the keyboardlibrary may require administrator/root privileges to function correctly.
Configuration
- Open the Esp controll.pyfile.
Adjust the IP_PREFIXvariable to match your local network's subnet. For example, if your computer's IP address is 192.168.1.50, change the prefix to "192.168.1.".
# ---------------- CONFIG ---------------- IP_PREFIX = "192.168.1." # ... # ----------------------------------------
Run the script from your terminal:
python "Esp controll.py"
The script will start scanning the network for the ESP-DeskDeck. Once found, it will display the device's IP address and begin listening for button presses.
Usage
- Power On : Once the ESP32 is powered on and the firmware is loaded, it will connect to the Wi-Fi network and display its IP address. If the connection fails, it will create an access point named ESP32-Meteo-Config (password: 12345678) and its IP address will be 192.168.4.1.
- Access Web Interface : Open a web browser and navigate to the IP address displayed on the OLED screen.
- Set Location : On the main page, type a city name in the search bar and click "Search". The device will retrieve and display the weather forecast for that location.
- Configure Buttons : Go to the /tastipage (e.g., http://192.168.1.123/tasti). Here you can assign an action to each of the four buttons.
- Click on a button's configuration card to open the action selector.
- Select an action and click "Save".
- If a green pulse appears on the card when a button is physically pressed, it means the device is correctly registering the press.
Available Actions
- display_toggleToggles the OLED screen display between weather and time.
- media_play: Play/Pause media.
- media_next: Next track.
- media_prev: Previous track.
- media_vol_up: Volume up.
- media_vol_down: Volume down.
- media_mute: Mute audio.
- ctrl_c: Copy (Ctrl+C).
- ctrl_v: Paste (Ctrl+V).
- ctrl_zUndo (Ctrl+Z).
- win_d: Show desktop (Win+D).
- screenshot: Take a screenshot (Win+Shift+S).
- open_site: Opens a specific URL (requires URL setup in the web interface).
- Start the system : With the Esp controll.pyscript running on your PC, you can now press the physical buttons on the DeskDeck to activate the configured actions.
License
This project is licensed under Copyright. For more details, consult the LICENSE file.
Electronic parts:
- https://www.temu.com/it/5-50pcs--interruttore--ttp223--touch-autobloccante-non-bloccante-interruttori-capacitivi-monocanale-per----l8-g-601104901520167.html?_oak_mp_inf=EKf2gqG61ogBGiA2MDBkZjVmYjliOWE0ZDAzYTRkMWVlMjhkZjNkZTM5MiCBq%2Fz%2B7DM%3D&top_gallery_url=https%3A%2F%2Fimg.kwcdn.com%2Fproduct%2Fopen%2F6490c1002a3042ef80bdd7a43b4aa7f8-goods.jpeg&spec_gallery_id=26898004026&refer_page_sn=10009&freesia_scene=2&_oak_freesia_scene=2&_oak_rec_ext_1=MTE4&_oak_gallery_order=1605957270%2C937819776%2C1027753554%2C232500134%2C1234815949&search_key=touch%20sensor%20arduino&refer_page_el_sn=200049&ab_scene=1&enable_vqr=0&refer_page_name=search_result&refer_page_id=10009_1781603910225_8o2sawal7e&_x_sessn_id=fmzgdmssu4 (touch keys)
- https://www.temu.com/it/4-moduli-display-oled-i2c-da-0-91-pollici-con-risoluzione-128x32-compatibili-con---esp32-e--forniti-con-4-spine-da-assemblare-g-601105786535335.html?_oak_mp_inf=EKf7g8e91ogBGiBiM2JiYWNhNjU1MDg0OTdhYmQ3MmMzZDkwZmM5YWU5ZiDNpP%2F%2B7DM%3D&top_gallery_url=https%3A%2F%2Fimg.kwcdn.com%2Fproduct%2Ffancy%2Ff6b3473f-ecee-48f0-9609-cbe89f0819ab.jpg&spec_gallery_id=30682277385&refer_page_sn=10009&freesia_scene=2&_oak_freesia_scene=2&_oak_rec_ext_1=ODc0&_oak_gallery_order=1006529700%2C831254459%2C1004178562%2C572292350%2C1339059715&search_key=schermo%20oled%20esp32&refer_page_el_sn=200049&ab_scene=1&enable_vqr=0&_x_sessn_id=fmzgdmssu4&refer_page_name=search_result&refer_page_id=10009_1781604012406_8tiibamkxs (oled screen)
- soldering iron
- solder
wires
7. https://github.com/Alessiosavi1/ESP-DeskDeck (program and instructions)

License
You may create derivative works based on this object, provided that all such derivative works are published exclusively on the MakerWorld platform and include proper attribution to the original creator. You may not share, upload, host, distribute, or publish this object—or any derivative work of this object—on any other digital platform, marketplace, or distribution channel. Commercial use of this object and any derivative works is strictly prohibited. This includes, but is not limited to, selling, renting, sublicensing, or using the object in any context in which you receive monetary compensation or other financial benefits.
Comment & Rating (0)