Low-cost 3D Printed editable engagement certificate


Print Profile(2)
Description
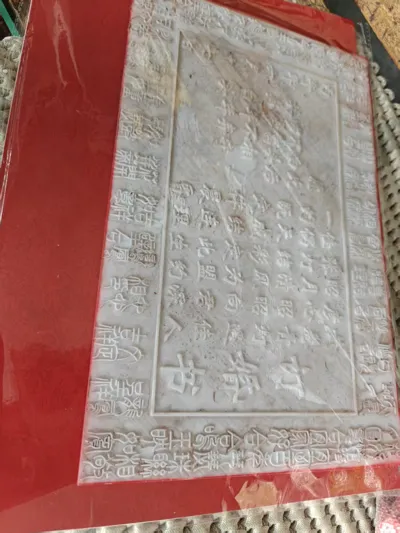
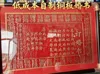
A 3D printed pattern template provides the outline; the rest is handcrafted. The artisan carves the marriage certificate from a copper plate with thousands of hammer blows, symbolizing the union of two families and the promise of growing old together, enshrined in brass.
I. Procurement
1. Glue (Since the board's length exceeds the Print in Place limit of 3D printers, it is cut into two pieces and glued together)

2. Red Copper Strip (The core of the copper plate marriage certificate, select 0.1mm thickness with a width of 250mm)

3. One 25mm small rubber mallet (for tapping details with a leather pad on the copper plate), one square-top welding hammer head (to create a stippled texture), one large rubber mallet (for roughly tapping the outline), industrial polishing scouring pad or sandpaper, one soft leather pad, one sharpened chopstick (for fine outlining)


4. Paper tape (to frame the copper plate marriage certificate on the cardstock; golden yellow looks best), cardstock (background for the A3 copper plate marriage certificate), picture frame (A3 inner diameter frame)

II. Production Process
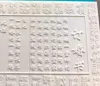
1. Open the 3mf file, edit the text in the slicer software, edit the names in the editable bride and groom positions, and the editable lunar month and day. The Weibei font is recommended.


2. Start printing. This requires 240.47g of filament and takes 6h 29m.
3. After printing, use 3D printing specific glue to stick the two templates together.

4. Use an art knife to cut along the edge. A sharp art knife allows you to tear it directly after cutting, no need for scissors. *Caution! Be very careful not to cut your hand with the art knife!!!
5. Wear gloves. Use two pliers to quench and blacken the copper sheet on a gas stove, then place the glued template onto the copper sheet. The color will change from reddish-brown to black. *Caution! This process involves a risk of burns, so be sure to prioritize safety.
6. Place the cut copper sheet on top of the template and secure it with tape around the edges.

7. Use a large hammer to tap out the general outline. *Caution! Do not hit too hard. Tap gently, hammer by hammer. Be very careful not to hit your hand with the hammer!!!

8. Use a small hammer with a leather pad to tap out the details. *Caution! Do not hit too hard. Tap gently, hammer by hammer. Be very careful not to hit your hand with the hammer!!!

9. Use chopsticks to refine the font edge details.
10. Use the welding hammer head to create stipples (just tap directly on the plate, no need for force; the weight of the hammer itself is enough).

11. Spray paint (bright red spray paint is recommended).

12. Use a scouring pad and sandpaper to polish the font details, and it's complete.

13. Framing: Tape golden or yellow tape around the copper plate marriage certificate; it shouldn't be too wide. Apply it in a circle to the cardstock, then place the marriage certificate on the cardstock, place the cardstock on the frame template, secure the frame, and you're done!

Friends who enjoy DIY crafts can print one to make their own engagement certificate! Wishing everyone success in creating their own copper plate marriage certificate!
Happy marriage!
License
You shall not share, sub-license, sell, rent, host, transfer, or distribute in any way the digital or 3D printed versions of this object, nor any other derivative work of this object in its digital or physical format (including, but not limited to, publishing derivative works outside the Makerworld platform or hosting on other digital platforms). The objects may not be used without permission in any way whatsoever in which you charge money or collect fees. Subject to the above restrictions, derivative works may be published only within the Makerworld platform, and all such derivative works must be licensed under the same SDFL‑C license, without modification or additional terms. You may download the digital versions of this object, 3D print it, and display images, videos, or usage demonstrations of 3D printed versions of the object on personal social media platforms or Makerworld official channels, provided that no digital versions of the object are shared or distributed.
Comment & Rating (0)