
Bicycle Wall Mount with Integrated Shelf
Print Profile(2)
Bill of Materials




- Dübel x 3:
- Schrauben x 3: M4.5x70 mm
- Schrauben x 16: M3x30 mm
- Multiplex Platte x 1: 260x130x15 mm
- Multiplex Platte x 2: 260x255x15 mm
Description
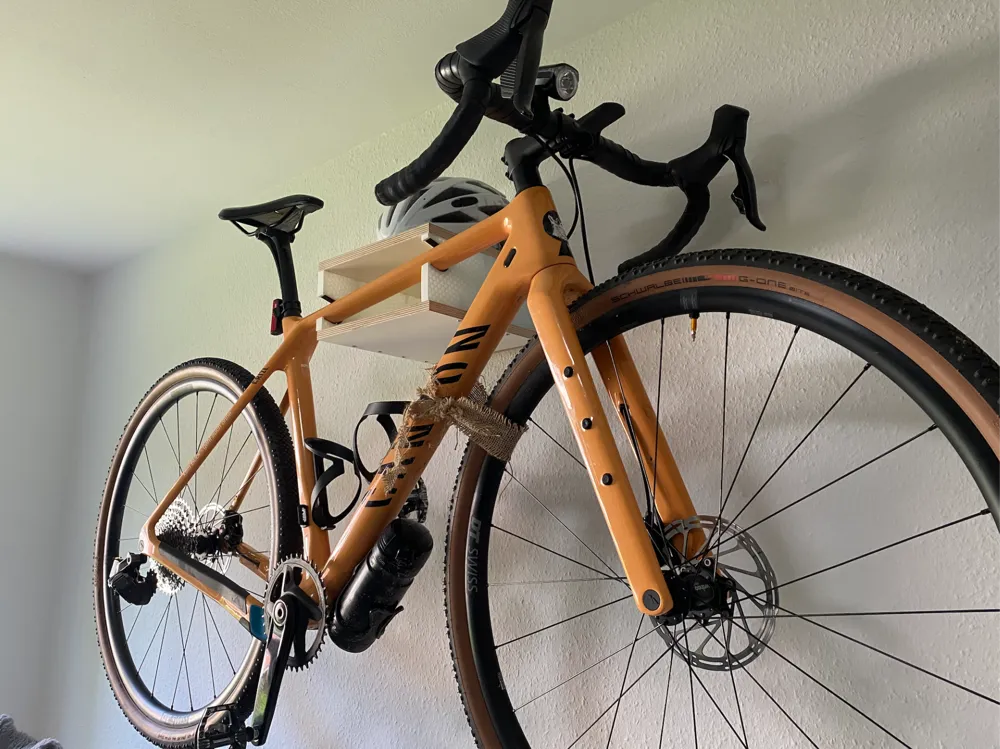
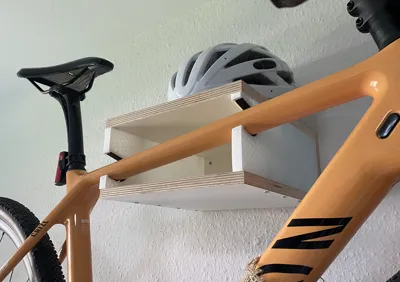
This wall mount offers an elegant and space-saving way to hang a bicycle on the wall. Thanks to the integrated shelf, helmets, gloves, or other accessories can be stored directly above the bicycle.
Boost Me (for free)
If you like the model, I would be very happy about your boost and your support. This way I can continue to develop new and better models 🚲
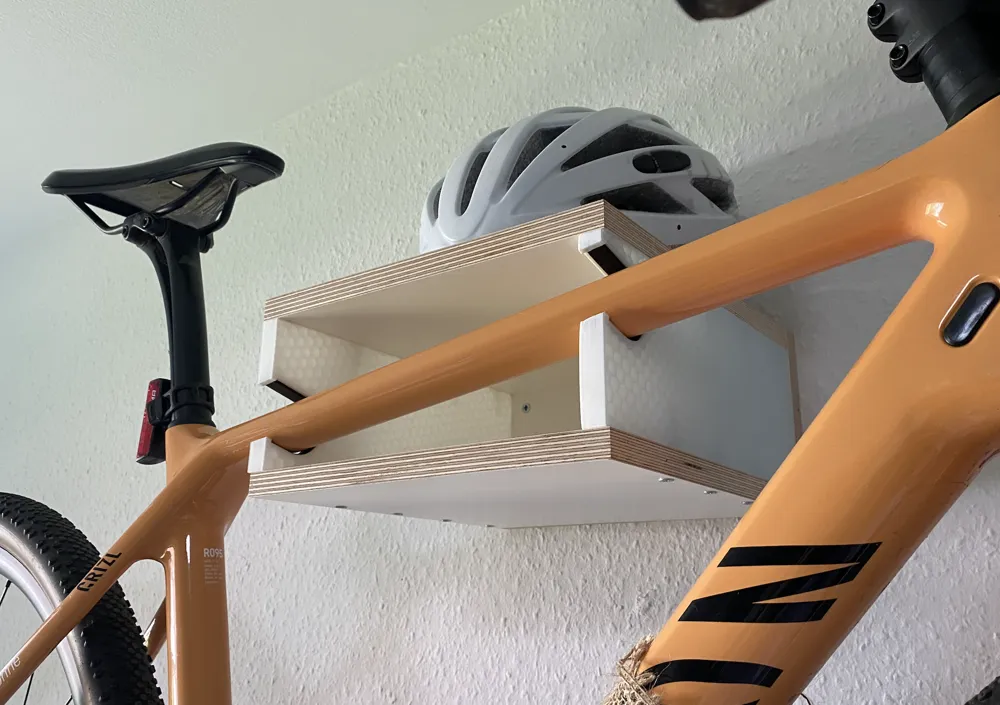
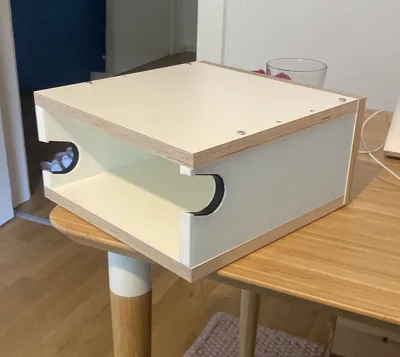
What's special about this design are the 3D-printed side parts, which are available in two versions: for straight cross bars and for slightly angled ones. The version for angled frames is designed for an inclination of approx. 10°.
The receptacle has a diameter of 40 mm. Please check before printing whether this is suitable for your bicycle. If required, versions with a larger diameter can also be provided upon request.
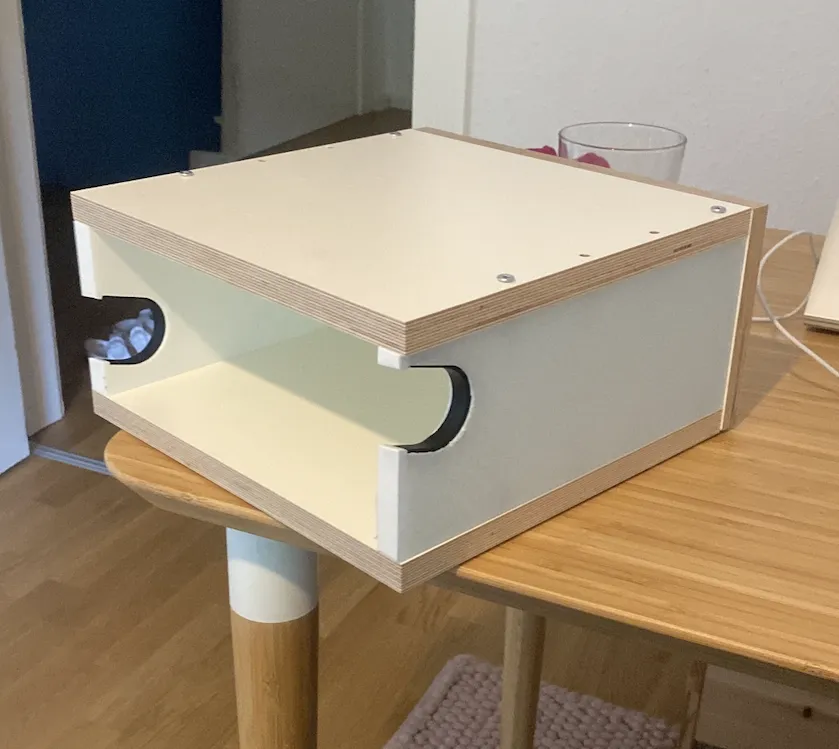
The construction consists of:
- an upper multiplex board
- a lower multiplex board
- a rear multiplex board
- 3D-printed side part left
- 3D-printed side part right
For the printed parts, white PLA is used. For the top layers, transparent PLA is recommended so that the honeycomb infill structure remains visible and creates an interesting look at the same time.
To ensure the bicycle rests securely and cannot slip, EPDM strips (10 mm wide, 3 mm thick) are inserted into the contact surfaces.
Required Materials
- Top plate: Multiplex, 260 × 255 × 15 mm
- Bottom plate: Multiplex, 260 × 255 × 15 mm
- Back plate: Multiplex, 260 × 130 × 15 mm
- 3D Print: 2× side part (PLA e.g. White and transparent for visible Honeycomb structure)
- 16× M3 × 30 mm wood screws
- per side part:
- 4 screws top
- 4 screws bottom
- per side part:
- 3× M4.5 × 70 mm for wall mounting
- 3x wall plugs
- All holes in the wood are pre-drilled with a 3 mm drill bit.
Required Tools
- Drill or cordless screwdriver
- 3 mm wood drill bit
- 5 mm wood drill bit
- Phillips screwdriver or suitable bit for the screws used
- Measuring tape or folding rule
- Pencil for marking
- Spirit level (for wall mounting)
Assembly
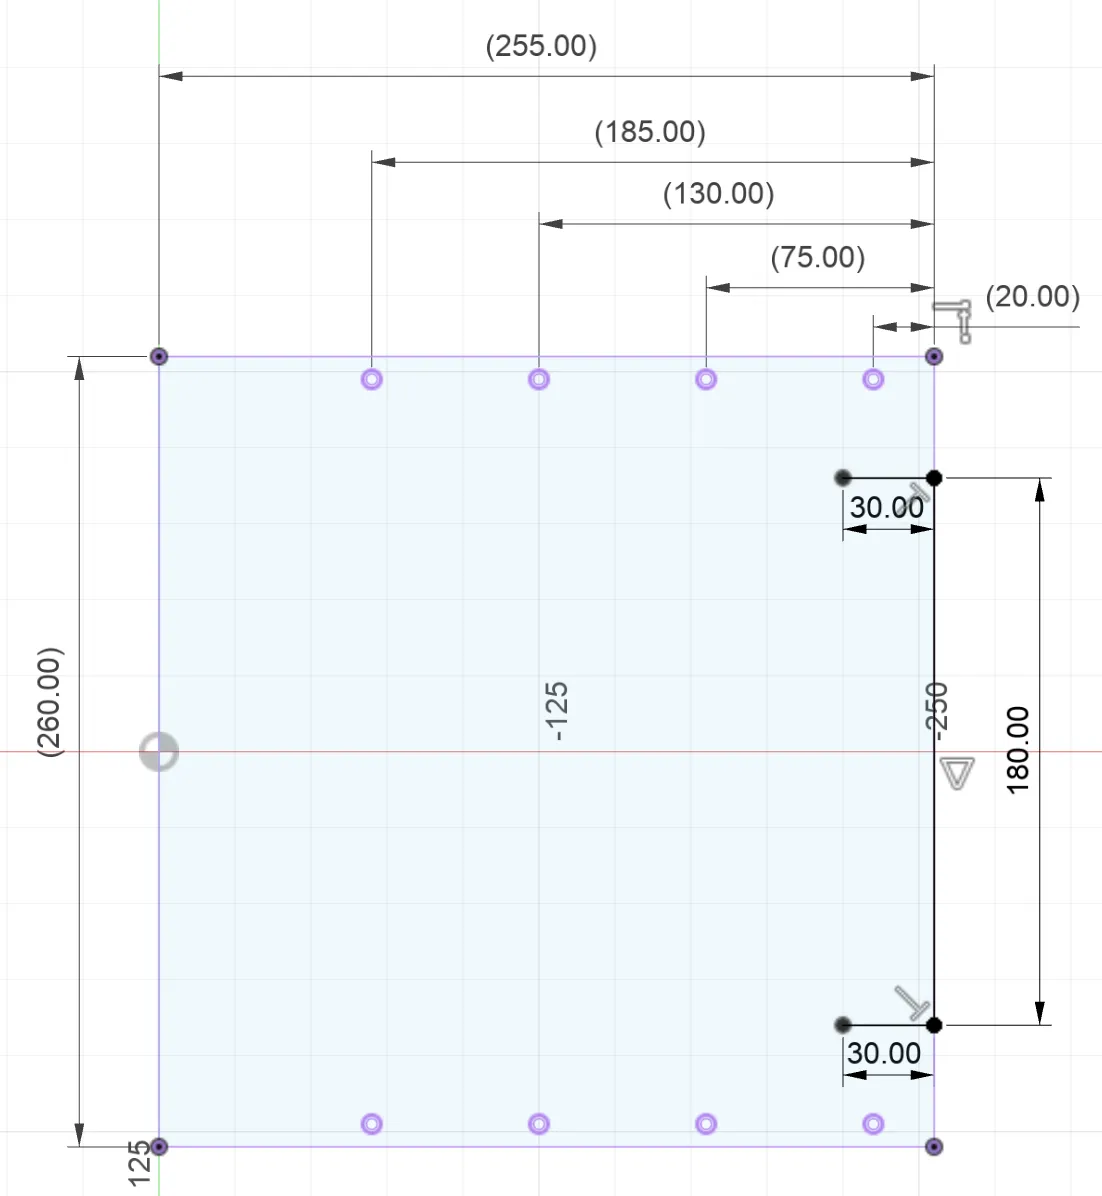
- Cut the top, bottom, and back plates.
Pre-drill all holes in the cover plates with a 3 mm drill bit.
The top and bottom plates receive through-holes from above so that they can be screwed to the side parts. Additionally, holes are made from behind into the plate to allow screwing to the back plate.
Pre-drill all holes in the back plate.
A 3 mm drill bit is used for the holes of the cover plates. A 5 mm drill bit is used for the holes for wall mounting.
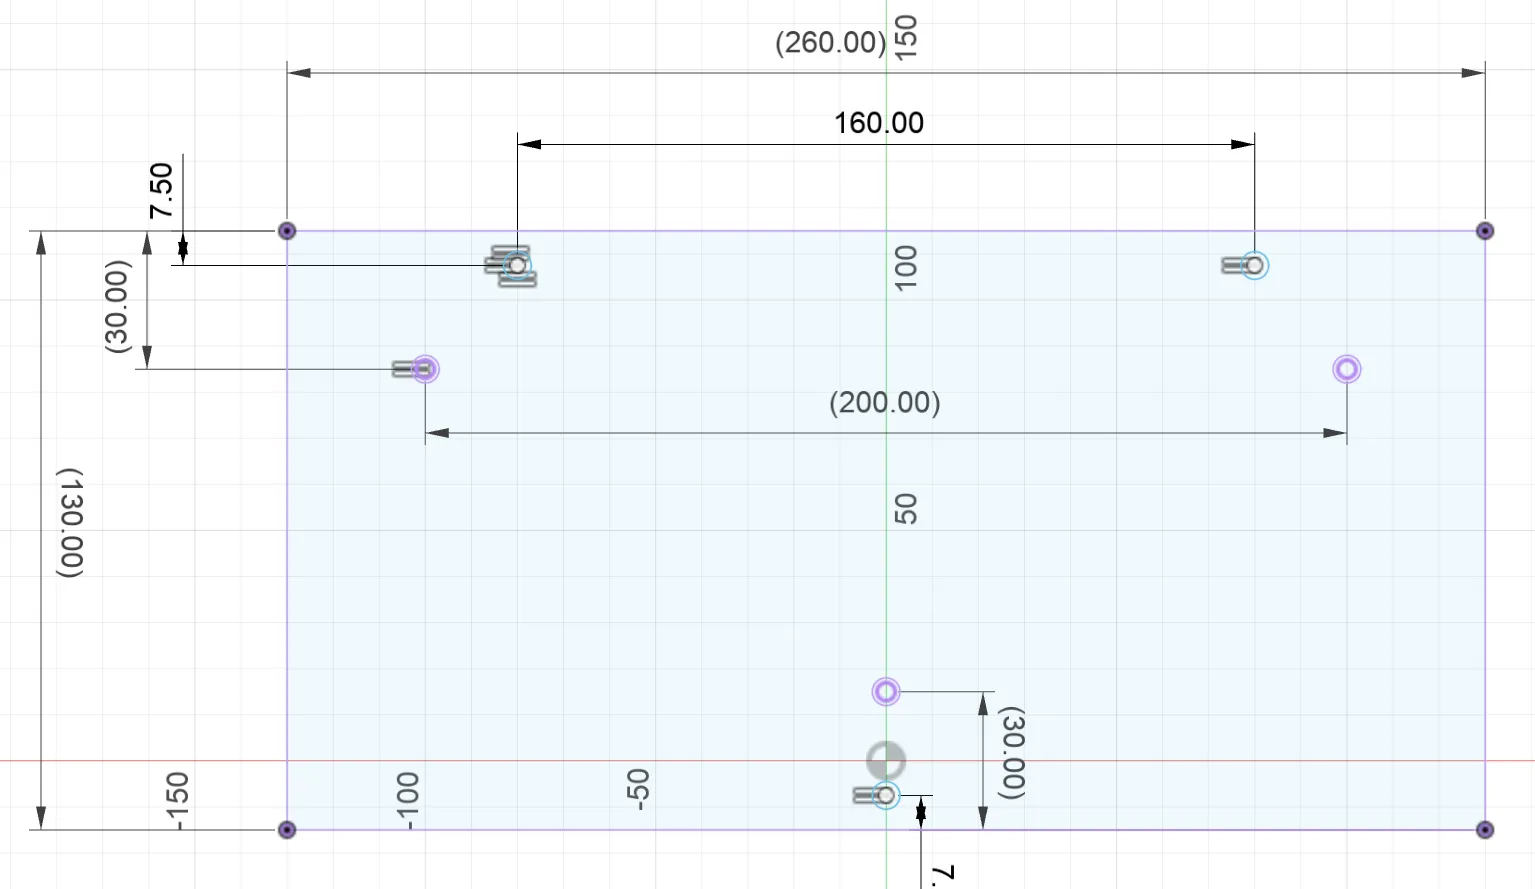
- Screw the back plate to the construction:
- 2 screws into the top plate
- 1 screw into the bottom plate
- Mount the two 3D-printed side parts.
- Per side, 8 M3 × 30 mm screws are used (4 top, 4 bottom).
- Insert the rubber strips into the support surfaces.
- Only then attach the complete mount to the wall with 3× M4.5 × 70 mm screws.
Notes
- The mount should only be attached to a load-bearing wall.
- The maximum load capacity depends on the wall condition and the plugs or screws used.
- The design is intended for bicycles with a top tube of about 10° inclination.
License

You shall not share, sub-license, sell, rent, host, transfer, or distribute in any way the digital or 3D printed versions of this object, nor any other derivative work of this object in its digital or physical format (including - but not limited to - remixes of this object, and hosting on other digital platforms). The objects may not be used without permission in any way whatsoever in which you charge money, or collect fees.


Comment & Rating (0)