
Phone holder for bike-motorcycle-scooter 2.0
Print Profile(1)
Description
Boost Me (for free)
Support my models with a Boost, to encourage me to create more and better ones! Thank you if you want to help me
Check out my other models on my profile too to discover new ideas and 3D projects! HERE
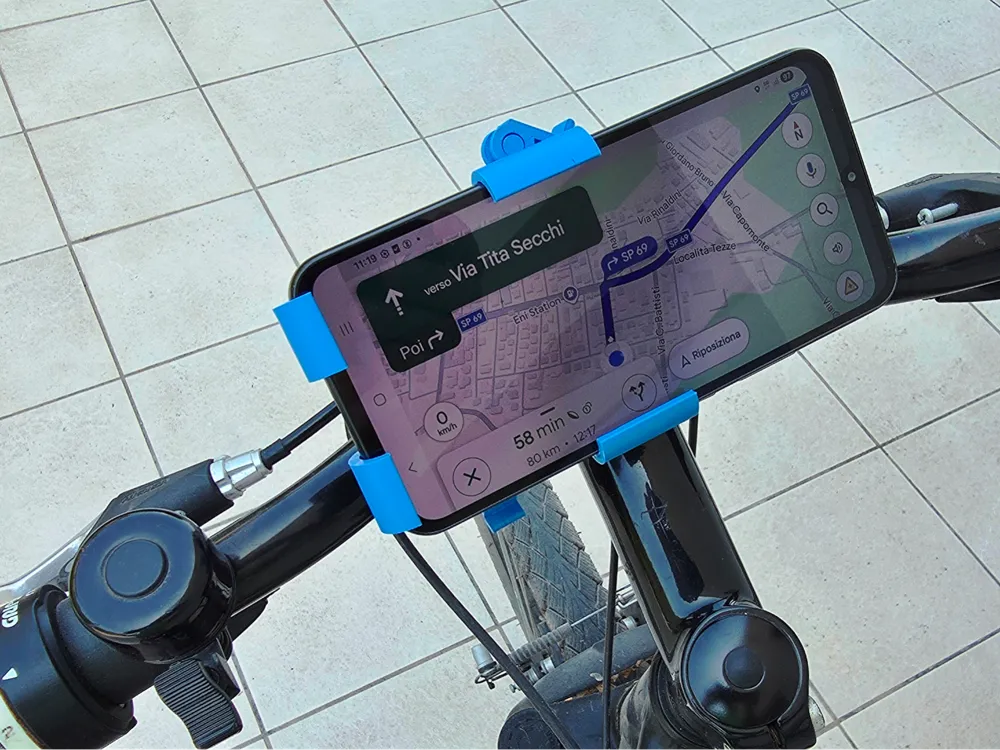
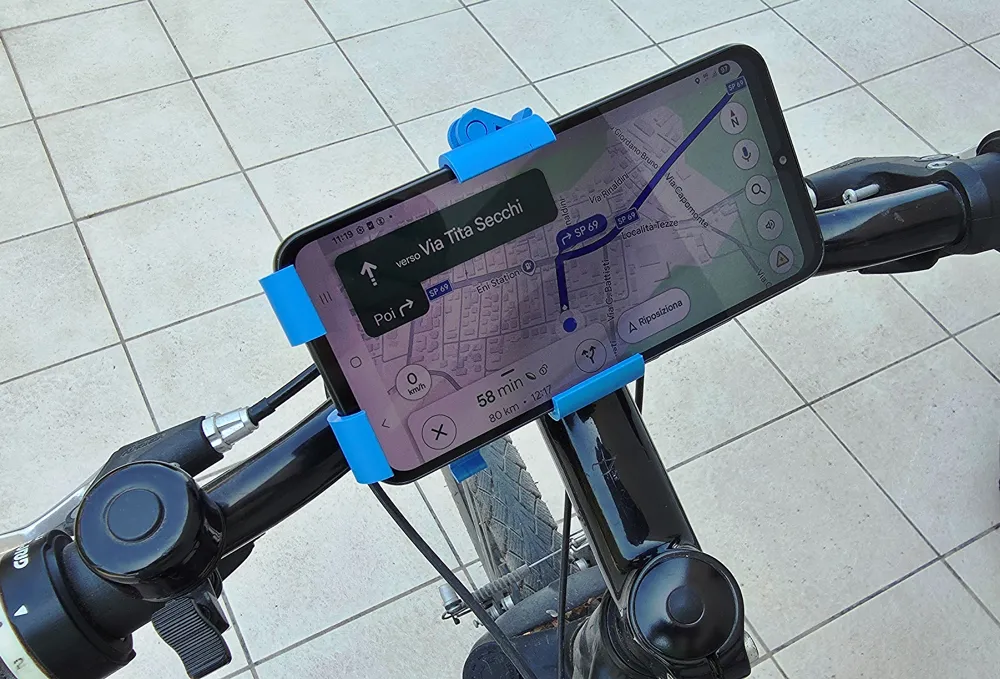
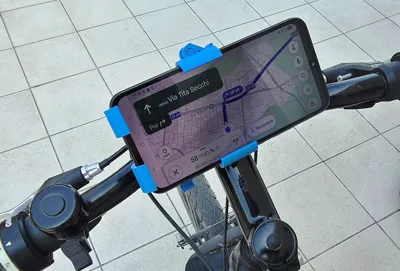
Phone holder for bicycle and motorcycle - version 2.0
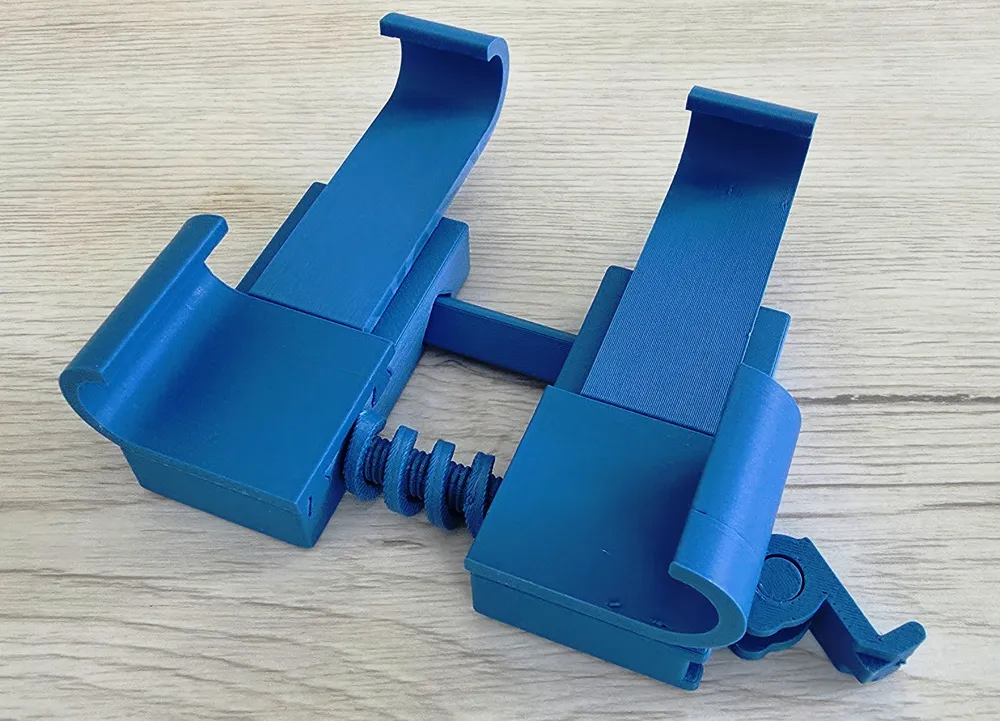
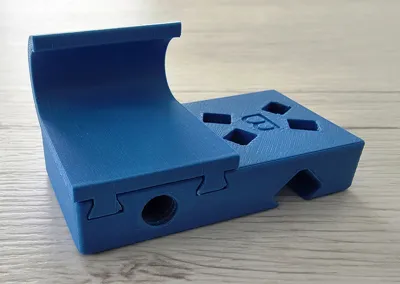
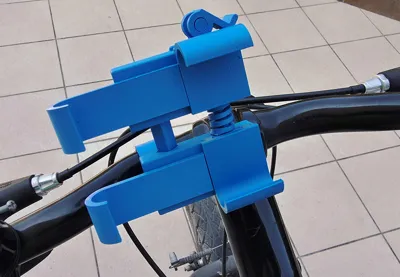
This is a new version of the phone holder I designed a few months ago (https://makerworld.com/it/models/2877387-phone-holder-for-bicycle-motorcycle-scooter#profileId-3213255). I have improved the aesthetics somewhat and made attaching and detaching more practical when changing the phone's orientation. Compared to the previous model which consisted of only three parts, for the current one I chose to separate the clamps that wrap around the phone, printing them so that the tension they are subjected to acts along the length of the filament, rather than across stacked layers. I introduced a new helical spring, which improves the opening of the two side parts, and increased the infill to 90% for the joints and clamping levers. To join the different parts, I used both the snap hooks already present in the previous model and a new insertion system with a dovetail profile and end-stop locking
Model Description
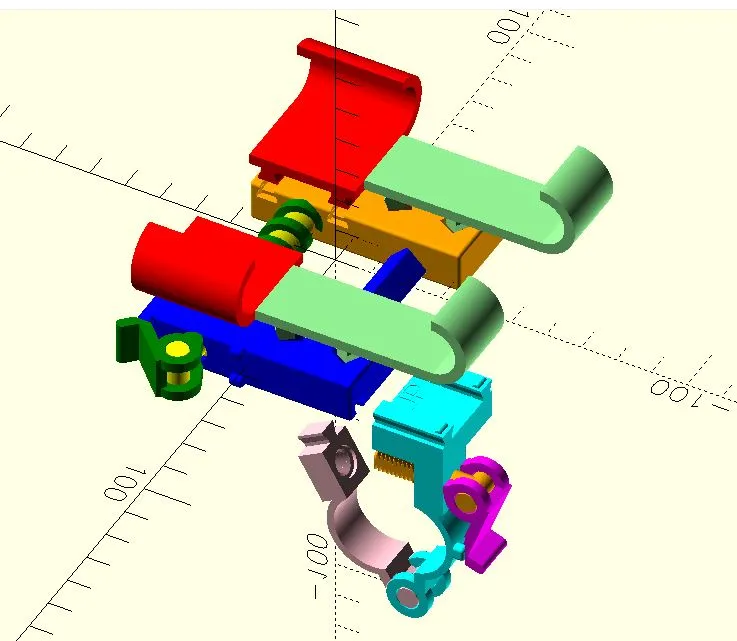
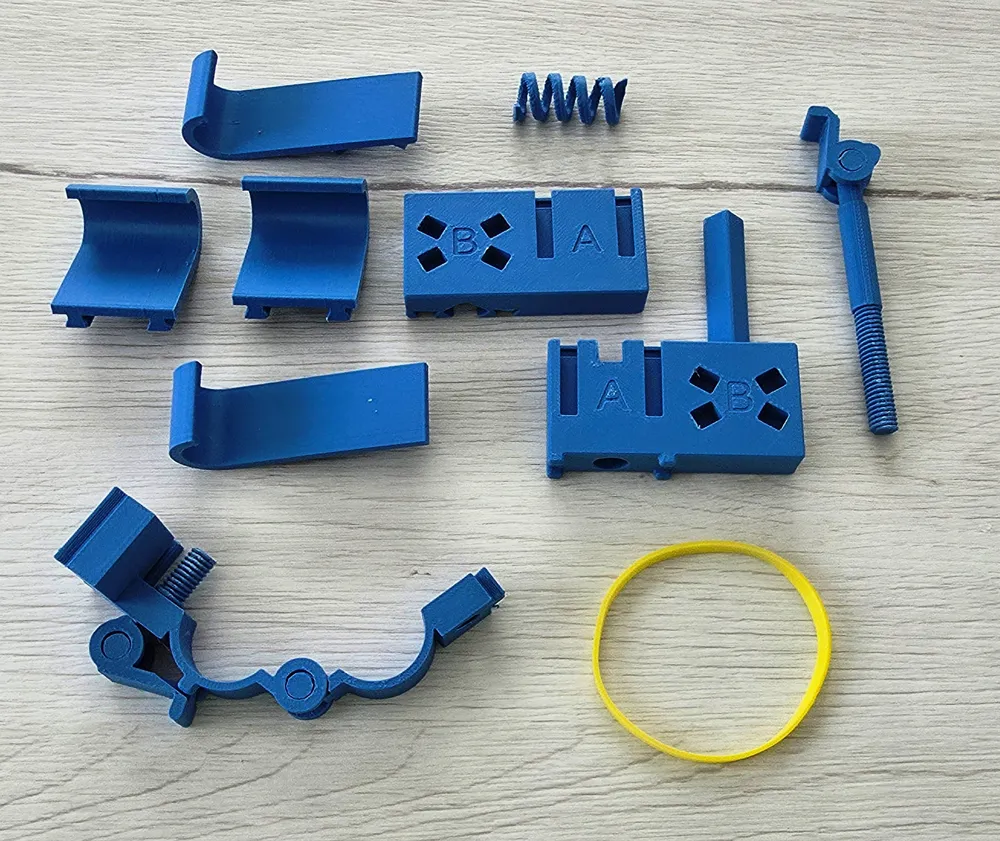
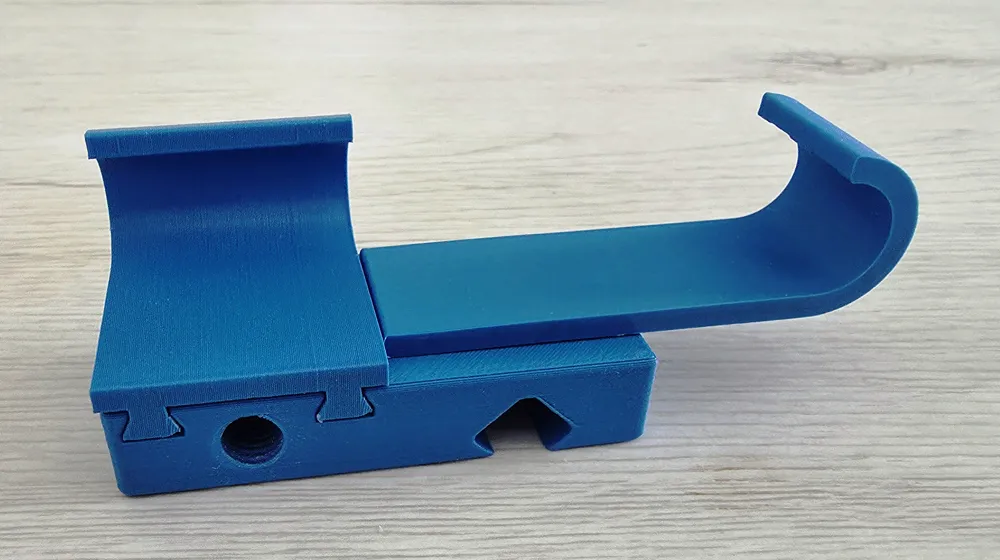
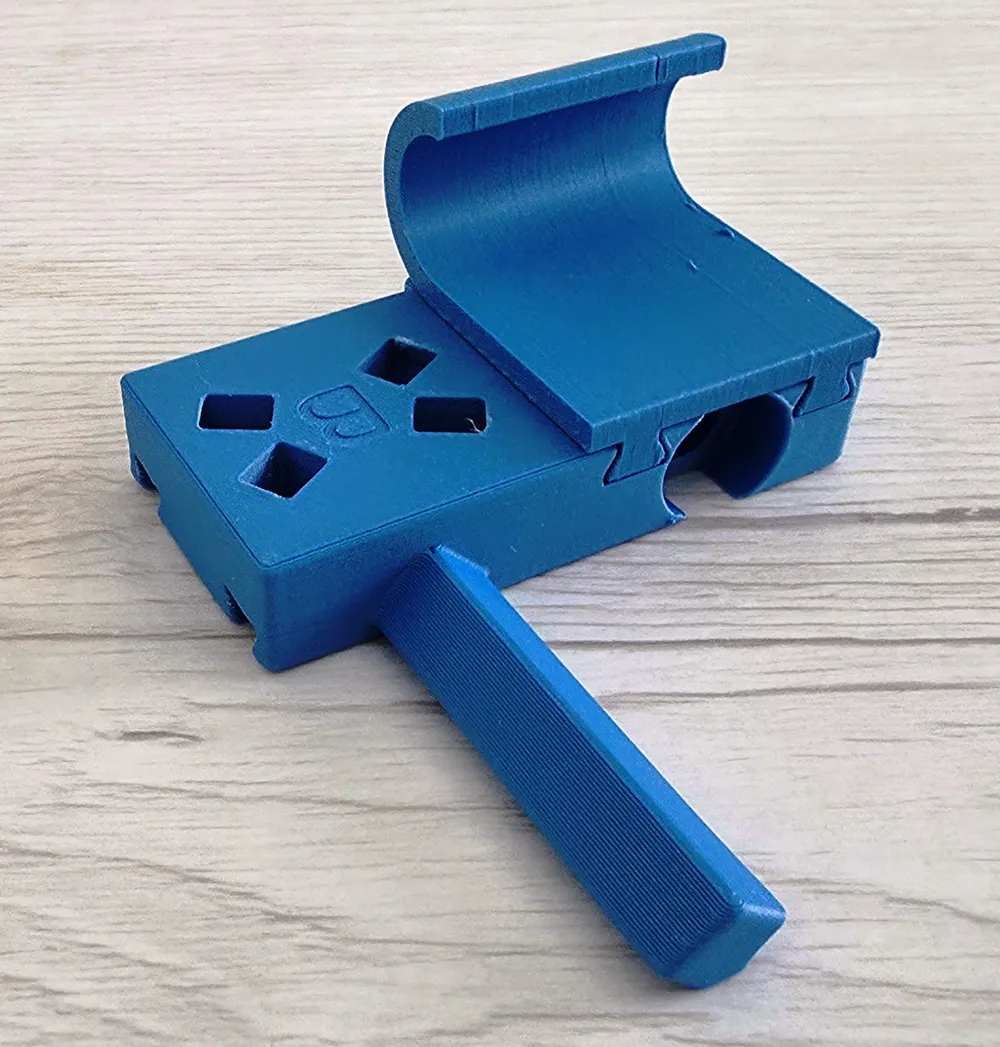
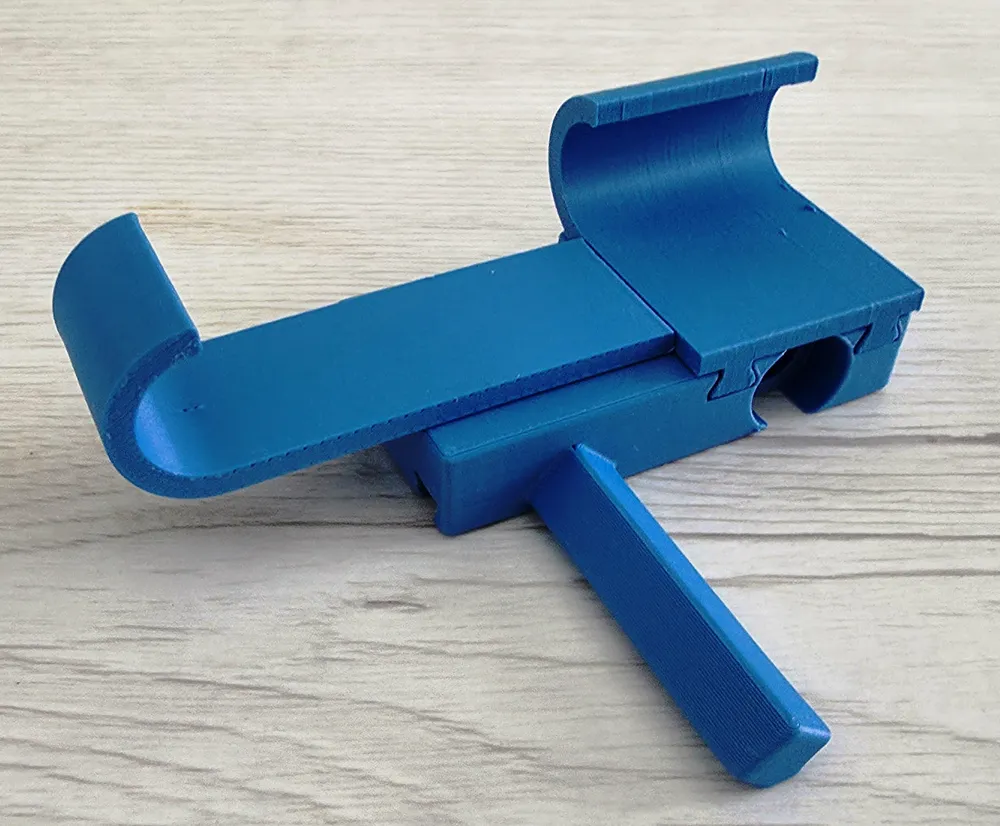
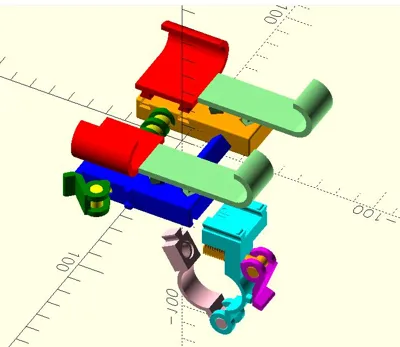
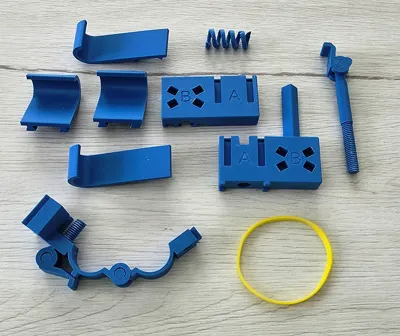
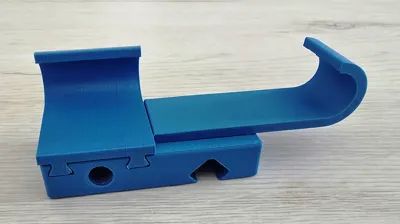
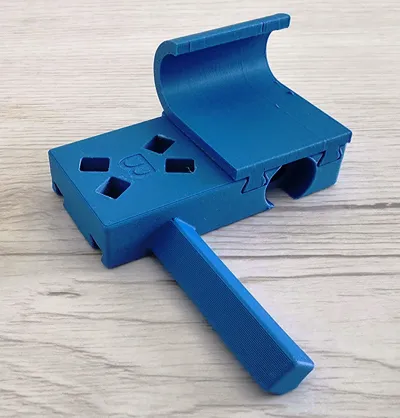
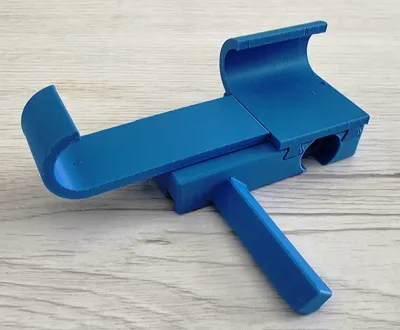
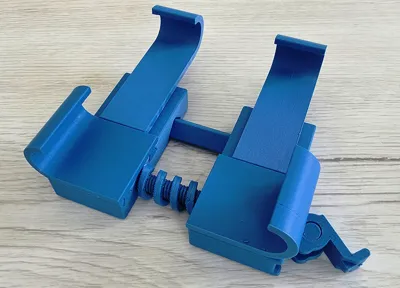
The phone holder consists of 7 parts:
- handlebar clamp
- fixed holder base
- movable base
- clamping lever
- helical spring
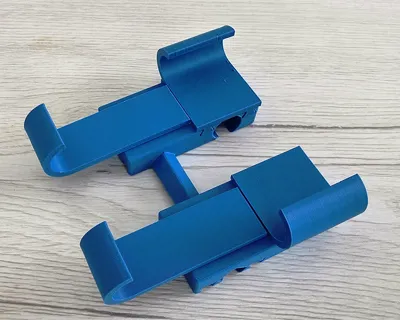
- side clamps “A” (2 pieces)
- bottom clamps “B” (2 pieces)
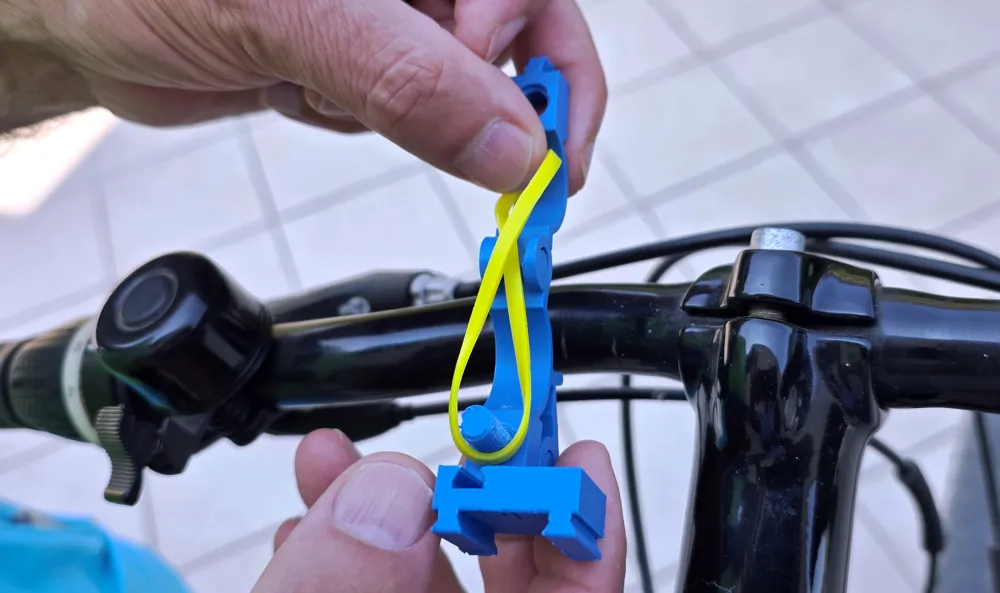
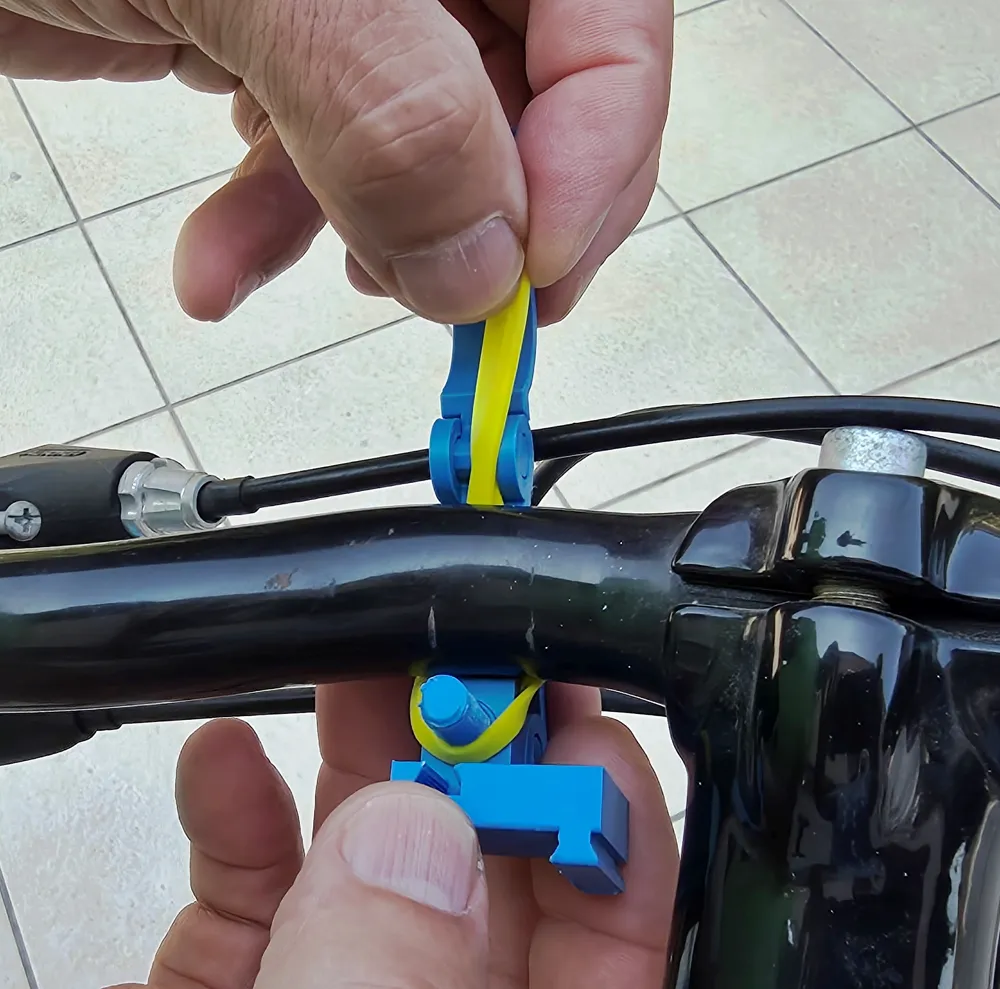
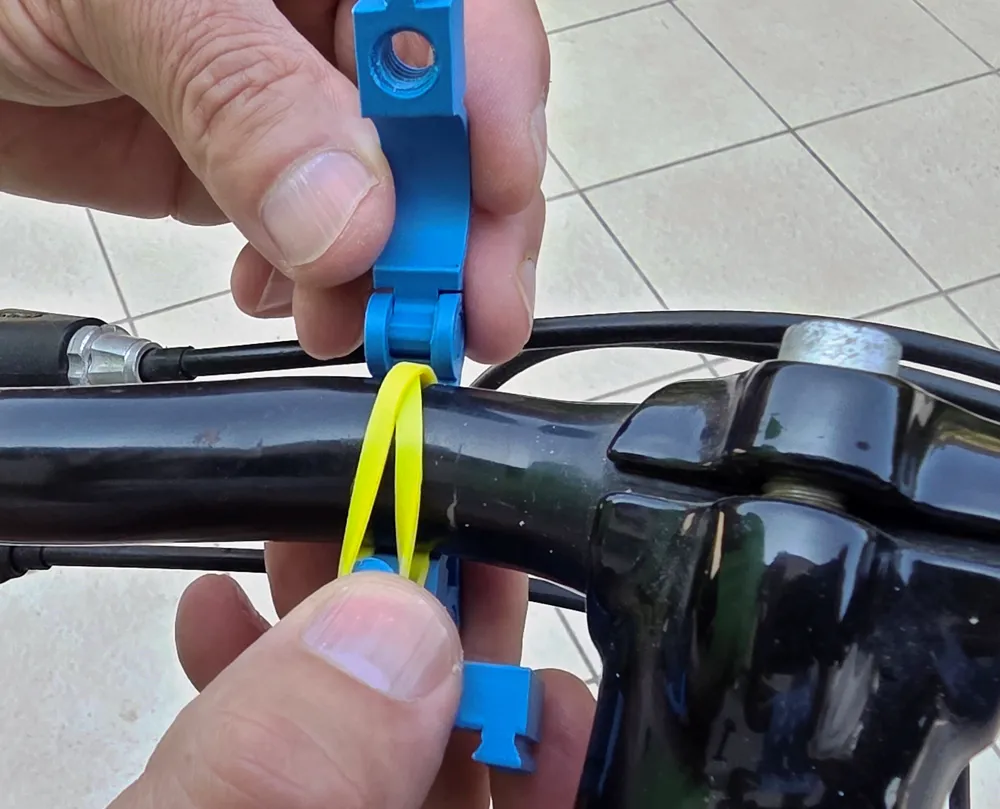
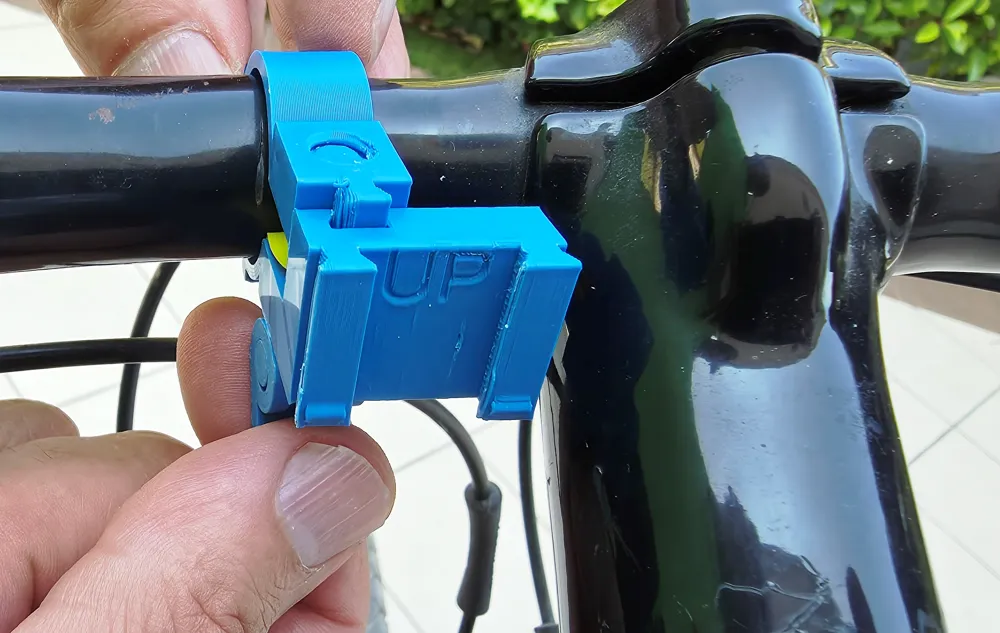
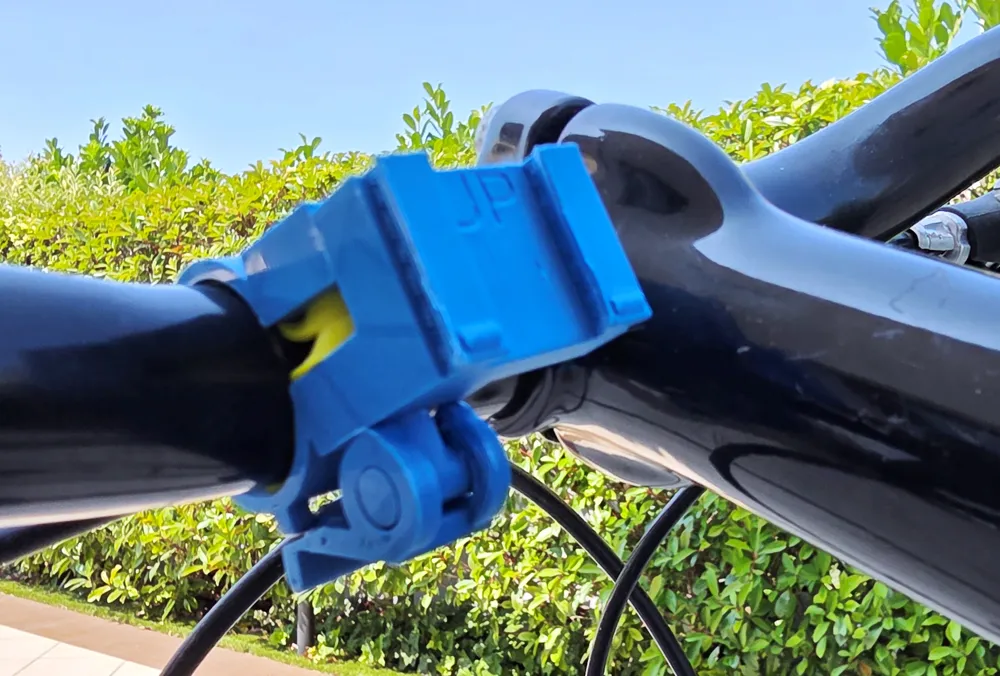
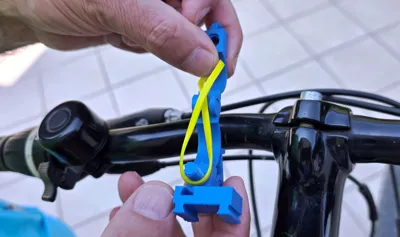
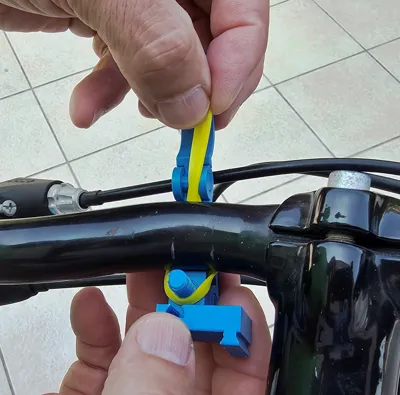
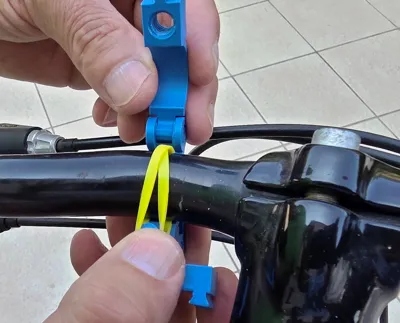
The articulated clamp attaches to the handlebar of a bicycle or motorcycle. The opening is adjustable and fits bars with a diameter between approximately 18 and 22 mm. To improve grip on the smooth handlebar surface, a common rubber band is used, as shown in the assembly instructions. Initial tightening occurs via the integrated screw in the clamp; once the correct grip is achieved, final locking is done with the snap lever
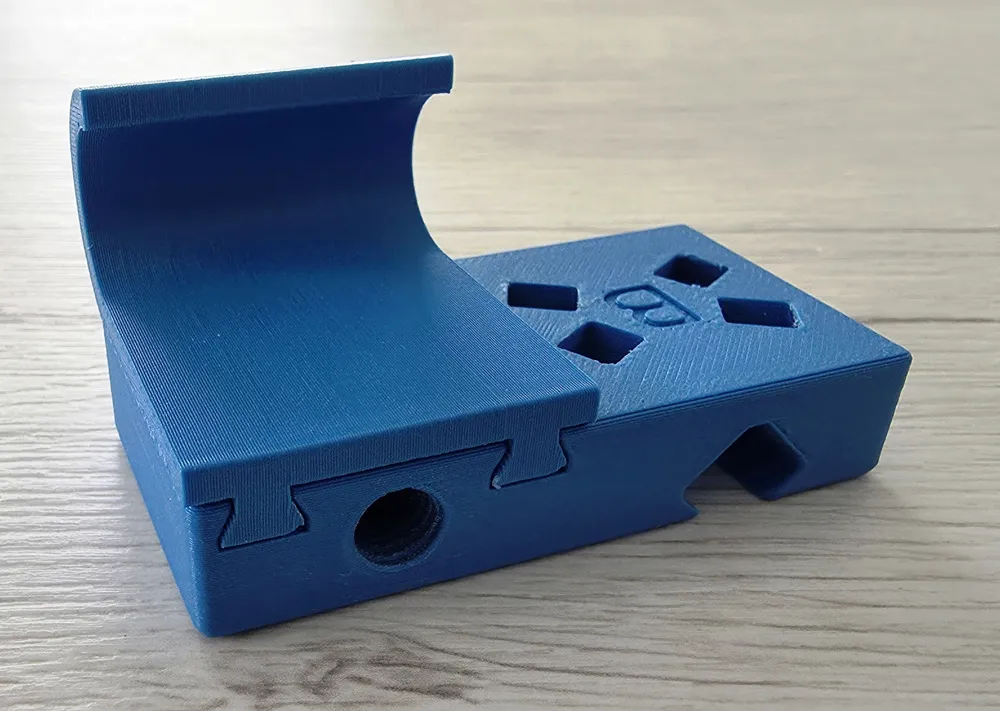
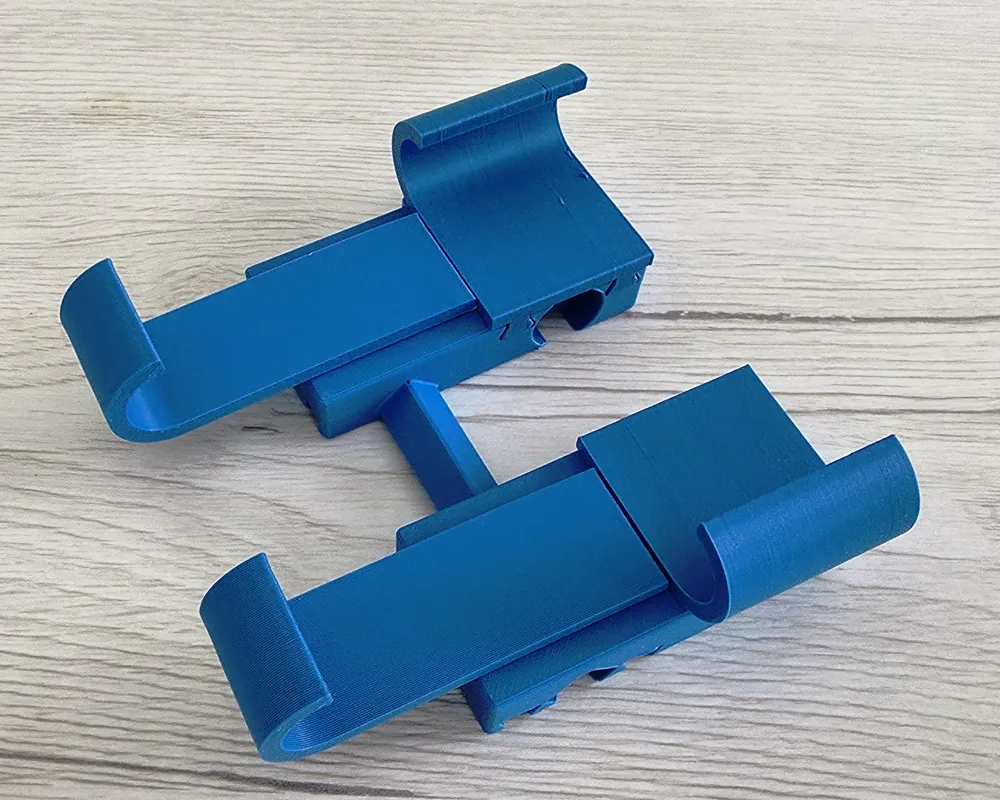
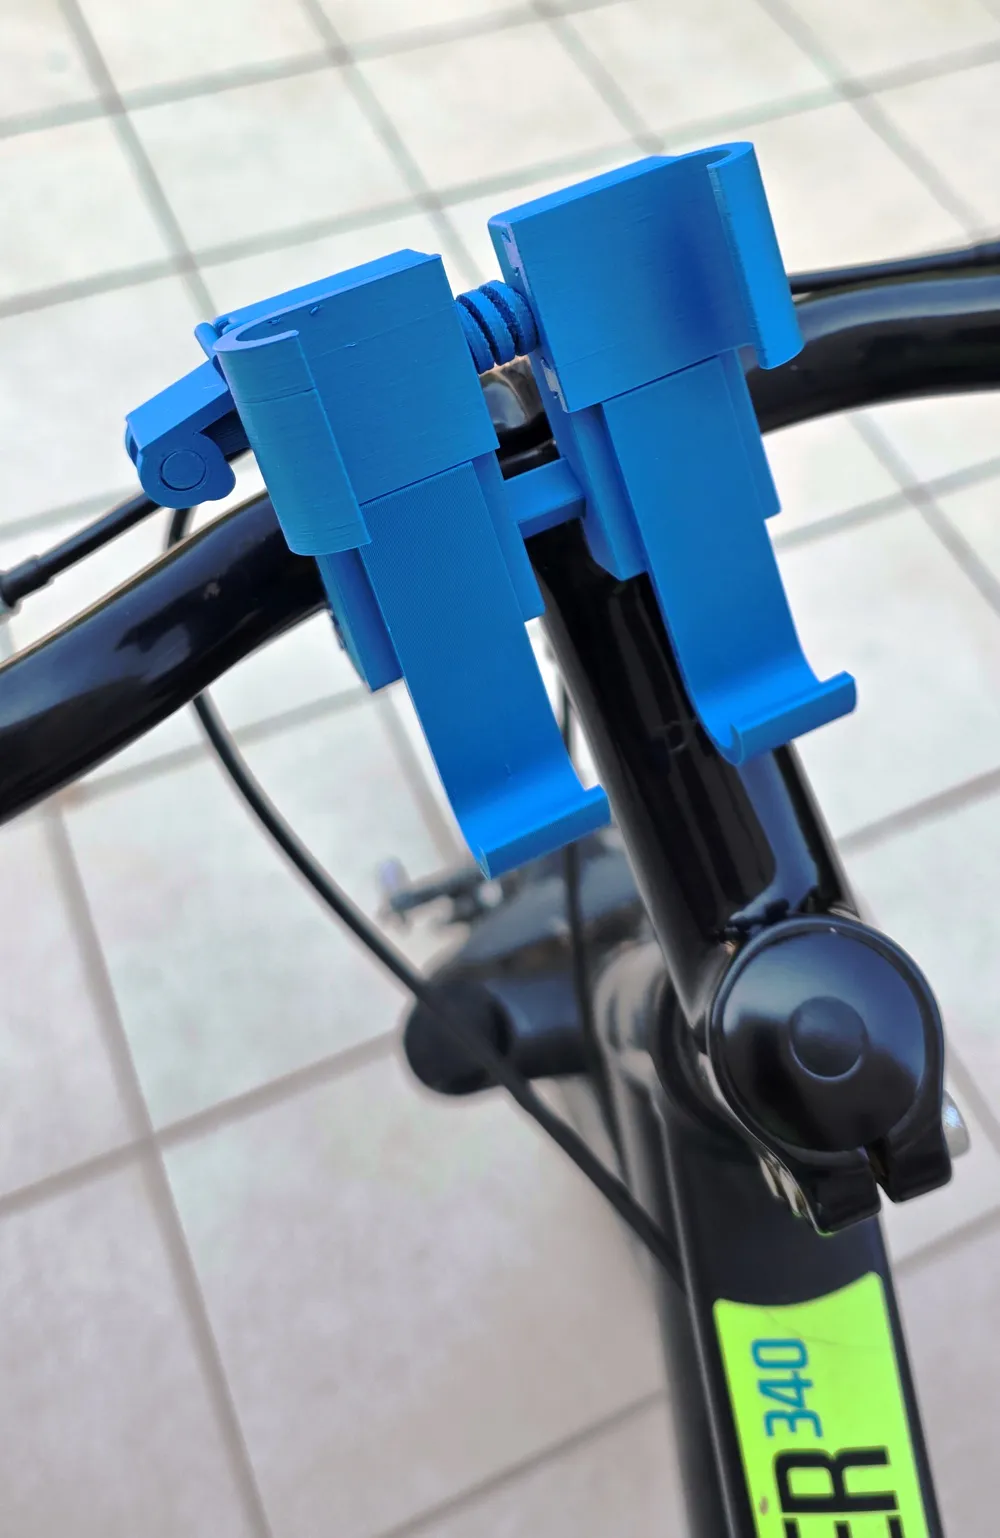
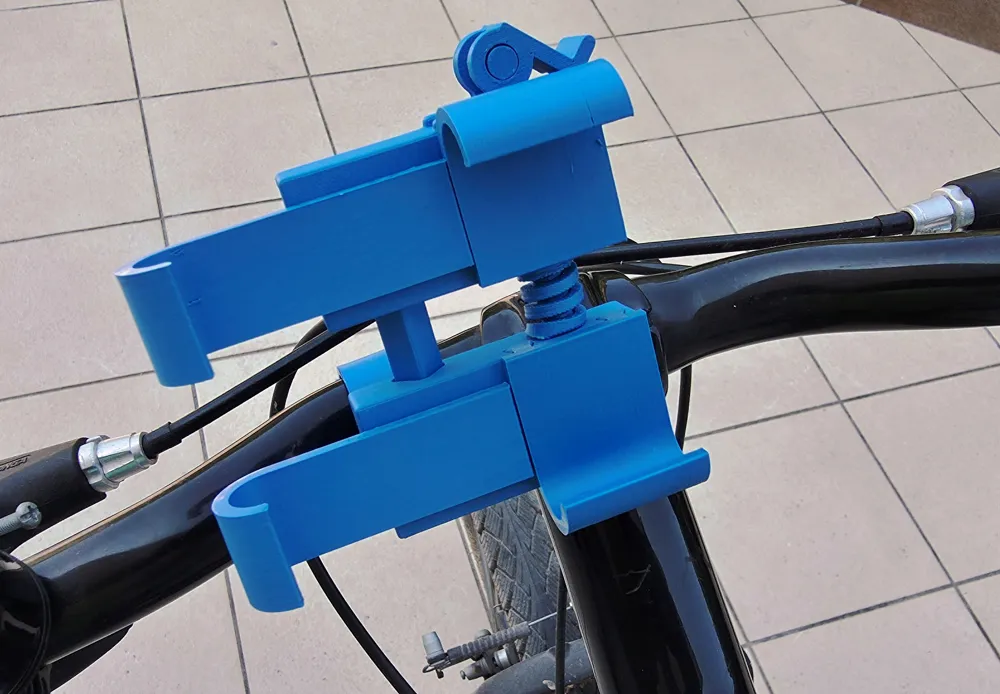
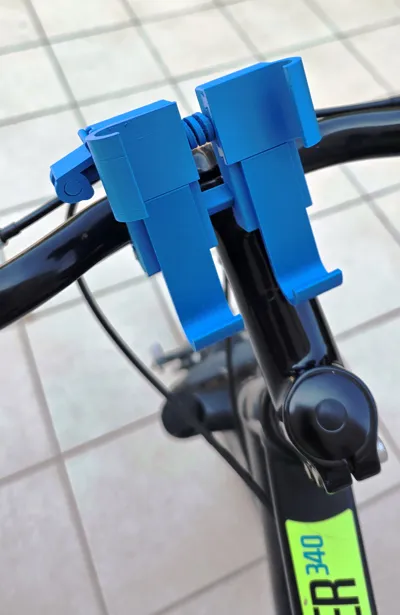
The end of the clamp must be inserted into one of the two bases of the holder using two dovetail profiles, allowing you to choose the phone's orientation vertically or horizontally. The two bases slide against each other via a guide and a threaded bar that allows adjustment of the distance between the side clamps, according to the smartphone's dimensions. The bar features a lever with an eccentric and a counter spring for quick locking and unlocking, making it practical to insert and remove the phone
Main Features
- Phone holder for bikes, scooters, and light motorcycles
- Adjustable clamp for handlebars from approximately 18 to 22 mm
- Vertical or horizontal phone orientation
- Adjustable width based on smartphone
- Quick lock and unlock lever
- No tools needed for assembly
- Only 3D Printed parts, no other metal components
- Optimized design to increase tensile strength
Materials and Tools Needed
To complete the assembly, simply add a common rubber band with an approximate diameter of 30-40 mm
No tools are required
Printing Tips
The holder has been designed to maximize resistance characteristics along the length of the filament, even with less performant materials. I printed it with common PLA and tested it on my bike. To make it even more robust, for example for motorcycle use, it can be printed in PETG, or, for those with more performant 3D Printer than my A1, also in PET, ABS, or PC
Assembly Instructions
1. Parts Assembly
After printing all parts, remove supports from overhanging sections and eliminate small imperfections, using a nail file if necessary. Screw and unscrew the threaded bars completely a couple of times to eliminate sticking
Insert side clamps “A” into the dovetail inserts of the bases, pushing firmly until you hear the locking “click”
Insert the hooks of the bottom clamps “B” into the holes of the bases, applying even pressure (yes, it requires a lot of force, it's normal)
Couple the two bases together, inserting the guide, the threaded bar, and the spring. Only screw the bar in a few millimeters; final adjustment will be made later based on the phone's dimensions
2. Mounting the Clamp on the Handlebar
Open the clamp's joint and hook the rubber band between the screw thread and the opposite end of the clamp, giving it half a twist so it stays in place. Insert the open clamp under the handlebar and, while closing it, unthread the elastic from the opposite end and hook it onto the screw thread, near the other end. Bring the two ends of the clamp together and begin to tighten the screw by turning the locking lever. Do not fully tighten immediately: when the clamp begins to grip the handlebar, use the snap lever for final locking
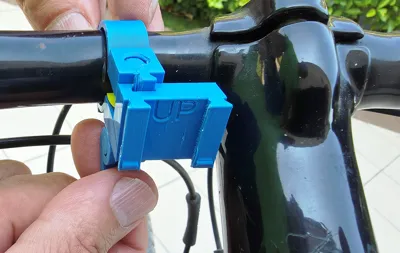
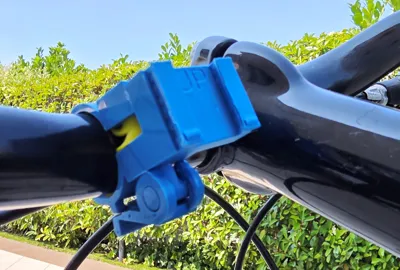
Ensure that when the clamp is mounted, the "UP" text is at the top
2. Attaching and Detaching the Holder
Depending on whether you want to orient the phone horizontally or vertically, insert the holder onto the clamp from above, using the dovetail slots present on one or the other base. Slide the holder downwards until you hear the locking “click”
If you wish to change the phone's orientation, simply pull the holder upwards, keeping the clamp steady, remove it, and insert it into the slot of the other base
3. Adjusting Opening and Locking of the Phone
Begin tightening the threaded bar to bring the side clamps closer. Insert the phone and continue adjusting until sufficient space is left to easily remove it. Finally, check that the phone is correctly locked by operating the lever
Safety Notes
Before using the holder on the road, always ensure that all parts are securely attached, that the clamp is stable on the handlebar, and that the phone is held correctly. As this is a 3D Printed object, the final strength depends on the material used, printing settings, and the print quality itself. For added safety, especially on motorcycles, scooters, or uneven roads, I recommend also using a lanyard or an additional safety system to prevent accidental smartphone drops
Boost Me (for free)
Support my models with a Boost, to encourage me to create more and better ones! Thank you if you want to help me
Check out my other models on my profile too to discover new ideas and 3D projects! HERE
License

You shall not share, sub-license, sell, rent, host, transfer, or distribute in any way the digital or 3D printed versions of this object, nor any other derivative work of this object in its digital or physical format (including - but not limited to - remixes of this object, and hosting on other digital platforms). The objects may not be used without permission in any way whatsoever in which you charge money, or collect fees.


Comment & Rating (0)