
Remixed - X1C Chamber Heater


Print Profile(3)


Description
Update 03.04.2024
Up on a request I added a faceplate, the plate goes over the PTC-Heater and is fixed with the M4 screws.
STL and STPE files under raw model files.
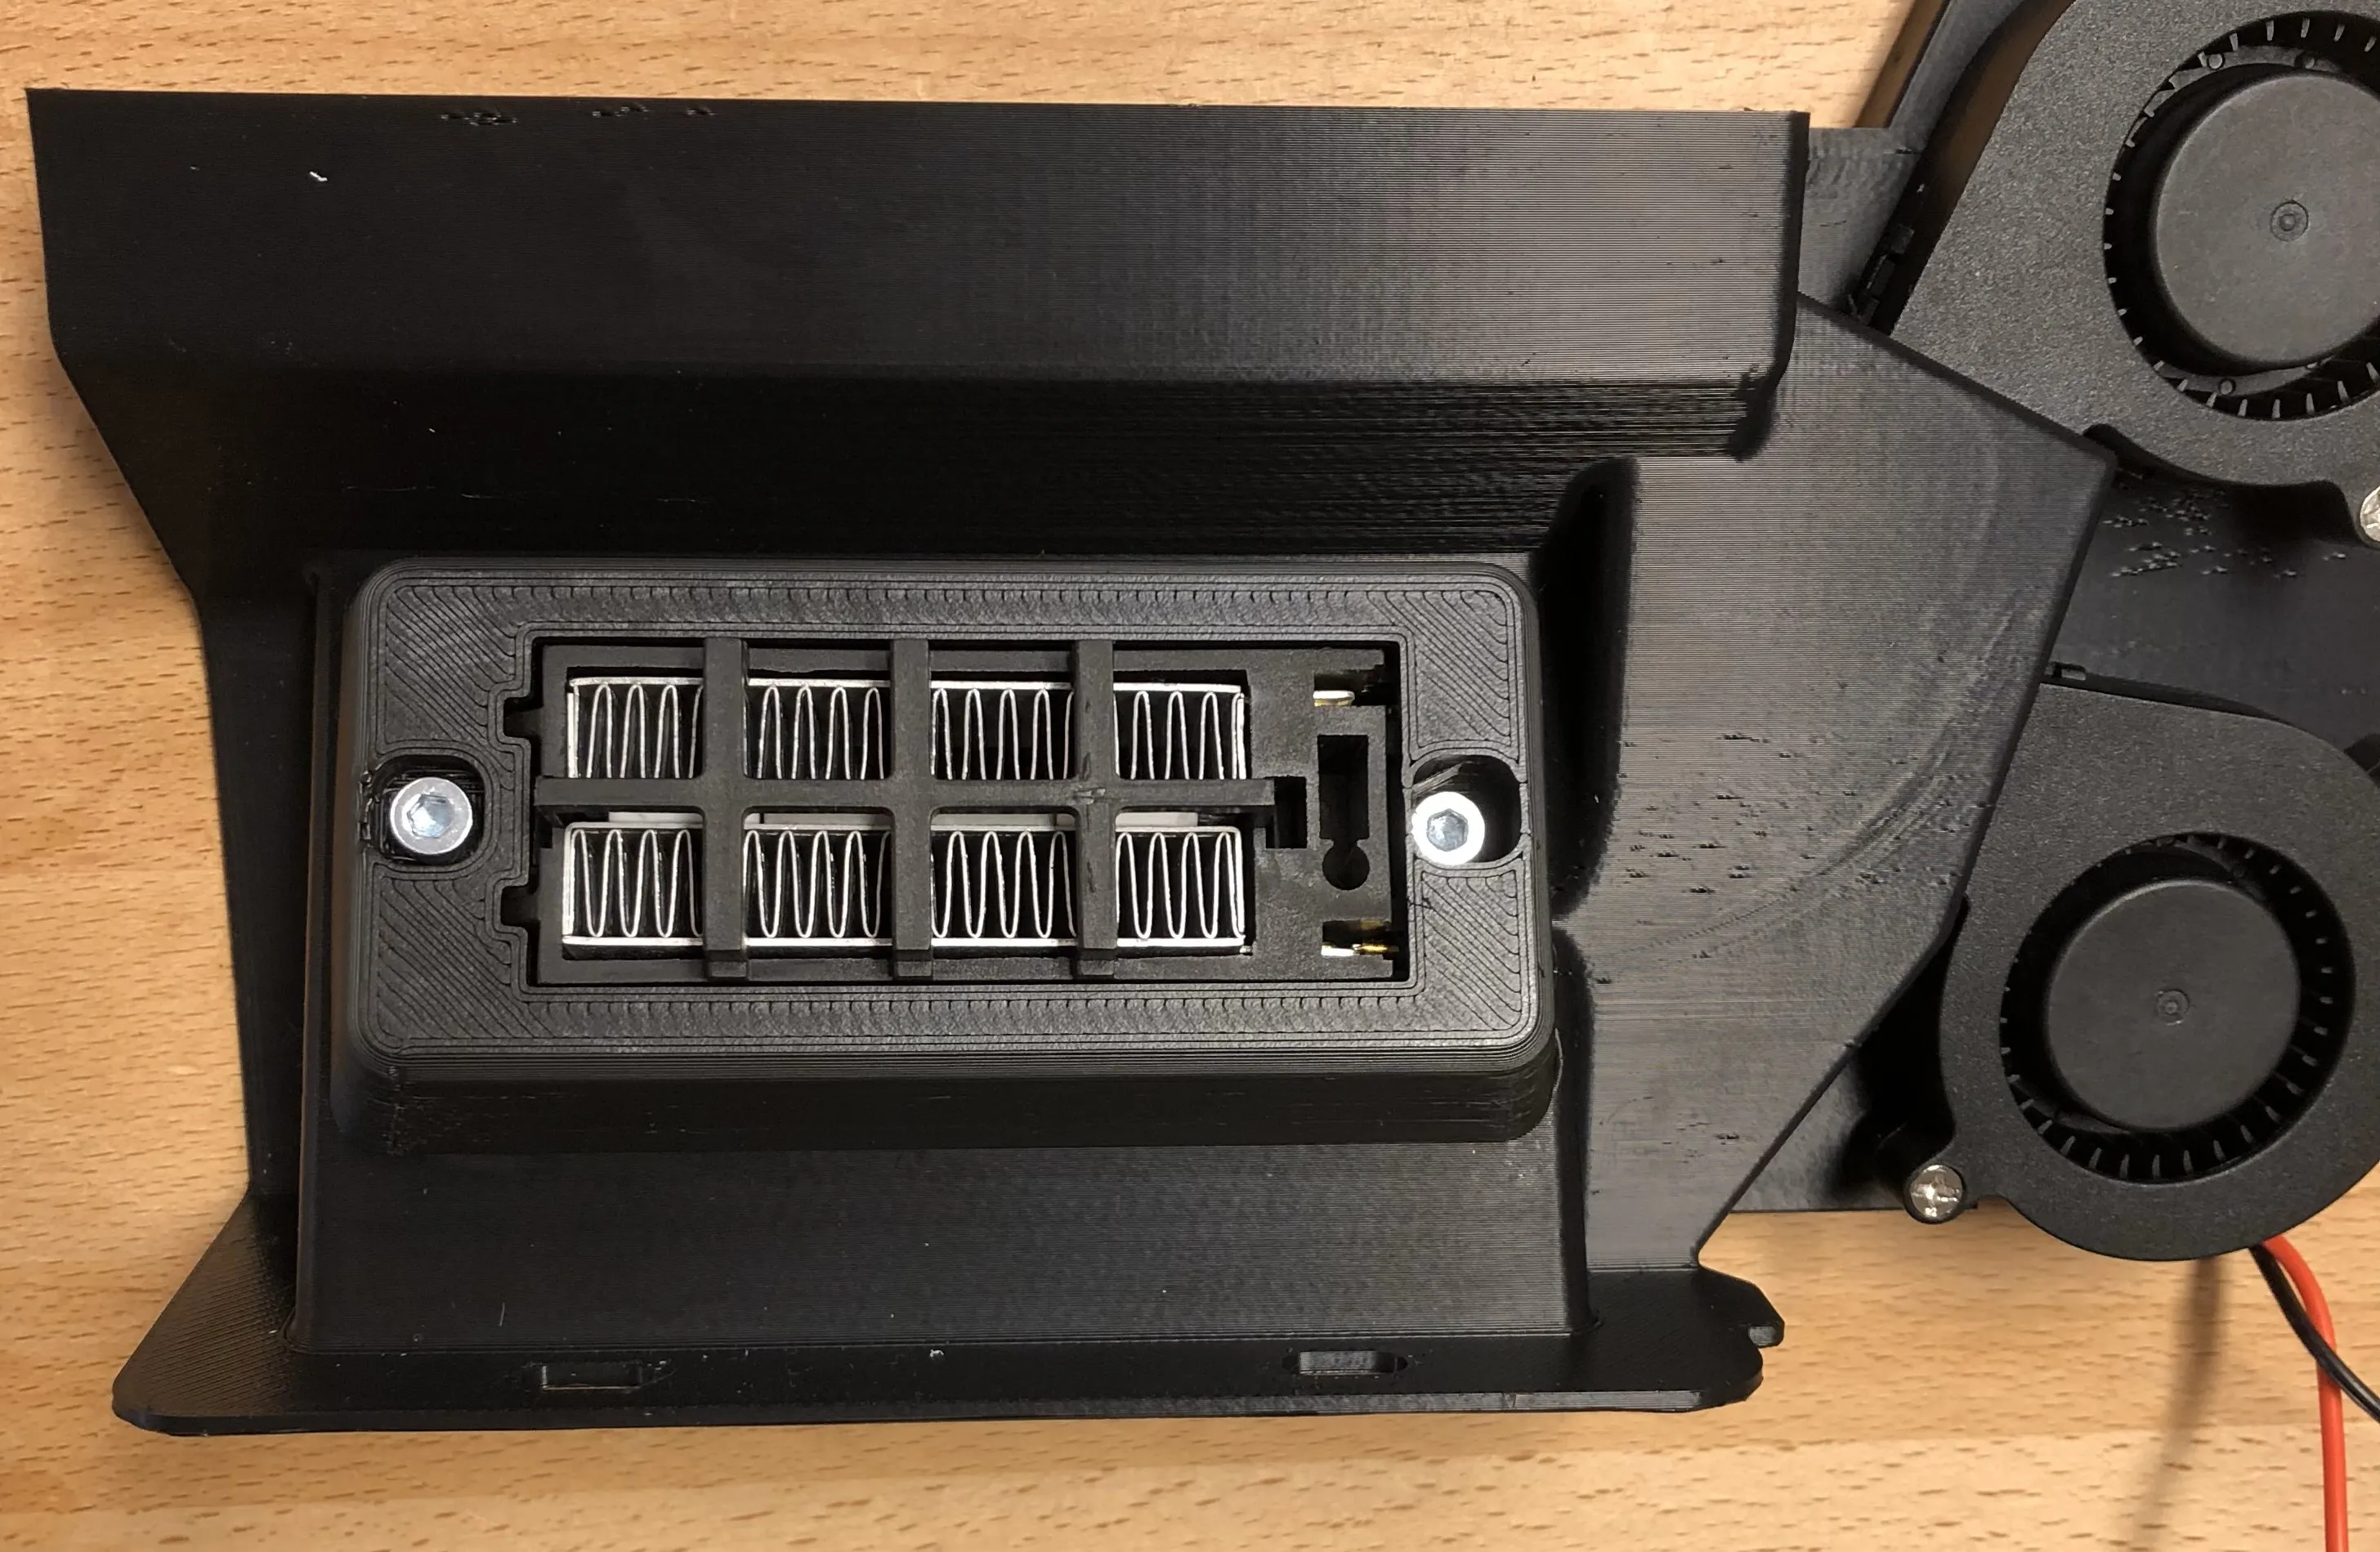
Make sure to route the cables of the PTC-Heater neatly.
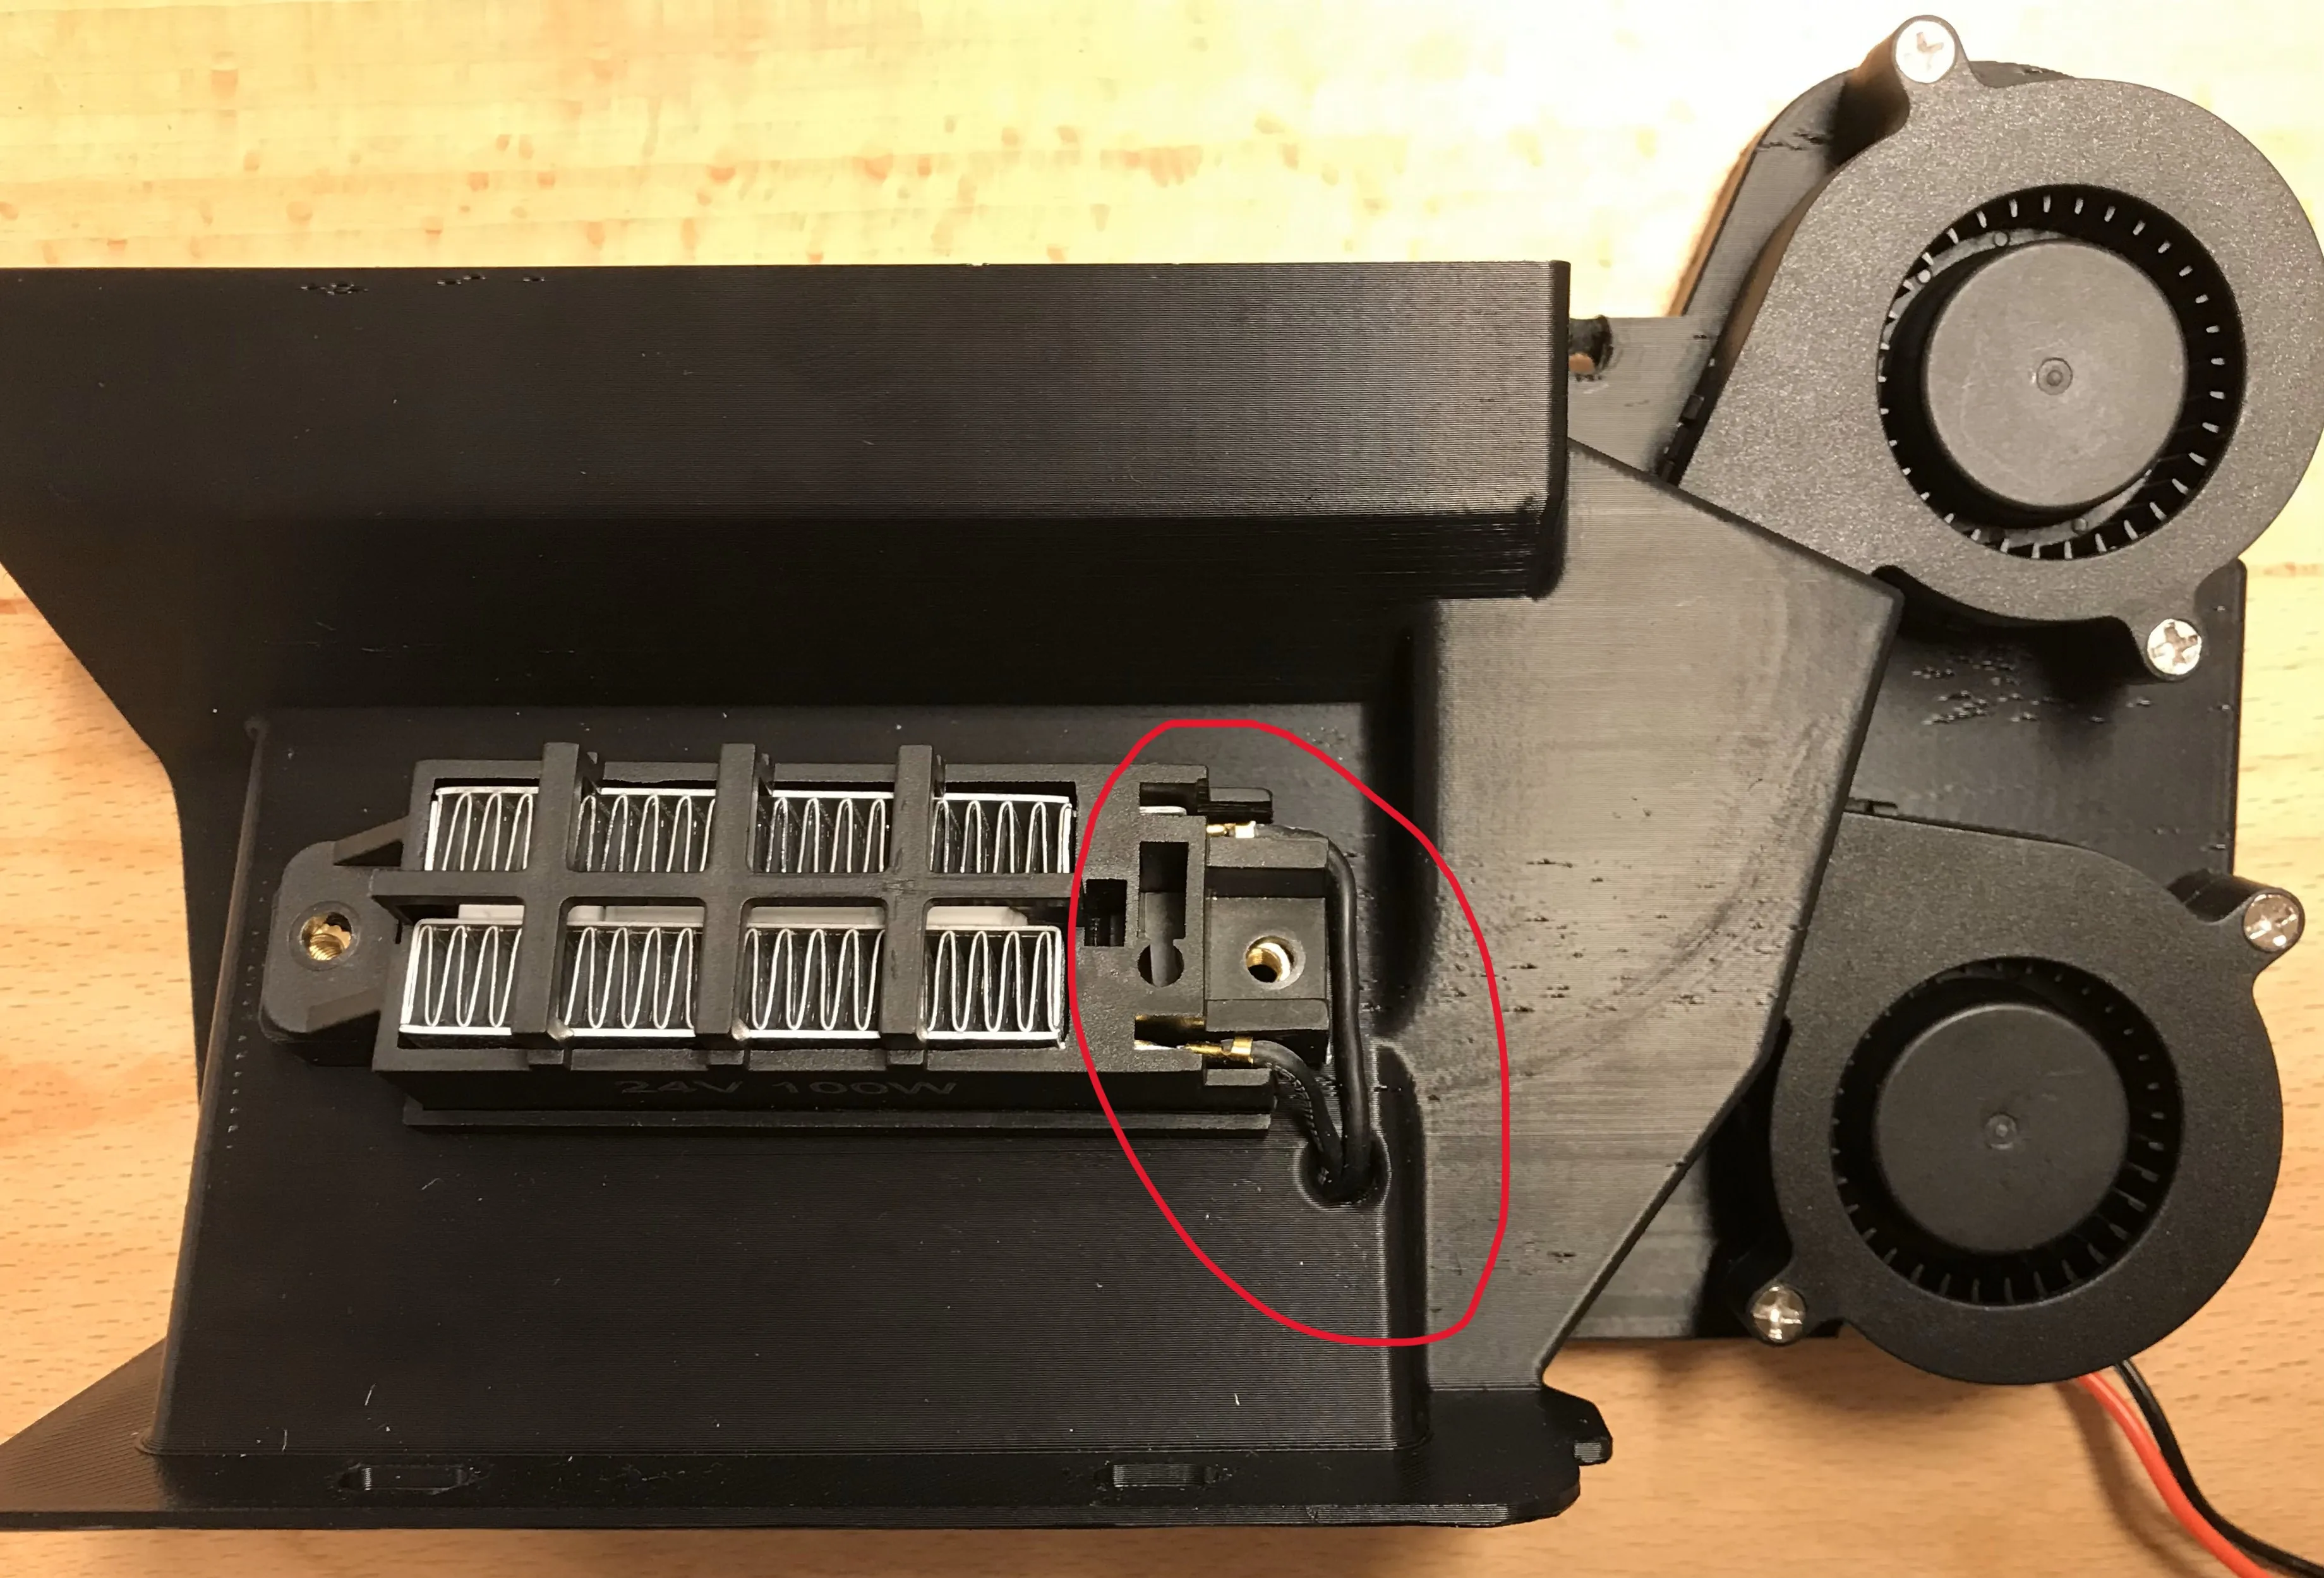
I highly recommend to use a high temp filament like (PAHT-CF, PA6-CF/GF or other) because the plate is very close to the PTC-Heater.
I printed it with extruder greentec Pro, this material is heat resistant up to 160°C.
!There is no long term experience with the plate!
orientation for printing:
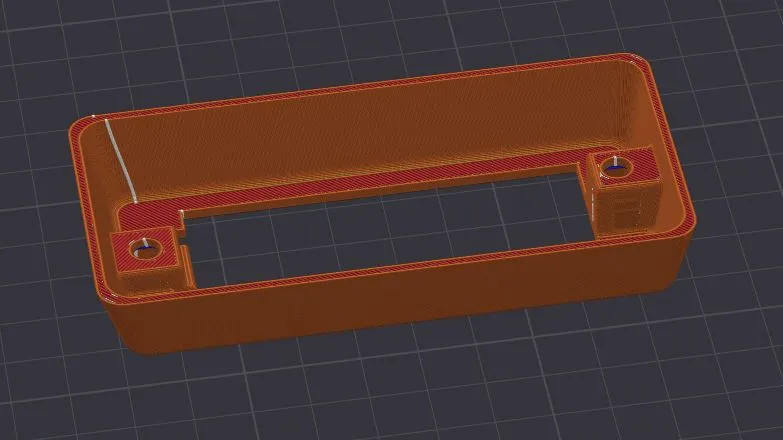
The holes don´t need supports, i used the sequential bridging method by maker´s muse
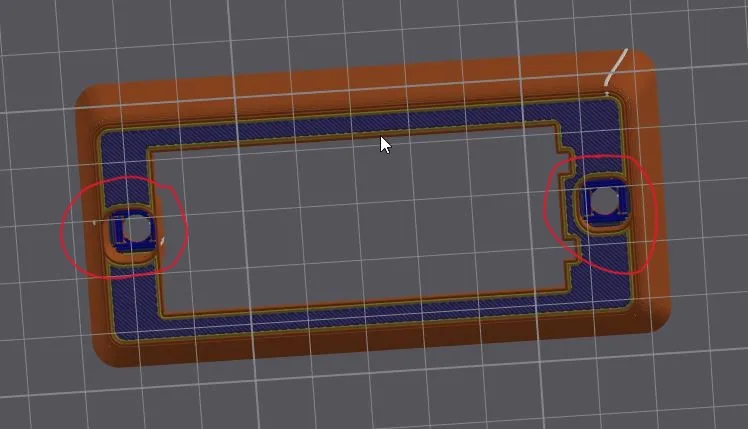
Thanks @chriss_goe for the request
_________________________________________________________________________________________________________________________________________
This design is based on the awesome “X1C Chamber Heater”. Thanks @frank.clark for sharing this idea.
Unfortunately i had an issue with the original design, where the bottom case of my X1C was starting to deform in the middle. I guessed this was because of the position of the PTC-Heater. Which blows the hot air in a very flat angle.
So I designed a "remix" (I build this model from scratch) to prevent this issue and fit my needs.
Also added:
- a mount for the temperature sensor
- a smaller air channel form the fans to the PTC-Heater
- space for wiring in the bottom
- grooves for running the wires on the back side of the fan plate
I uploaded a STEP file if you want to adjust it to your needs.
_________________________________________________________________________________________________________________________________________
!Do this project only if you are comfortable with electronics and a little tweaking!
!Also at your own risk!
_________________________________________________________________________________________________________________________________________
For needed parts see the original description.
Also see https://makerworld.com/en/models/391012 if you are looking for a nice PSU / Temperature controller case
Additional needed parts:
- Two M4 threaded inserts (one shortened to 5mm)
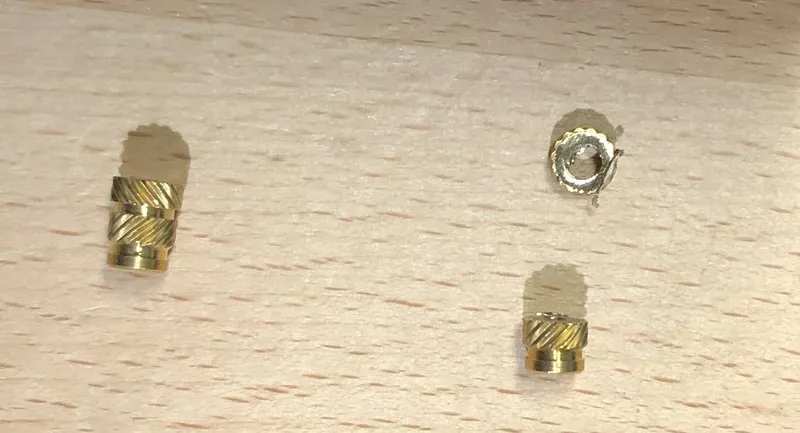
- Two M4x10 screws
- Four M3 Inserts
- Maybe VHB-Tape to fixate some wires
Filament: extrudr durapro ASA (or other heat resistant materials)
Print settings:
- 0.6 mm Nozzle
- orientation: like in the uploaded orca slicer 3MF(Chamber_Heater_AUX_@0.6_ASA_OS) under the raw model files
- layer height: 0.18
- wall generator: arachne
- wall loops: 3
- Top/bottom layers: 6
- infill: 10% gyorid
- support: paint on like in the uploaded orca slicer 3MF(Chamber_Heater_AUX_@0.6_ASA_OS) under the raw model files
- brim: yes (8mm)
License

You shall not share, sub-license, sell, rent, host, transfer, or distribute in any way the digital or 3D printed versions of this object, nor any other derivative work of this object in its digital or physical format (including - but not limited to - remixes of this object, and hosting on other digital platforms). The objects may not be used without permission in any way whatsoever in which you charge money, or collect fees.


Comment & Rating (153)