
Analogue Pocket Case


Print Profile(3)


Description
Version 2.0 Released!
Re-designed the case from the ground up to improve print ability and overall aesthetics. Added several variants including a cable winder, no carts, improved inserts for adapters and button cutouts, option for screen protectors, and more so.
---
After getting an Analogue Pocket I found the 1st party case to be insufficient and was looking for another hard case that could hold gb(a|c) carts as well. I couldn't find one I really like so I decided to try and model one myself.
Purchase
If you are unable to print this model or want it printed in a color you don't have you can purchase this on my Etsy store here: https://r0adkllprints.etsy.com/listing/1647328893/analogue-pocket-case
Materials
- 2 - M3 30mm Socket Head Screws
- 6 - 8X3mm Round Magnets
- Super Glue (I used Gorilla Super Glue Gel to great success)
Parts
This build consists of 4 printed parts:
- Lid - Printed in PLA (or w/e hard material you prefer)
- Lid Insert - Printed in TPU
- Body - Printed in PLA (or w/e hard material you prefer)
- Body Insert - Printed in TPU
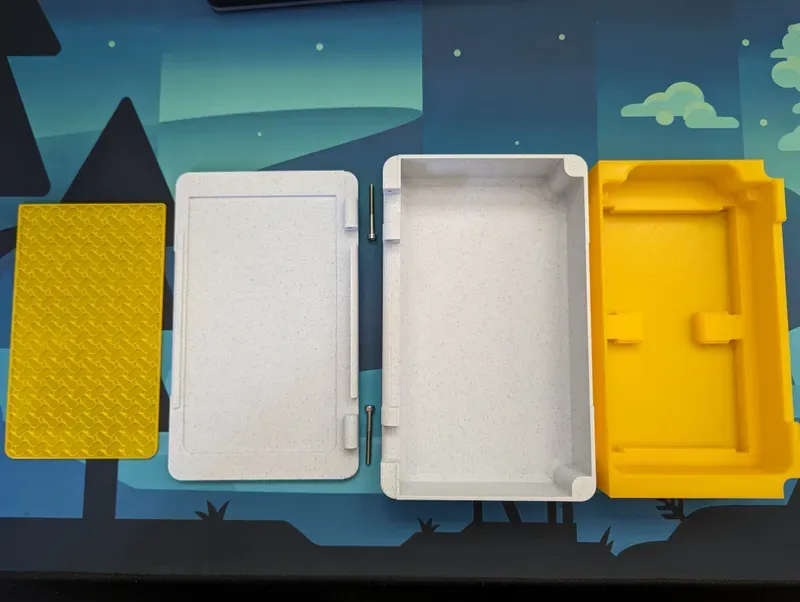
Lid & Body
I've provided two separate models for these parts depending on how you want to print them. I typically print these parts in PLA for ease/cost, but you can print them in w/e hard material you wish to print in.
One to embed the magnets (see CaseBody_v1.stl and CaseLid_v1.stl) where you will need to put a pause in the print when slicing the models to glue in the magnets, then resume the print to seal them in. The body model takes 2 stacked magnets per hole (so 4 total).
The other to have the magnet holes exposed so you don't have to add pauses when slicing the models. (see CaseBody_NoMagnetEmbed_v1.stl and CaseLid_NoMagnetEmbed_v1.stl)
Lid Insert & Body Insert
It is recommended to print both of these parts in TPU (I'm a big fan of Overture 95A TPU but any TPU you would like to use should work fine) since the material is softer and shouldn't scratch your Pocket or GB games. (plus this material is really fun to print in!!)
The body should be a straight forward print but make sure your material is dry and your settings are tuned as it can be prone to zits.
The lid is printed with exposed infill so as to give it a cool appearance and make minimal contact with the pocket in the case. I print this part with 3 bottom layers, 0 top layers, and gyroid infill (but feel free to mix this up!)
Assembly
Once you have you're parts printed and gathered assembling the case is pretty straight forward.
If you didn't print the magnet embed models, then now you'll want to glue your magnets into the Lid and Body parts (BE CAREFUL OF THE POLARITY HERE AS YOU WANT THE CASE TO ACTUALLY CLOSE)

Next, glue the Lid Insert into the Lid using super glue. Then screw the Lid onto the Body using the 2 M3 30mm socket head screws like so:
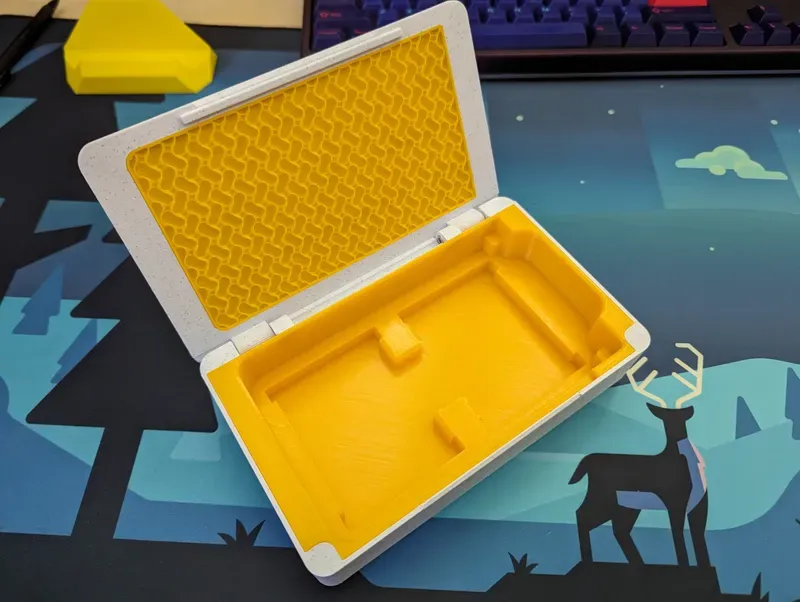
Last, just drop the Body Insert into the Body and viola! your case is ready to hold and protect your pocket!
—
Changelog
v1
- Initial Release
v1.1
- Fixed issue where magnet hole depth wasn't deep enough to accommodate variance in magnet height leading to poor embedding on some prints.
v1.2
- Shrunk bottom chamfer from 5mm to 2.5mm to provide better corner radius for bed adhesion
- Added non-logo lid for those that don't want the bridged embossed logo
v1.3
- Added notch in BodyInsert to give more space to the side buttons
- Added cutouts for the d-pad and buttons in the LidInsert
v2.0
- Re-designed the case from the ground up
- Improved printability by removing sharp corners
- Added more padding between device and hinge
- Added a Cable Winder Version
- Added a No Carts Version
- Added several special lid design versions
- Added multi-color lid print support
- Included my Orca slicer files used to print
v2.1/v2.2
- Updated the Carts and No Carts variant inserts to accomodate screen protectors without a special lid insert
License



Comment & Rating (52)