Dreame L10s Ultra Bumper Support


Print Profile(3)


Description
German:
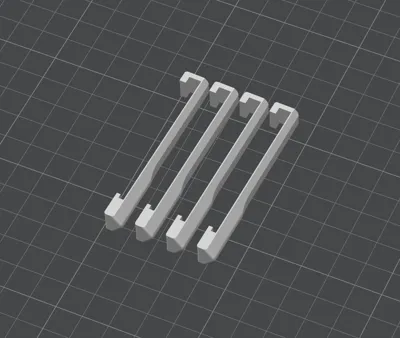
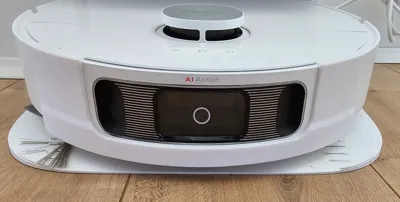
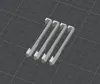
As our Dreame L10s Ultra repeatedly became entangled on the legs of our rocking chairs and other low-lying obstacles, I devised a solution to prevent future occurrences.
This involves attaching four "Bumper Supports" to the bumper. This slightly reduces ground clearance in this area, triggering the bumper and preventing the robot from traversing such objects.
Feedback, suggestions for improvement, and any other comments are most welcome ;)
Thank you.
Update Version 2
Following issues with the extension being loose or shifting outwards due to its shape, I revised the model and printed it using PETG. It should now function more reliably.
Update Version 3
As our robot continued to dislodge components, I further refined the design. This iteration, while requiring more robust assembly—ideally a two-person effort—eliminates slippage.
Assemble by starting on one side of the bumper, sliding the printed component into place. Continue sliding until reaching the sensor cutout. Gently bend the component and carefully thread it at the top and bottom. Finally, adjust for central alignment.
English:
Since our Dreame L10s Ultra repeatedly became entangled on the legs of our rocking chairs and other low-lying obstacles, I devised a solution to prevent future occurrences.
This involves attaching four "Bumper Supports" to the bumper. This slightly reduces ground clearance in this area, triggering the bumper and preventing the robot from traversing such objects.
Feedback, suggestions for improvement, and any other comments are most welcome ;)
Thank you.
Update version 2
Following issues with the extension being loose or shifting outwards due to its shape, I revised the model and printed it using PETG. It should now function more reliably.
Update version 3
As our robot continued to dislodge components, I further refined the design. This iteration, while requiring more robust assembly—ideally a two-person effort—eliminates slippage.
Assemble by starting on one side of the bumper, sliding the printed component into place. Continue sliding until reaching the sensor cutout. Gently bend the component and carefully thread it at the top and bottom. Finally, adjust for central alignment.
License
You shall not share, sub-license, sell, rent, host, transfer, or distribute in any way the digital or 3D printed versions of this object, nor any other derivative work of this object in its digital or physical format (including - but not limited to - remixes of this object, and hosting on other digital platforms). The objects may not be used without permission in any way whatsoever in which you charge money, or collect fees.
Comment & Rating (25)