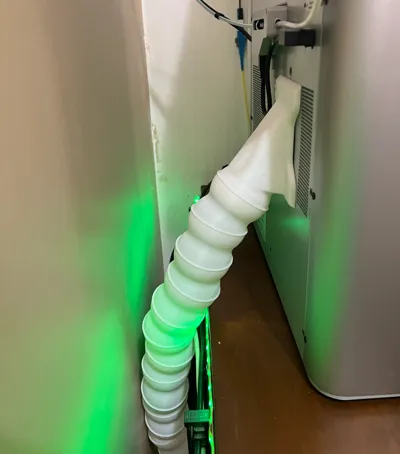
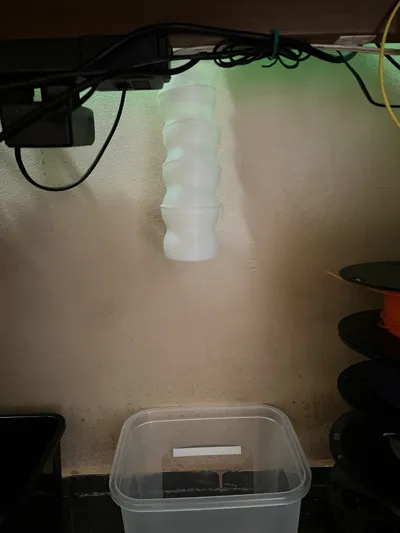
Magnetic Poop Chute with Flexible Segmented Tube


Print Profile(4)


Bill of Materials
- Super Glue x 1: (for magnets)
- Neodymium Magnets (5x2mm) x 8:
Description
Remixed to use 8 smaller 5x2 magnets which I already had.
Plates
I provided a bunch of pre sliced plates, to make it easier to print from Bambu Handy or from SD card.
Just print whatever you need:
| Plate 1 | A Complete set (Funnel with 9 segments) |
| Plates 2..6 | Extra segments |
| Plate 7 | Funnel only |
Print recommendations
Material: PLA Basic. (Silk or Mate PLA is not recommended)
Build Plate: Smooth / High Temp Plate (the textured PEI works but might make fitting segments a bit harder).
Adhesion (IMPORTANT): If you have the habit of touching your build plate with your fingers, I STRONGLY suggest to first wash your build plate with liquid/dish soap, use paper towels to scrub (your sponge probably has traces of oils), then and rinse well, just shake the excess water off and let it dry inside the printer. The entire time handle it by the edges of the build plate.
I guarantee this will eliminate 99% of all bed adhesion problems.
It is worth washing the bed prior to printing this, then you won't need to use brims and post process a bunch of parts, and they will print reliably.
After printing
Just print the parts, put a drop of super glue on the magnet holes, and press the magnets in.
Snap the segments together. If you find fitting parts hard, just debur the inside edge with a knife, nailfile, or deburring tool, specially if printed on a texture plate, it leaves a bit of extra flesh at the bottom.
This remix is based on


Comment & Rating (363)