Makita MAKPAC Mini; Size 1, 2, 3 and 4 (50 %)


Print Profile(5)


Description
The original MAKPAC is expensive, so why not after all 3D print it? Yes - possible, but there are no models available and 3D printing a 30x40 cm piece will cost you almost the same as buying an injection moulded part. Also most printers dont offer that kind of build volume - but what about smaller sizes? Right - there is none, but wouldn't it be nice to have those to put in screws, drill bits and such?

About
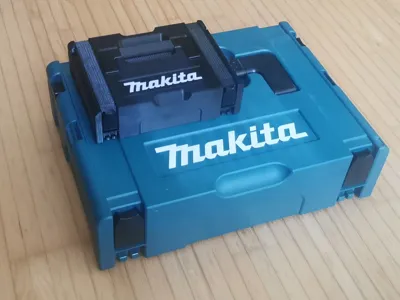
the box is intended to mimic the MAKPAC so it has the same proportions and looks the same so it fits nicly into your workshop
Note that this is not a scale model of the original MAKPAC, if you scale it up it will not be compatible with the original
so what is different?
- internal geometry is a bit simplified (especially the corners)
- hinge mechanism at the back is modified so it is more stable
- carry handle hinges are made to be disassmbed
- screw mounts in the lid are not to scale (designed to accept M3 screws)
- mounts for the carry strap on the lid are not present
- cutouts for a padlock on the front right are not present
- holes in the corners are omitted (they would protrude to the inside)
- bottom pattnern is slightly changed for easier printing
- wall thickness slighly increased for more rigidity

BOM
- a printer with rougly 200 x 150 mm build area
- roughly 250 to 300 g of filament
i've just used regular black and white PETG from Geeetech (affiliate link) - some plastic glue (UHU Hart works for me; affiliate link)
If you want Makita color, try looking for RAL 5021 (or RAL 5018) - those tend to be pretty expensive, that is why i used plain old black :)
Printing
Keep in mind that there are lots of appearant overhangs and bridges, make a testprint to check it if works - it is intended
use the following settings as a guidline
general
- PETG
- 0,2 mm layers
- 3 walls
- 3 bottom surface layers
- 25 % gyroid infill
- normal supports with 1 mm interface spacing
- interface 90° to buildplate
- bridges 0° to buildplate
pins
- maximum walls
- concentric pattens
- random seams
feet
- no supports, just the bridges
label
- no supports, just bridges
- bridges at 45°
- color change after layer 4 (base is 0,8 mm) if you want the logo to be colored differently, layer 5 and 6 get the other color
- there is also a blank label included - use 2 layers (0,4 mm) for your own text

Assembly
the feet and the label need to be glued on (it is needed to save material and make it easer to print), also the handle needs to be glued together
the bridges used in printing have a tolerance of about 0,1 to 0,2 mm and are intended to give the glue a surface to grab on - so even if you print in PETG it will be durable bond - so if you have a multi material printer and want to use support material to have a clean surface, be aware that you intentionally make the glue surfaces “rough”
after everything is glued together, add the handle and the lid with the matching pins
due to print tolerances and the fact that they are printed with random seams the are intentionally rough so they have better friction and don't fall out. if you don't get them in straight away, turn then and move them back and forth until they snap into place
the latches need to be angled at 45° and then twisted in (just like on the original MAKPAK)
Changelog
2023-06-03 v60
- added body size 2, 3 and 4
2023-06-03 v59
- ironed out a few “odd corners” of the body (size 1) piece in preparation for the other sizes
2023-06-02 v58
- added an optimized latch piece
2023-05-29 v54
- Initial release
Credits / License
The MAKPAC was licenced by Makita from Thanos - they have released their frist Systainer in 1994. So obviously, this model is for private use only and can't be replicated commercially.
The Makita Logo i used, is taken from the Public Domain file from Wikipedia Commons: File:Makita Logo.svg - the Registered Trademark Symbol (®) was removed, since it is too small to be printed
Boost Me (for free)
Enjoying my models? Show your support with a Boost! Boosting not only adds a few extra points my way - it also helps cover the material costs that goes into prototyping each design. Every bit of support helps me keep creating fresh, high-quality models for you to enjoy! Thank you for helping keep the creativity flowing 💡✨
Comment & Rating (154)