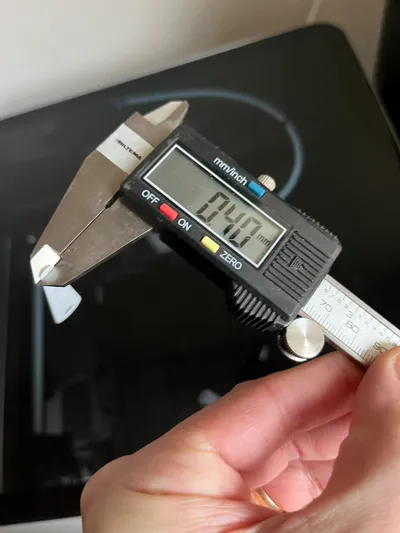
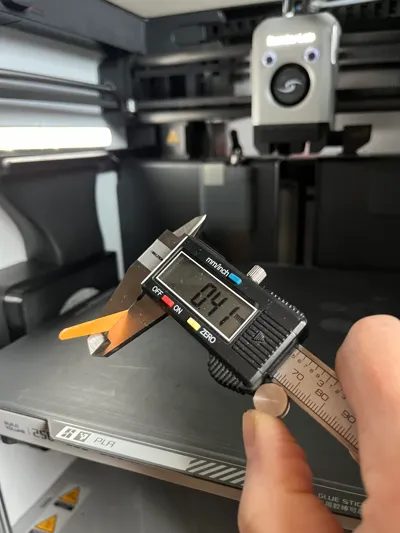
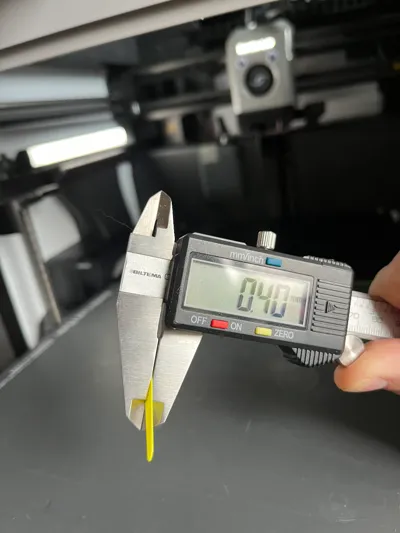
0.4 mm feeler gauge for non-destructive tramming


Print Profile(4)


Bill of Materials

Description
This can be used for X1/P1 series bed tramming in case you don't own a 0.4 mm feeler gauge. It will likely print with Good Enough[tm] accuracy for using when tramming your bed. Certainly better than the method Bambu recommends anyway. Having said that, if you have a real gauge by all means use that one!
Bambu's instructions (and gcode) is at https://wiki.bambulab.com/en/x1/manual/manual-bed-leveling. Please read all of it, but then instead of messing with the thumb screws before tramming, leave them alone! And instead of aiming for a “printing surface barely touches the nozzle” which is impossible to get right, use the feeler gauge and aim for the same “drag” at all three points. I didn't make the 0.4 mm up from thin air: The height is actually set to 0.4 mm in the bed tramming gcode.
I call this non-destructive bed tramming because unlike when you follow Bambu's instructions, if the levelling was already fine you won't mess it up! Also, you can re-run my procedure as many times you like, if you want to just verify it once more. This is impossible when following the original instructions because the auto homing turns the “barely touch the nozzle” into 0.4 mm every time. After a couple of iterations of that you'll obviously run out of threads for the thumb screws.
Some say you can just use a piece of paper. It's true you can do so for the levelling alone, but it comes with the same problem as the “barely touches the nozzle” method: A paper is about 0.1 mm, but after auto-homing it will again be 0.4 mm so you can't verify a previous setting. You have to use 0.4 mm exactly - and this printed gauge is exact enough if you don't have the real deal.
It's a good idea to put the bed tramming gcode in the root of your SD card. That way it's always usable directly from the printer's touch screen!
Note: For A1 series and H2D, this is NOT the tool. The A1's want 0.1 mm and H2D wants a whopping 2.5 mm (yes, 2.5 as opposed to 0.25). I will add models for these although I'm not too sure 0.1 will be feasible for printing. At that thickness, a piece of paper may actually be fairly accurate though. Be sure to read the correct Bambu wiki page for your printer!
A clever user commented that he made a PETG raft in order to print this on a textured plate. Until we have a print profile doing this, you might want to experiment with it in case you only have the textured plate.
Boost Me (for free)
If you'd give me a boost for this super trivial model, I'd just be embarrassed. But OTOH if you boost me for my non-destructive idea and description, I'll be happy as a clamp!

Comment & Rating (130)