Portal 2 Atlas Working Eye

Print Profile(2)


Description
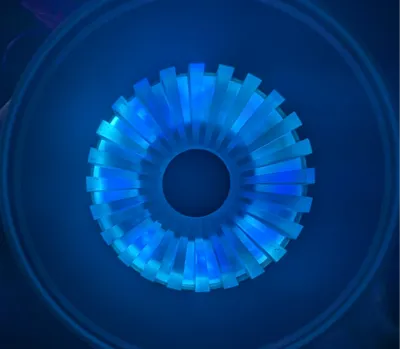
Portal2 Atlas Eyeball is now available with printing and assembly instructions!
This was made as a gift for a friend that is a HUGE Portal fan.
Bill of Materials
This is a list of potential items that can be used, however you can use any LEDs, Switches, or power source that meets your needs. These are the items that were used in the pictures for the first one that I created.
White and Blue LEDs (any colors can be used, but this made the affects very similar to the actual game)
Battery Pack
Multi Pack of AA Battery Packs
Switch
WAGO
Hot Glue (CA Glue can be used but will make it difficult to replace LEDs in the future)
Assembly Instructions
After all of the parts are printed. Most of the assembly time is spent with the wiring of the LEDs.
- Add Blue LEDs to center of the wiring base plate by feeding the wires through the center hole.
- Bend slightly to fit into the notch for each LED
- Add the White LEDs to the outer ring and bend them slightly to fit into the notch. I suggest wiring 4 through the top channel and 4 through the bottom channel. Feed the wires through the outer base hole.
- Secure with hot glue (be careful to not over glue as the plates will not fit correctly if you use too much) Ultimately you just want enough glue to hold the LEDs in place.
Glue the Black eyeball piece to the white eyeball ring. You can use CA to make this more secure.

Glue the black pupil to the glow iris base ring. You can use CA to make this more secure.

Glue the glow iris to the translucent iris. You can use CA to make this more secure.

Glue the eyeball pieces for steps 4 and 5, to the iris pieces you assembled in 5-7, adjust the iris forward slightly which will help with the LED light diffusion. You can use CA to make this more secure.

- Connect the red wire from your batter pack to the switch. You can either solder this with heat shrink, or use a wago connector.
- Connect the Black wires together using WAGO wiring nuts. I used a 3 connector, and put 6 black in the first 2 and 5 in the second. 16 from all of the LEDs plus the additional one from the batter pack.
- Connect the Black wires together using WAGO wiring nuts. I used a 3 connector, and put 6 black in the first 2 and 5 in the second. 16 from all of the LEDs plus the additional one from the switch.
- Optional: After verifying everything works, you can glue the eyeball into the wiring base plate. I would suggest using a very small amount of hot glue so that it could be removed and taken apart if you want to change anything.
Instructions will continue to be updated with more images. I did not take photos of every step during my first build and will in the next coming days with my next build.
Comment & Rating (2)