Benchy Harbor - Display for Benchy Enthusiasts


Print Profile(1)
Description

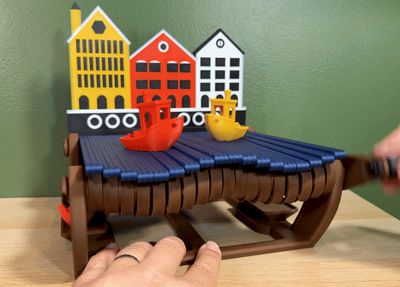
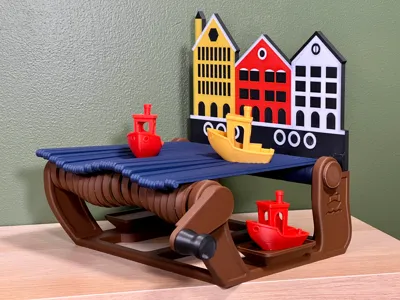
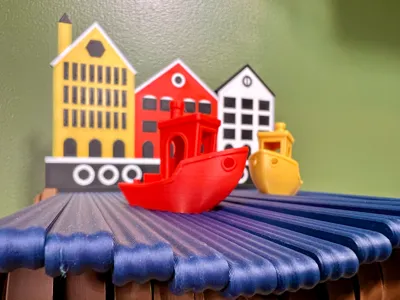
Welcome to Benchy Harbor, where your 3D Benchies can sail into a world of mechanical waves! If you have several of these little boats just sitting on your shelf, at least give them a fun place to hang out. This delightful harbor scene is the perfect spot for your Benchies, providing you with a captivating wave display. Just turn the crank handle and watch the boats bob around in the water.
While the mechanical action worked well with this print, this is mostly a decorative art piece for your 3D printing workspace, kids room, or anywhere you want to have a splash of color. For my Patreon supporters, consider using this display for table to help draw people over to your booth.

Print Profile Components:
While there are many parts to this print, we've oriented everything on the print profiles so that they should be good for you to print on a minimal number of plates. It's also worth noting that this was designed to work with the typical size 3DBenchy. It's important to note, that my printing and testing was performed using the Bambu Lab High Temperature Smooth PEI Plate for minimal resistance between moving pieces.
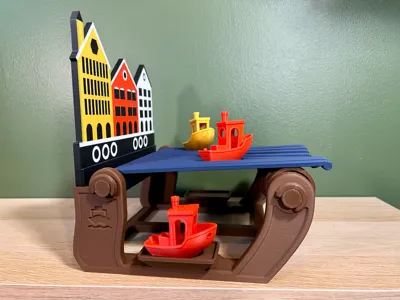
- Base - This is the core piece of Benchy Harbor where everything else will be attached. We printed this without supports, but if you have issues with the vertical holes, you may consider enabling tree supports.
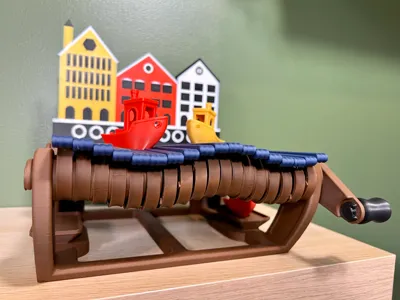
- Wave and Crank Shaft - This are the parts that extend from right to left across the base. The wave shaft goes across the back two holes and the crank shaft goes across the front two holes. it will be obvious which direction the crank shaft goes in as it only works one direction as shown in the next image below.
- If using a bed slinger, ensure that brims are enabled so these do not get knocked over.
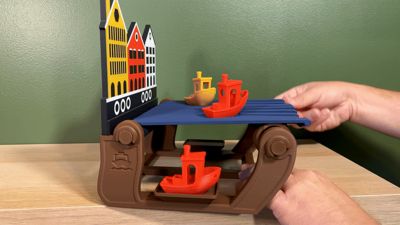
- Water Wave Parts - While the rest of the pieces can be printed in pretty much any color, but I would recommend printing these water pieces in blue. You will push the rear wave shaft part of the way through and then start putting each wave parts on one by one.
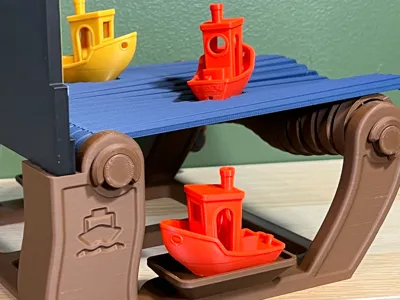
- Offset Wheels - These slip on to the crank shaft with a precise fit that should require a small amount of force to push on to ensure they are snug. You will notice that there are arrows on the side of each offset wheel that help you align how the next wheel will slide on. Each wheel should be one turn on the gears on the crank shaft. When you set the wave parts down on the offset wheel, you will see that there is a slight indentation where the wave rests on its offset wheel, so everything stays in alignment. Getting these aligned is important to complete the “wave” effect.

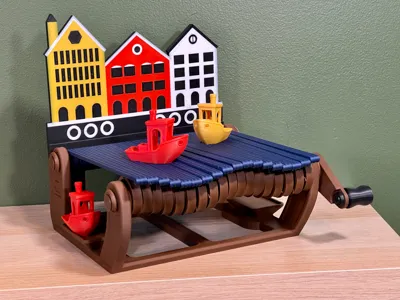
- Handle - This is the part that you hold to turn the crank. It simply slides through the crank and a clip holds it in place, only requiring a small amount of force to snap in.
- Harbor Background - This is the colorful display of buildings in the background. This piece slides and clicks into place on the back of the base.

Design Intent and Feedback
As mentioned previously, this is designed to be a fun art piece for your benchies to have an interesting place to rest so they don't just collect dust as they sit. We like to walk up to anything on our shelves in our workspace and have some fun way to interact with it. If you want to build this, please provide feedback to help us make it better. We would like to make a version of this that is connected to a motor and gears so it can just keep running in the background, which would be sure to catch people's attention while visiting your workshop. We have also started designing other backgrounds, such as a deserted island. Comment below what backgrounds or features you would like to see!
As with any new design, I would love to hear your feedback on how we can update the actual printed design to continue making it fun and engaging. Post your build photos, give us a download, and if you want to see more cool projects, give a boost! 🚀

License
You shall not share, sub-license, sell, rent, host, transfer, or distribute in any way the digital or 3D printed versions of this object, nor any other derivative work of this object in its digital or physical format (including - but not limited to - remixes of this object, and hosting on other digital platforms). The objects may not be used without permission in any way whatsoever in which you charge money, or collect fees.
Comment & Rating (130)