Xbox Controller Stand with Swappable Logos


Print Profile(2)


Description
TLDR
Xbox one controller stand with improvements:
-smoothed model
-with customisable (multicolour) decorations
-low printing time
-5x2 mm magnets and 8x3 mm anti slip rubber pads optional
Why I made this remix
I found a great controller stand design by agepbiz but I wanted to make it more personal.
First off, I found a ‘smoothed’ version of the model (remix) that looked better as a starting material.
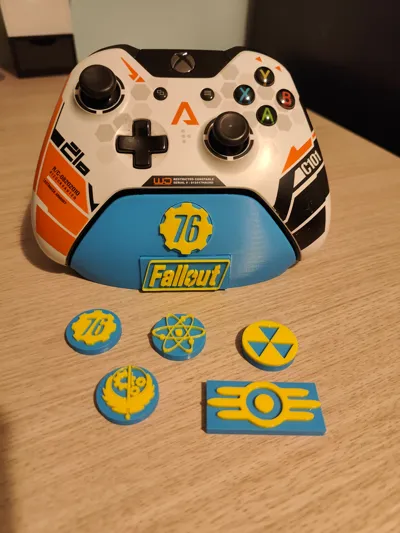
Next up, I imported some SVG's with fallout logo's and added them to the controller. However, printing time increased from 1.5 to 8 hours and filament use was almost doubled, with half of it being wasted in flushing volume (image below)!

I thought I could do better. So I used Fusion360 to carefully create a rectangular and circular cutout, that I could print flat on the bed to reduce the amount of filament swaps considerably.
It did fit very well and followed the contour of the original design. Unfortunately, it didn't look very nice as stair stepping was quite visible. I'm excited for the day when bambulab implements non planar slicing so we could eliminate this effect :)

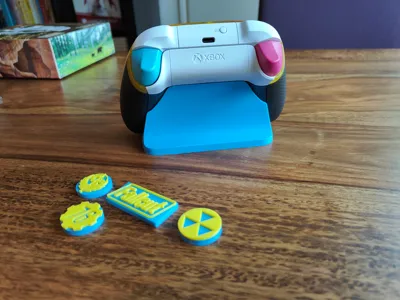
But for now, I resolved this by making the swappable parts completely flat. This has the additional benefit that ironing can now be enabled. This gives us very smooth surfaces, so smooth that it would be hard to tell these parts were 3d printed. See the photo below of these prints straight after the print has finished.

I originally intended to use 5 mm magnets in the stand and the swappable parts to lock them together, but I found a simple push fit worked really well for me. However, I left the magnet holes in the model as they're invisible once the logo's are inserted (see teardrop shaped holes in the image below). This way you can always add the magnets if you desire to do so.

If you wish to add your own logo's, it's really quite simple!
Right klick the rectangular or circular template, klick ‘add part’ and select ‘svg’. Now set the dimensions correctly (I used 1.6 mm height). If you don't have a .svg file, you can convert an existing image into one with the free software inkscape.
I'd be happy to answer your questions or help you with creating your own custom design, just leave a comment!
Boost Me (for free)
if you enjoy printing my files, a boost is always appreciated :)

Comment & Rating (55)