


Print Profile(1)

Bill of Materials

Description

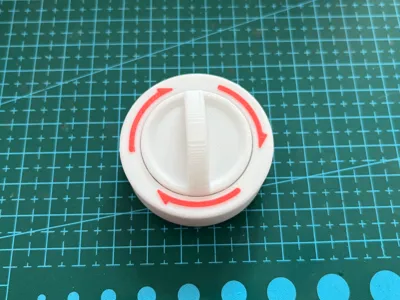
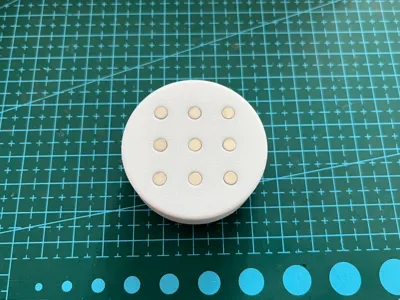
This is a miniature Gashapon machine handle toy, capable of simulating the tactile clarity and crisp sound of rotating a Gashapon machine handle. Installing nine 4×2 magnets at the bottom enables use as refrigerator magnets, transforming your refrigerator into a "Gashapon machine".
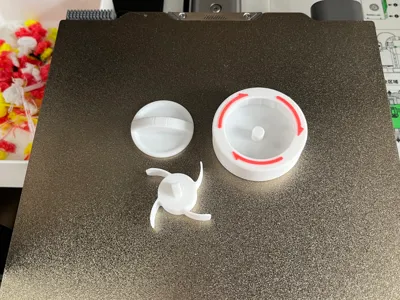
Beyond magnets, all other parts can be printed without support. Printing the ratchet using a filament known for its elasticity and toughness is recommended. The arrow indicating the direction of rotation can be colored with a marker, or alternatively, AMS or pause color change can be utilized for two-color printing (when using 0.2 layers for high print quality, replace the top two layers with the second color).
If concerned about the ratchet detaching from the printing panel, a version with a brim can be printed. For those wanting to install magnets of different sizes, a base model without holes can be downloaded and edited independently.
Installation method: Insert the two blades of the ratchet into the base, aligning the shaft hole with the rotating shaft. Afterward, insert the remaining two blades, press them into place, and finally install the handle.

This is a miniature Gashapon machine handle toy, capable of simulating the tactile clarity and crisp sound of rotating a Gashapon machine handle. Installing nine 4×2 magnets at the bottom enables use as refrigerator magnets, transforming your refrigerator into a "Gashapon machine".
Beyond magnets, all other parts can be printed without support. Printing the ratchet using a filament known for its elasticity and toughness is recommended. The arrow indicating the direction of rotation can be colored with a marker, or alternatively, AMS or pause color change can be utilized for two-color printing (when using 0.2 layers for high print quality, replace the top two layers with the second color).
If concerned about the ratchet detaching from the printing panel, a version with a brim can be printed. For those wanting to install magnets of different sizes, a base model without holes can be downloaded and edited independently.
Installation method: Insert the two blades of the ratchet into the base, aligning the shaft hole with the rotating shaft. Afterward, insert the remaining two blades, press them into place, and finally install the handle.
License
You shall not share, sub-license, sell, rent, host, transfer, or distribute in any way the digital or 3D printed versions of this object, nor any other derivative work of this object in its digital or physical format (including - but not limited to - remixes of this object, and hosting on other digital platforms). The objects may not be used without permission in any way whatsoever in which you charge money, or collect fees.
Comment & Rating (2)