Sunbu AMS Lite Loader Stand - A1 Mini Version


Print Profile(1)

Description
A loader stand for Mr. X3D's great Sunbu AMS Lite/ Sunlu S4 filadryer combo, found here:
https://makerworld.com/en/models/155592#profileId-170306
This is printable on the A1 Mini by popular request, and requires some assembly. If you have an A1/P1/X1 sized bed, see the original model here that prints as one piece.
https://makerworld.com/en/models/587460#profileId-508654
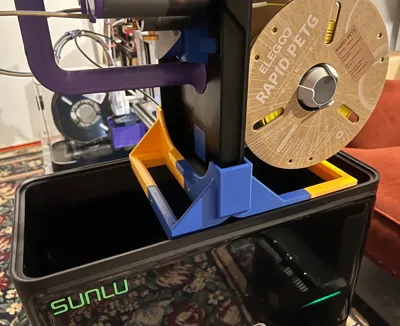
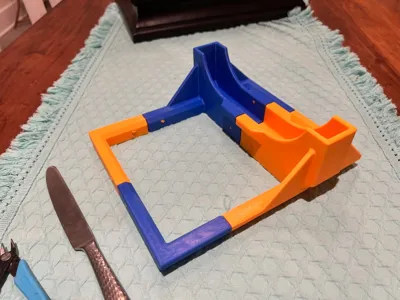
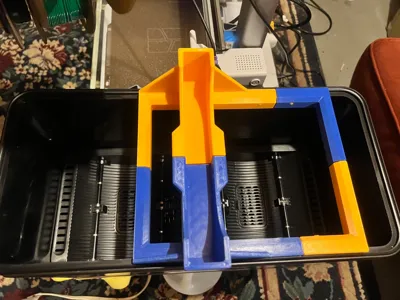
This stand locks into the center divider of the Sunlu S4, and provides a secure slot to hold the heavy Sunbu AMS vertically while loading or maintenance is performed. The Sunbu AMS is difficult to load by itself because it can't really be put down, especially with PTFE tubes and power connected. This stand is flat bottomed and will also work on any flat surface. This version prints without supports!
NOTE: Orient the heavy side of the Sunbu AMS, usually the one with 3 or 4 spools on it facing the longer legs of the stand so it does not tip over(see pic). Make sure the stand is dropped into the center divider and the sides securely before inserting the end of the heavy AMS. Double check it is secure before commencing filament switches/maintenance.
Assembly Instructions:
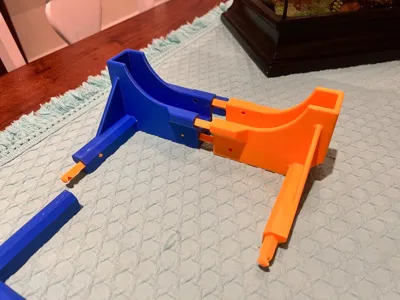
Print all 3 plates on your A1 Mini, profiles are in regular PLA. Collect them on a sturdy table with a butter knife and flush cutters as tools.

Begin by inserting 6 dowels in one half of the loader base, making sure the dowel hole lines up with the lock hole. All dowel lock holes will be parallel with the bottom of the stand. Push them until the dowel lock hole lines up with the hole on the base piece. Use the flat of the butter knife to push harder if necessary.


Insert one dowel in right base for right leg, and one in either the right or left extension. The long legs of the extensions will link to eachother and the shorts to the base. See pic. Make sure lock holes line up with holes on base before pressing them in!

Press base halves together. This may require a lot of force because of the 5 dowels, use the floor and your weight if needed.

Assemble leg extentions now by pressing single dowel together


Now press leg extension into base using the two dowels on left and right


Like so. Now, begin to insert the 16 dowel locks. Make sure the dowel holes line up with the base holes by inspection. Dowels may need to be pushed further in if the do not line up.

Use flat of the butter knife to press locks in. If they do not go in with moderate force, trim the edges with flush cutters to remove any leftover brim. You can use the edge of the table to assist with pressing.


Congrats, you're done! Enjoy your easier loading, and send Mr. X3D a boost for for your dry, clean filament.


License
You shall not share, sub-license, sell, rent, host, transfer, or distribute in any way the digital or 3D printed versions of this object, nor any other derivative work of this object in its digital or physical format (including - but not limited to - remixes of this object, and hosting on other digital platforms). The objects may not be used without permission in any way whatsoever in which you charge money, or collect fees.
Comment & Rating (11)