D20 Kitcard Jumbo V1


Print Profile(8)

Description
Boost Me (for free)
Roll for boost!
Greetings fellow adventurers,
Whether you need an emergency d20 or a quick little extra to put in a celebratory card for a fellow DnD’er, the “D20 kitcard Jumbo” has you covered.
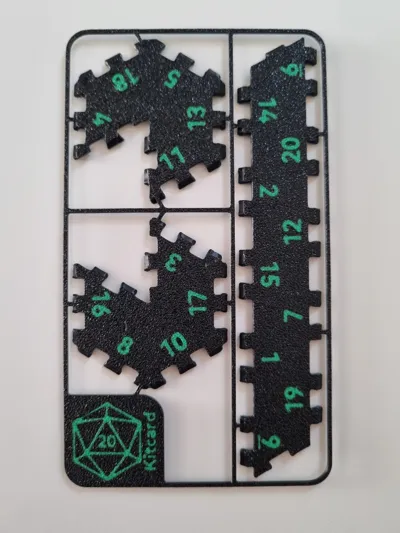
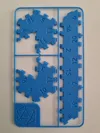
This jumbo version is a 34mm high d20 that features a layout of which the opposite sides sum to 21.
If you want a more standard sized 20mm high d20, you can find it with the link below:
https://makerworld.com/en/models/749759#profileId-683258
Assembly Instructions (no glue required):
The joints of the pieces feature a slight dovetail design and require a bit of pressure to push into place. Once assembled it is not recommended to disassemble again.
Edit:
*For step 1 comments have pointed out to be carefull with the connections to the frame at face 3 & 11.
**For step 5 & 6 comments have pointed out that the assembly is easier when starting with the 10-face of the bottom piece to the 6-face of the middle piece and then the 5-face of the top piece to the 14-face of the middle piece (even with this change, opposite sided still sum to 21)
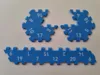
1. Carefully remove each piece from the frame.*
2. Gently bend the faces of the top piece (4-11) inward, align the 4-face above the 11-face and push down on the 4-face to connect.

3. Gently bend the faces of the bottom piece (3-16) inward, align the 3- face above the 16-face and push down on the 3- face to connect.

4. Gently bend the faces of the middle piece inward, but don’t connect the ends yet.

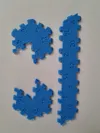
5. Connect the first 2 faces of the bottom piece and the middle piece with the 16-face aligned to the 6-face & the 8-face aligned to the 20-face.**

6. Connect the top piece and the middle piece with the 14-face aligned to the 4-face.**

5. Go around and align the subsequent faces. Don’t worry if they don’t connect straight away, you’ll be able to push down and push everything into place at the end. You just have to make sure to align the joints so they can snap into place.

And there you have your new D20!
Options:
In the print profiles you will find the following options:
- duo color with frame
- single color with frame
- duo color no frame
- single color no frame
Materials:
All these were designed and printed with PLA.
Edit: Comments have pointed out that PETG has good results as well, but ABS does not.
Additionally PETG doesn’t leave the fold lines you get with PLA.
Due to a lack of varying PETG's to test with, I'm not fully able to confirm this, so if anyone tries it with PETG, please leave a comment.
Commercial license:
If you're interested in obtaining a commercial license, please visit my Patreon:
License
You shall not share, sub-license, sell, rent, host, transfer, or distribute in any way the digital or 3D printed versions of this object, nor any other derivative work of this object in its digital or physical format (including - but not limited to - remixes of this object, and hosting on other digital platforms). The objects may not be used without permission in any way whatsoever in which you charge money, or collect fees.
Comment & Rating (560)