Search models, users, collections, and posts
BackBiter
IP Report


Print Profile(2)

0.2mm layer, 2 walls, 15% infill
Designer
21.5 h
3 plates

Backbiter with better grip options
Designer
30.2 h
5 plates
Open in Bambu Studio
Boost
228
506
24
15
370
96
Released
Description
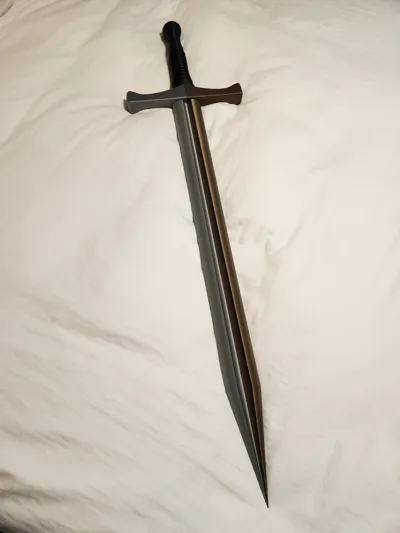
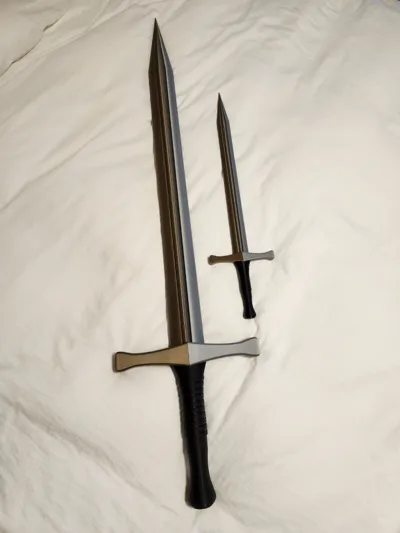
Comically large adaptation of Backbiter, a sword used in the Percy Jackson series. It is a broad sword composed of two metals, celestial bronze and tempered steel. The model is made up of 18 parts that fit together to form the weapon. It needs to be assembled in a specific order due to the way the joints work. It doesn't need glue to hold together but I suppose you could use some to make it stronger. When completely assembled, the model is 130 cm (> 4 ft) long. The pieces are labeled with embossed letters that denote their orientation.
The video shows the assembly process with a 50% scale model.
Assembly:
- Slide bronze C0 onto black connector C1 until half of black C1 is exposed at the top of the bronze blade piece, and repeat for steel C0.
- Slide bronze C1 onto black connector C2 until half of black C2 is exposed at the top of the bronze blade piece, repeat for steel C1, and push the C1 assembly on top of the C0 assembly.
- Slide bronze C2 onto black connector C3 until half of black C3 is exposed at the top of the bronze blade piece, repeat for steel C2, and push the C2 assembly on top of the C0C1 assembly.
- Slide bronze C3 onto black C4 (top split) connector until half of black C4 is exposed at the top blade piece, repeat for steel C3, and push the C3 assembly on top of the C0C1C2 assembly.
- Slide the top pointed bronze blade piece onto the rest of the blade until completely seated, then work the last steel blade piece onto the connector making sure it's straight.
- Slide the two quillon pieces onto the bottom of the assembly makin sure they are oriented correctly.
- Push the grip all the way into the bottom.
Screw the pommel onto the grip
License
This user content is licensed under a
Creative Commons Attribution-Noncommercial
Comment & Rating (24)