MGS4/MetalGearMKII


Print Profile(1)

Description
Hello everyone, and welcome to my latest creation!
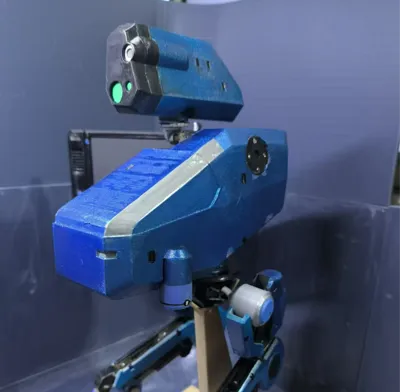
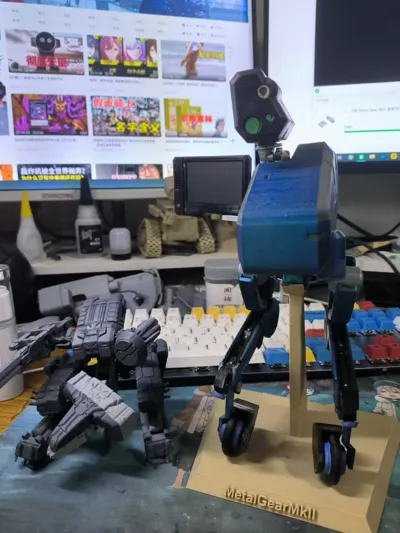
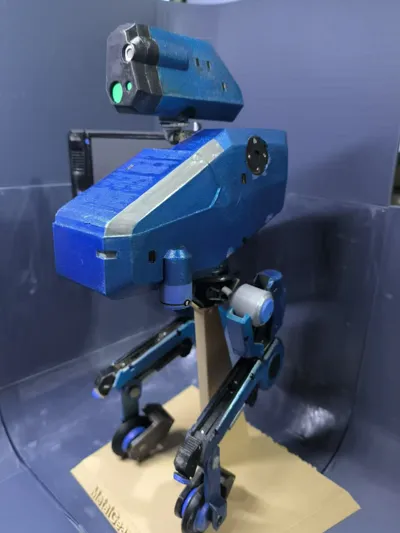
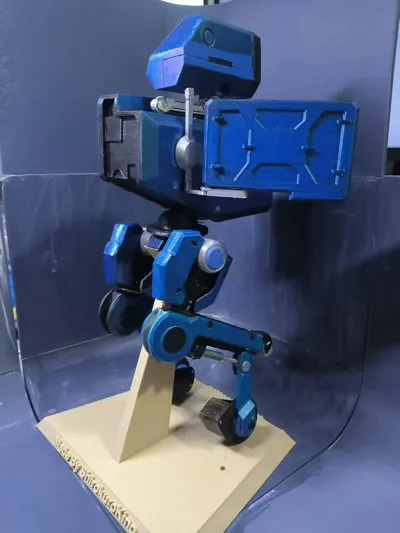
This is the assisted bipedal upright walking robot from the game MGS4, MetalGear MKII!
MGS4 was once a game I really enjoyed on the PS3, and the giant MetalGear REX that appeared in the game not only had its own commercialized model, but 3D printed drawings as well.
But the more compact MG MKII was hard to see on the market, so I decided to make one myself.


REX was dwarfed and humbled by the massive MKII!
I'm generally happy with the final product, for example, he has a wealth of sub-assemblies and many of the joints are movable.


But there are things I'm not happy with.
First of all, because of his shape, the center of gravity is very much on the top.
The game is set up to be bipedal because of high performance materials and servo motors, and then the algorithm realizes bipedal uprightness, but in my actual 3D print, he can't stand at all without the support of the floor.
Although I've adjusted the padding in hopes of getting lighter weight parts, it has had little effect on the overall center of gravity adjustment.


At the same time I did some carving of a lot of his details, which made it a little difficult to color.
The final coloring method I chose was spray paint, using a blue metallic spray paint from Tengu on top of black aqua filler clay, with a color separation effect via blue butyl gel and masking tape. The details were later color-filled through markers.
For the problem of the joints not being tight enough due to the weight, I recommend you to use blue butyl glue.

This isn't a bandwagon ad, this is a recommendation of some goodies that I have personally found to work really well when making 3D prints! It's not too expensive and it's reusable!
Lastly, a guide on putting this together, although I don't think it's too complicated to put together, I'll give the schematic just in case.

The neck is all movable joints here, and blue butyl rubber is recommended.

Here's a schematic of how the thigh part is put together, note that part #3 has the recessed surface facing outward.
Also while 2 and 3 can be made tight without glue, 1 and 4 are recommended to use glue.
I use propanolol, which works by melting a portion of the surface and squeezing both surfaces before it sets to get a bond that is no less than printable.
Also propanol does not set as fast and stick everywhere as instant glue.

If the holes here are on the small side you can use a hobby knife to scrape around the edges, and put the pieces together in any order.
If you don't have any special need to play with it, I also suggest you use glue to fix it directly. The legs actually play a supporting role, and the fixation is better for the overall stability.
Then there's a teaser about the progress of another project, fans who follow me may know that I'm working on Jedi Zone Zero's Jukis' weapon, the Stormtrooper, which is a weapon that can be put together with additional parts to achieve different shapes

I've made his shotgun and grenade modes so far, but I don't have a clue about the final Ether Laser Cannon mode. I still need to rework and modify it because I'm using parts from the first two at the same time.
I'm good at modeling and such, but I'm still a beginner at engineering. For modeling, it's okay to directly insert the surface of the model for the sake of aesthetics, as long as it doesn't look like it's going to be a problem. But the engineering design is rigorous, must solve the intersection of the surface, some difficult to do it.
Finally, back to the MGS MKII.
Keep your pei board clean while printing.
You can turn on Brim, if the first layer is not sticking.
The padding can be adjusted appropriately, I'm currently using the lowest padding possible to get a lighter part.
I've printed successfully on my A1mini and confirmed no issues~
If you encounter problems during the printing process, you can message me, although I'm not a professional, I can analyze it for you with my rich experience in flipping cars.
Hope you can have fun with this model!
Boost Me (for free)
Please beg for a vote!
Printing this model in metallic colors would eliminate a lot of coloring headaches.
But poor boy doesn't have metallic color materials!
I'm using the cheapest supplies I can find on the market!
(Pardon my whining.)
Comment & Rating (12)