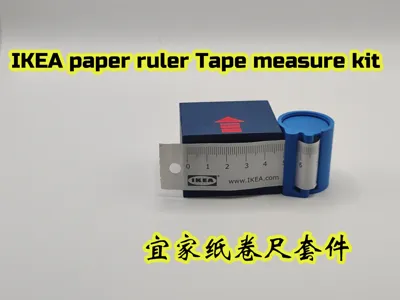
IKEA paper ruler Tape measure kit/IKEA paper ruler conversion


Print Profile(1)
Description
I often use a tape measure to take body measurements, making clothes for myself and my friends.
Occasionally, I need to measure data and stop measuring to record it, which leaves me feeling confused.
IKEA provides paper rulers for measuring furniture dimensions, which have actually always been a common tool for clothing professionals: easy to obtain, easy to bend, and inexpensive (in fact, almost free). This is the background of the model's creation.
Design a spool that can roll up the paper ruler.
Thanks to the printer's precision, a small clamping mouth can be designed for the ruler, allowing it to be torn off neatly.
Once you've measured the data, simply tear off the ruler to record the necessary information.
Organizing the data at once after the measurement is complete can improve work efficiency.
The human body parts rarely exceed 2 meters, so a small piece of transparent tape can extend the length of the paper ruler to 2 meters, sufficient for most situations.
Assembly Instructions:
These are the printed parts:

For the central rotating shaft, I have provided two versions:
One is the version that needs to be assembled as shown in the picture above.
The other version requires support for printing:

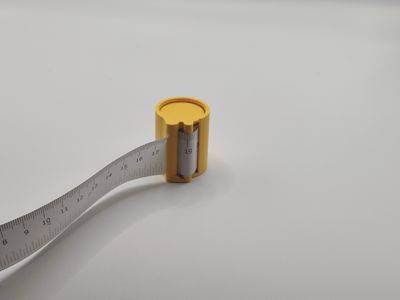
It has a small protrusion at the top, which allows you to retract the pulled-out tape measure without needing the bottom handle.
Choose one according to your needs.
I chose the version that needs to be assembled.

Assemble the rotating shaft, and look at the grooves reserved for the buckle to avoid assembling it in the wrong direction.


Position the end of the paper ruler into the groove.


Use one side of the buckle to clip the groove, rotate it slightly, and let both sides of the buckle clip the groove.


Insert the rotating shaft into the housing and press it into place.

Insert the handle, rotate it, and roll up the paper ruler.


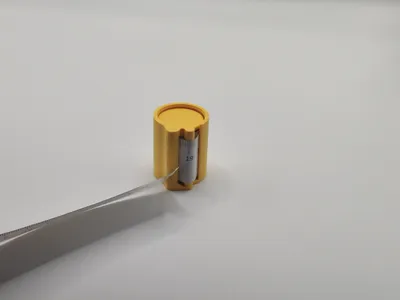
Pull out the ruler slightly, insert the head into the notch gap, and pass it through the notch.
(Slightly sliding it up and down will make it easier to pass through)
Roll up the ruler again with the handle.
After measuring, hold the notch and tear off the ruler, then use a new one to measure the next dimension.
How to determine the correspondence between the data recorded by the ruler and the body part?
Use different colors to mark it, write text or attach a label to the top of the ruler, or use the method I used at the end of this article.
I also provide a tray model that can store 5 rulers.

In fact, I also made two versions of the storage box : one that holds one ruler and one that holds five.


The schematic diagram of the measurement data is attached to the lid of the box, so you can place the corresponding ruler back in its place to organize the data later.
I have found that content automatically synchronized to the Chinese website may cause images to disappear. If the images disappear, you can check the international website.
Comment & Rating (3)