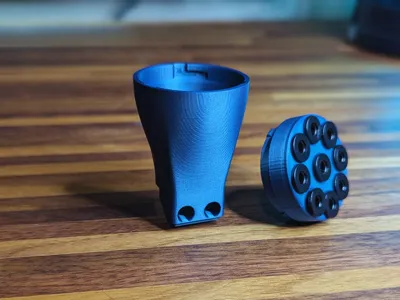
Kobra 3 8 Color Hub Kit - K3x8 v2


Print Profile(2)


Description
An upgraded design for my 8 color hub for the Anycubic Kobra 3. Not only is it much more aesthetic, but the cap is more secure while also being easier to remove if needed.
It requires collets to keep the tubes secure. You can probably use any brand as long as they are the same size. I will also link the exact ones I used at the bottom.
- UPDATE 09/29/2024 -
I've created printable collets that are compatible with my hubs! You can download and print them here:
https://makerworld.com/en/models/672203#profileId-600030
This kit replaces:
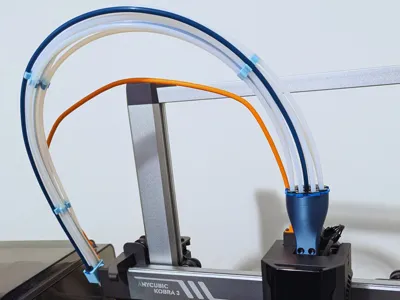
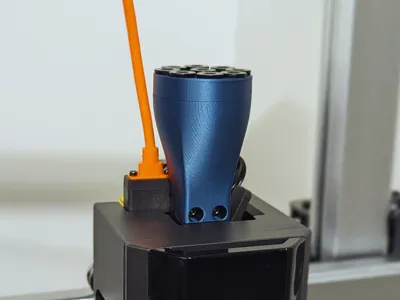
- The Filament Hub (the "splitter" on top of your print head). Simply unscrew the stock hub, and replace it with this via the same 2 screws.
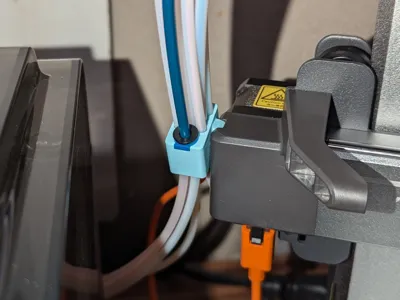
- The Cable Holder located on the left hand side to hold all 8 tubes +the power cable and the extra tube for external rolls. It attaches the same as the original by sliding in the groove. It should be a firm fit just like the stock. I also altered the angle slightly to not be as aggressive as the stock holder. I also added a smooth fillet on the bottom to help guide external rolls into the tube easier. The collet and tube for external roles here is not required, it's just there if you want to use it.
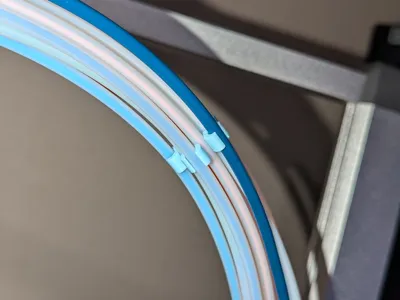
- The PTFE Tube Organizers to keep it all tidy. They will hold all 9 tubes + the power cable.
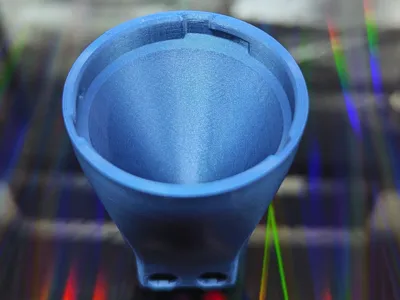
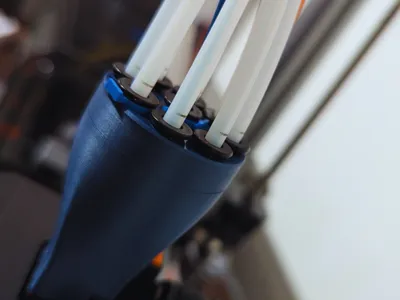
The cap for the hub will need 9 collets (link at the bottom). Press them in until they snap in place. Once in they should feel loose, this is normal. When inserting the tubes, press it in as far as it will go, there will be a stop inside which prevents it from going too far. It should pass the first line that is marked on the stock tubes as shown:

Once the tubes are in all the way, you will need to use the blue clips that come with the collets. These are required as they are what pulls the collet up which compresses and engages the teeth. To remove the tubes, remove the clip and press down on the collet so it's all the way in and pull out the tube.
When attaching the cap, make sure you twist it until you feel it click into place.
~Recommended print settings~
Layer heights: .06mm - .1mm
Outer/Inner walls order
Arachne Wall Generator
No higher than 60mm/s for the outer walls for the cap and main body.
For the main body you want the smoothest walls possible. So if you can, print this on it's own plate with a .2mm nozzle and a maximum of .08mm layer height, lower would be even better.
Also, everything is designed to print without supports. Orient everything to be upside down as shown here:

Link to the collets I used, they are sometimes not available from the seller, but most generic ones should work.
License
You shall not share, sub-license, sell, rent, host, transfer, or distribute in any way the digital or 3D printed versions of this object, nor any other derivative work of this object in its digital or physical format (including - but not limited to - remixes of this object, and hosting on other digital platforms). The objects may not be used without permission in any way whatsoever in which you charge money, or collect fees.
Comment & Rating (140)