Pavo 20 Pro, Walksnail Moonlight VTX Housing


Print Profile(1)

Description
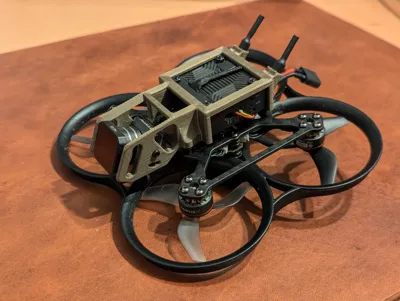
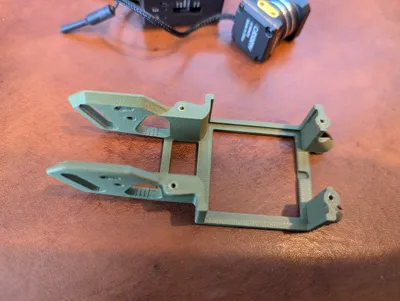
Pavo 20 Pro, Walksnail Moonlight VTX Housing
My attempt at producing a housing for the walksnail Moonlight VTX for the Pavo 20 Pro.
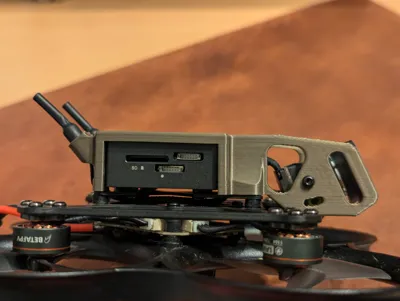
You can see that the design is influenced by the O3 VTX Bracket that is included, however, several changes have been made. I have moved the camera position to have a very small amount of the prop guards in view at 0 degrees, while providing protection for the lens still (ND filter slightly extends the print but is replaceable). The angle of the front face of the print is 25 degrees which is my preferred flying angle at the moment (this if my first drone so still adjusting). I have made the slot for the second screw between 0 degrees and 30 degrees. This can be used to line up the camera screw hole circle with either end, or the middle, to get differing known camera angles. Currently I haven't bothered with the second camera screws but still use the slot to line up 15 or 30 degree angles.
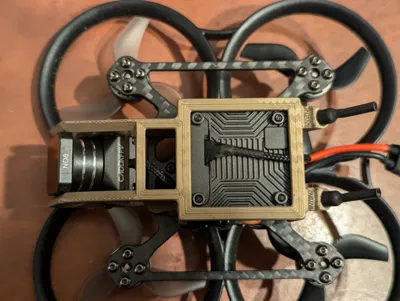
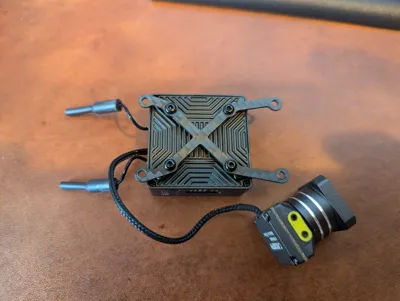
To mount the Moonlight VTX securely I made use of the 20*20mm VTX Mounting Plate that is included in the kit. I did find on mine that the VTX bracket bolts did not easily pass through the outer 4 holes , so I drilled the outer holes to 2.5mm (the shank of the mounting bolt is 2mm). Once you have done this you can mount the bracket to the 20x20mm mounting holes on the VTX as show below. There are some suitable length screws included with the Moonlight VTX .

You will notice that the rear screw holes are very close to the back of the VTX, making the holes clearance holes additionally helps with aligning the 3d printed frame.
I printed the frame in PLA. Once you have the frame printed you need to tap the holes with a spare m2 screw, this will make assembly onto the drone much easier.

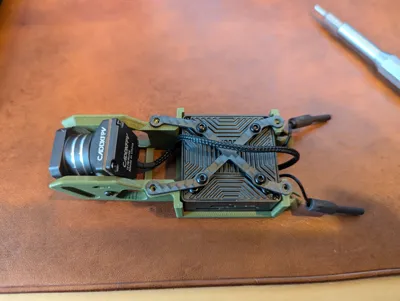
You can then install the VTX, camera and VTX mounting plate into the 3d print. The camera cable should run back through the notch, between the antenna and under to the front of the print. You will have to flex the back of the 3d print slightly to get the VTX in due to the added material for the screw hole.

Following this you can install the whip antennas that come with the Pavo 20 Pro into their housing.

Following that it should be as simple as fitting the completed Print, VTX and camera to the drone. I used the below video to re-pin my VTX cable from the flight controller. The below video is for a different Walksnail VTX on the Pavo 20 but the process is the same.
On that build the included frame was modified with a dremel. I tried this first but couldn't get the Moonlight to fit due to how close the screw holes were to the back of the VTX, hence ended up many hours into CAD to make this 3d model.
Hope you find the print useful.
Cheers
Rob
License
You may create derivative works based on this object, provided that all such derivative works are published exclusively on the MakerWorld platform and include proper attribution to the original creator. You may not share, upload, host, distribute, or publish this object—or any derivative work of this object—on any other digital platform, marketplace, or distribution channel. Commercial use of this object and any derivative works is strictly prohibited. This includes, but is not limited to, selling, renting, sublicensing, or using the object in any context in which you receive monetary compensation or other financial benefits.
Comment & Rating (33)