3D Connexion Space Mouse keyboard dock


Print Profile(1)

Description
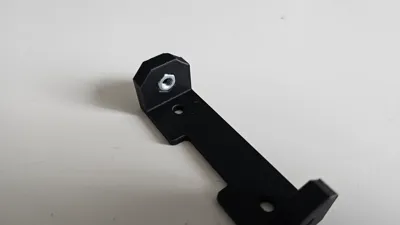
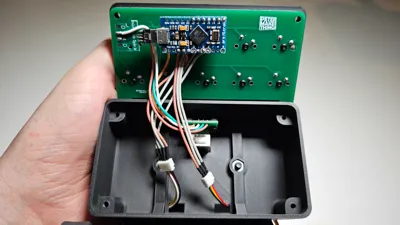
This is a pretty basic design that adds 15 buttons around the 3d mouse. I'm using it with the wireless variant, don't know whether it will fit the wired version. Feel free to modify the design, step file included.
The design includes 3 custom PCB's, these can be ordered from jlcpcb, simply drag the zip files with 'gerber' prefix and set the min quantity. I also included the Eagle project files is you'd like to modify the design.
Theoretically this could be built without the pcb's just by running the wires from each switch, but could get a bit messy.
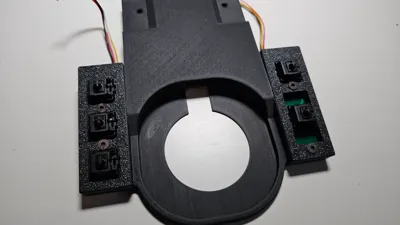
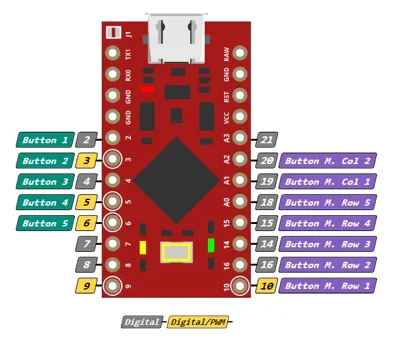
For Arduino sketch you can use any of the gamepad/keyboard generators available, in my case I used Simhub (connection diagram included in pictures). One thing to note is that the bottom L and R buttons are connected to individual arduino pins, but the top section is a matrix with 5 rows and 2 columns. I've attached the simhub generated code I used, if you decide to do the same please make sure to follow the wiring diagram.
The attached arduino code will just create a gamepad with 15 buttons, you then have to use joy2key (or any other alternative) to remap each button to a keyboard character (or a macro).
Assembly:
The pictures should be fairly self explanatory, but here are the key steps:
1. insert M4 nuts to 3 pieces
2. solder the mx switches to pcb's
3. solder wires to L & R btn pcb and guide them through the holes in main body
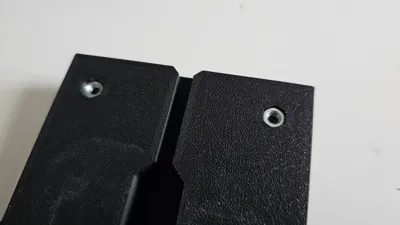
4. cover the L & R btns and lock with M3 countersunk screws
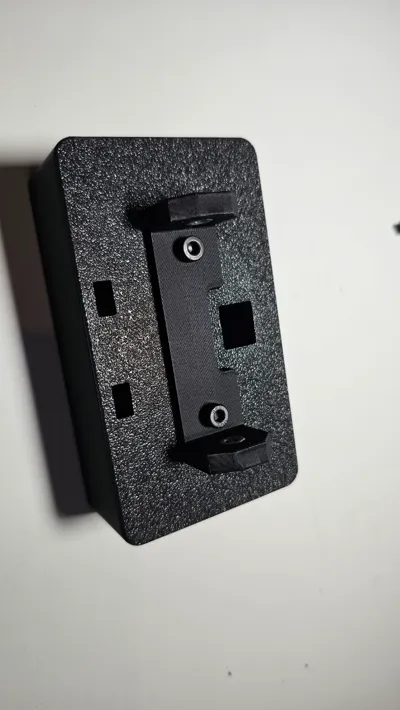
5. solder wires between micro USB and USB Type B breakout boards
6. attached USB type B breakout board with M2 screws
7. assemble all the 3d printed parts and guide the wires from L & R btns through the back of top btns box
8. connect all wires to arduino (matrix from top btns and the wires from L & R)
9. upload arduino code and test in windows 'Game Controllers' if all the buttons are working
10. remap the btns in Joy2Key and enjoy :)
Hardware required:
- 6x M4 nuts
- 2x M4 10mm
- 4x M4 14mm
- 4x M3 12mm
- 4x M3 countersunk 10mm
- 2x M3 washers (optional)
- 2x M2 5mm
- Arduino pro micro
- USB type B breakout board - LINK
- micro USB breakout board - LINK
- 2x JST 1.5 male+female (optional)
- 15x cherry mx compatible switches
- cherry mx compatible keyboard caps
- USB Type B (90degrees recommended) to Type A cable
- custom PCBs
Boost Me (for free)
License
You shall not share, sub-license, sell, rent, host, transfer, or distribute in any way the digital or 3D printed versions of this object, nor any other derivative work of this object in its digital or physical format (including - but not limited to - remixes of this object, and hosting on other digital platforms). The objects may not be used without permission in any way whatsoever in which you charge money, or collect fees.
Comment & Rating (17)