TG racing Belt Drive Kit (adapted from the second-generation Gai chassis belt drive system)


Print Profile(1)
Description
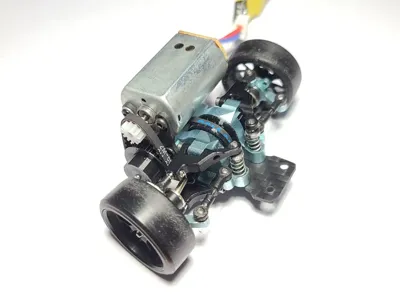
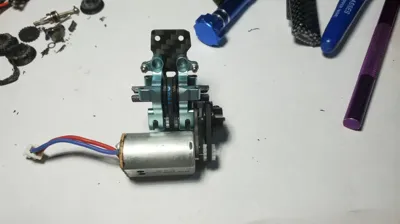
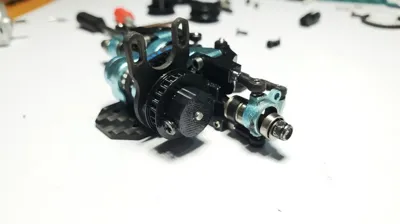
Adapting a gear-belt drive system, based on the author's own RC rear-wheel-drive drift micro-car—the second-generation chassis cover—for the TG racing 1.0 chassis.
A fellow enthusiast requested this, so I made it. Lacking the time myself (busy with the chassis), I'm open-sourcing it.
Theoretically, this should support most chassis; simply adjust the straight shaft and gearbox belt lengths as needed.
Boost Me (for free)
Thank you for your support!
This kit is easy to assemble; the author completed it in 5 minutes, requiring no instructions for independent installation. Refer to the assembly video on Bilibili; assembly steps are also provided below.
Bill of Materials
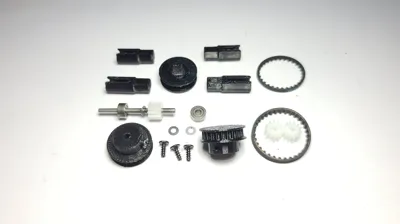
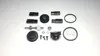
Printed Parts include: gear-belt straight shaft wheel, short connecting cup *2, extended 2mm connecting cup *2, gear-belt secondary reduction wheel (terminology varies; it's that part).
s2m-60 30-tooth 2mm width gear belt one (for gearbox) Belt available via Taobao; typically 5 yuan per belt.
s2m-66 33-tooth 2mm width gear belt one (for motor reduction) Belt available via Taobao; typically 5 yuan per belt.
0.5-module 12-tooth -2A hole tight-fit main shaft gears two (2mm shaft tight-fitting toy nylon gears; inexpensive and durable. They often survive even when the car breaks; 10 for 2 yuan).
2mm diameter, 30mm length bearing steel cylindrical pin one (bearing steel is recommended for its precision and straightness. This serves as the reduction shaft).
One main shaft gear is mounted on the cylindrical pin, approximately 4mm from one end, serving as a small pulley; the other serves as the motor pulley.
2*6*3mm bearings two, to secure the cylindrical pin (inner diameter 2mm, outer diameter 6mm, height 3mm; typically 1 yuan per bearing).
2*4*0.1mm stainless steel washers four, two on each side of the gear, to prevent the main shaft gear from rubbing against the bearing.
M2*5 self-tapping screw one, with a flat head, to act as a set screw (self-tapping screws are preferable for printed parts; their deep and wide impression reduces slippage).

Bambu Lab users can directly download the print profile! Other users must review the print requirements.
Print Requirements:
For the straight shaft pulley and reduction wheel, in the slicer, set the x-y outer contour dimension compensation to (-0.1) to reduce the xy size, making it more arc-like for easier printing. Refer to the print profile.
Reduce or enlarge the inner hole as needed.
The connecting cups require supports; a smaller support line spacing is recommended due to the small size of the parts, necessitating denser support surfaces.
An unnecessary bridging layer will print inside the straight shaft wheel. This can be removed with a small knife; it doesn't affect functionality.
Refer to the print profile for other considerations.
Use short connecting cups with narrow chassis, long cups with wider chassis. For extra-wide chassis, download the original model file and lengthen the connecting cup's dog bone contact area.
Assembly Steps:
1. Install two bearings into the connecting cups.

2. Install them onto the straight shaft wheel; the slots allow for direct insertion (install connecting cups in opposite directions, with support surfaces facing down and up to offset the height difference and maintain concentricity).


3. Mount the nylon main shaft gears onto the cylindrical pin, 4mm from one end.

4. Place two 2*4*0.1mm washers on each side of the gears to prevent bearing wear.

5. Install the 2*6*3mm bearings onto the left and right gearboxes.

6. Install the assembled reduction shaft.

7. Slightly tilt the straight shaft and install the belt.

8. Install the other half of the gearbox.

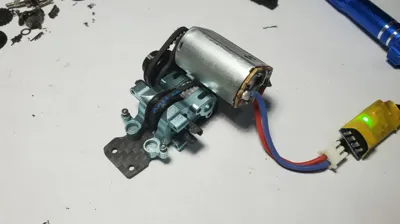
9. Install the motor mount on the long side, confirming the position before securing it.

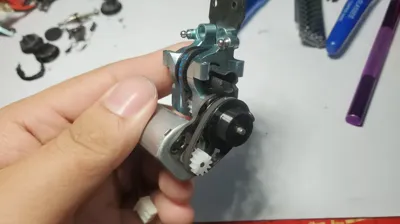
10. Install the M2*5 flat-head screw on the reduction pulley as a set screw.

11. Install the pulley onto the reduction shaft, ensuring a portion of the shaft protrudes.

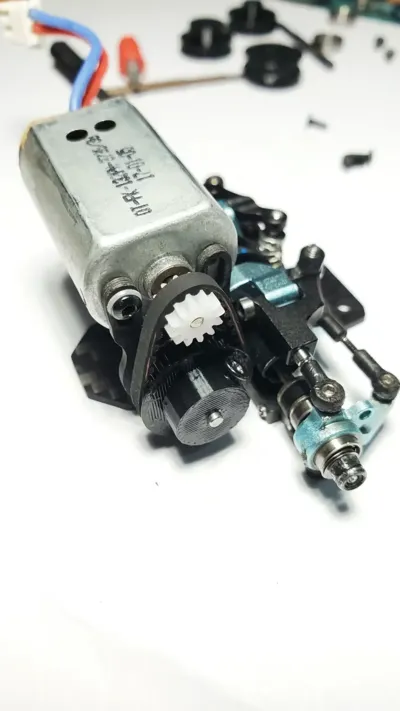
12. Install the motor gear, aligning it with the belt's operational range.

13. Install the belt, move it to the motor to tighten the belt, and secure it.

License
You shall not share, sub-license, sell, rent, host, transfer, or distribute in any way the digital or 3D printed versions of this object, nor any other derivative work of this object in its digital or physical format (including - but not limited to - remixes of this object, and hosting on other digital platforms). The objects may not be used without permission in any way whatsoever in which you charge money, or collect fees.
Comment & Rating (2)