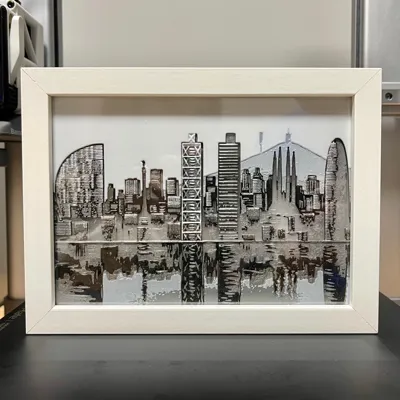
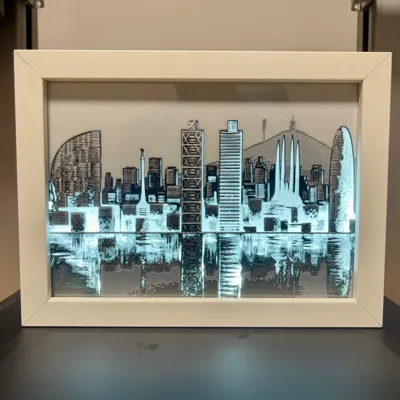
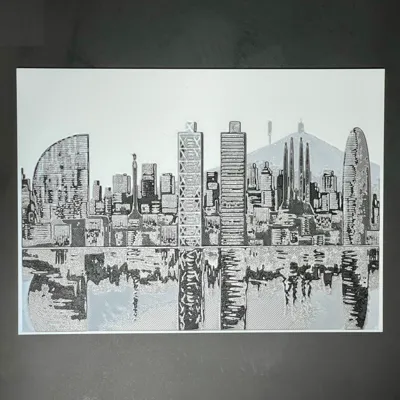
Barcelona City


Print Profile(1)

Description
I have created a simple illuminated sign by recycling various objects you might have around the house.
The steps followed are:
- Designing and dimensioning the image, I then processed it through hugeforce using 4 basic colors (Transparent, gray, black and white).
Printing the image with A1+AMS placing the indicated colors.
Project: BCN 7.hfp
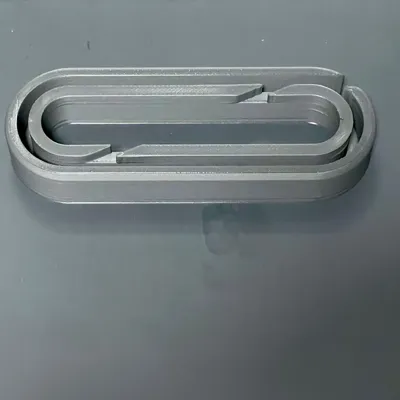
Print at 100% infill with a layer height of 0.08mm with a base layer of 0.16mmThe Model is 181.49x131.05mm in size
You may print at higher layer heights below the Min Depth of 0.48mm
The Max Depth is 2.2mm and the Actual Depth is 2mmFilaments Used:
PLA Sakata Transición trasnparente Transmission Distance: 10
PLA Smartfil Gray Transmission Distance: 2.5
PLA Smartfil Black Transmission Distance: 0.3
PLA Smartfil RE Blanco Transmission Distance: 5
This print uses 4 unique filaments!!!! It appears you have mixed filament types. Be certain this is what you want. !!!!!Swap Instructions:
Start with Transición trasnparente
At layer #7 (0.64mm) swap to Gray
At layer #11 (0.96mm) swap to Black
At layer #14 (1.2mm) swap to Gray
At layer #18 (1.52mm) swap to Blanco for the rest.Preparation:
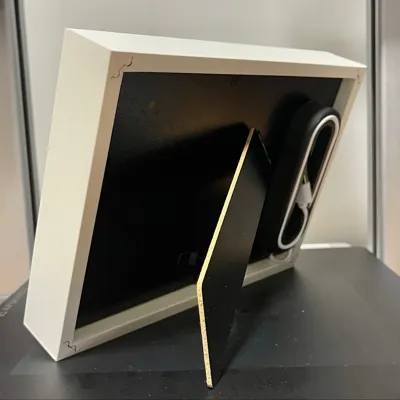
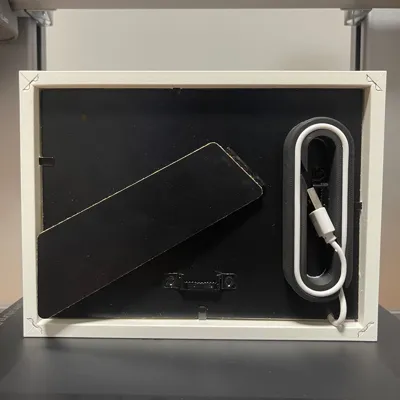
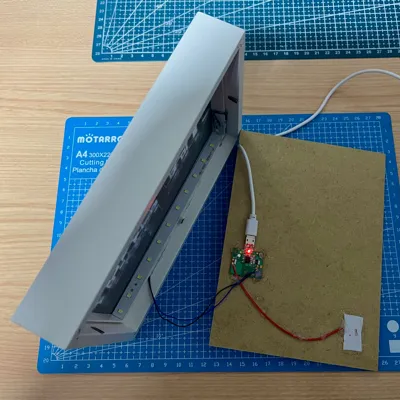
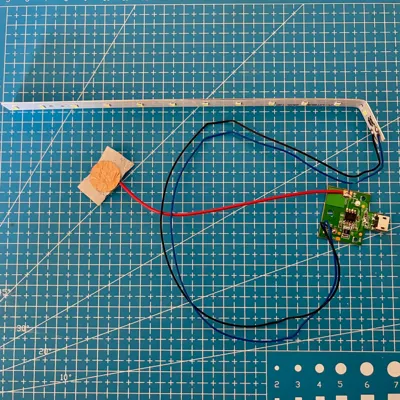
We will need a 5V LED strip connected to the board and a touch button recovered from a lamp purchased on AliExpress or similar (https://es.aliexpress.com/item/1005005323979102.htmlspm=a2g0o.order_list.order_list_main.330.21ef194dkRJmYW&gatewayAdapt=glo2esp).
The assembly is very simple, you can see in the attached images that with a little hot glue the LED strip is fixed to the inner frame and the rest to the back cover of the photo frame.
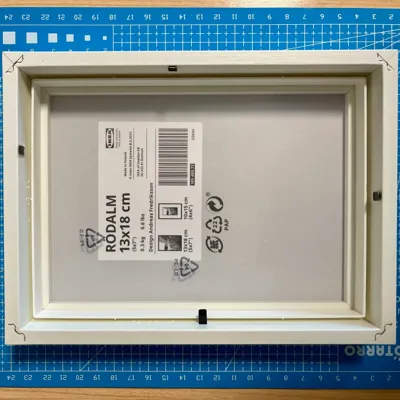
The photo frame used was purchased at Ikea Rodalm 13x18cm (https://www.ikea.com/es/es/p/rodalm-marco-blanco-10548872/).
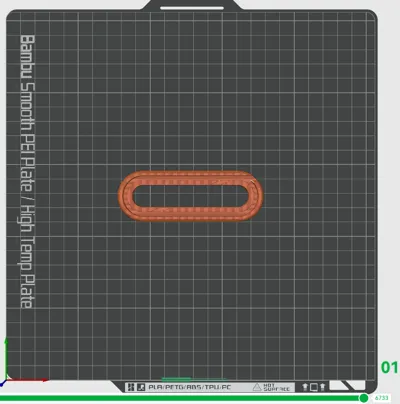
Printing the support placing it on the back cover glued to collect the cable output for when it is not connected.
I hope you enjoy it!!
License
You shall not share, sub-license, sell, rent, host, transfer, or distribute in any way the digital or 3D printed versions of this object, nor any other derivative work of this object in its digital or physical format (including - but not limited to - remixes of this object, and hosting on other digital platforms). The objects may not be used without permission in any way whatsoever in which you charge money, or collect fees.
Comment & Rating (0)