


Print Profile(6)


Bill of Materials

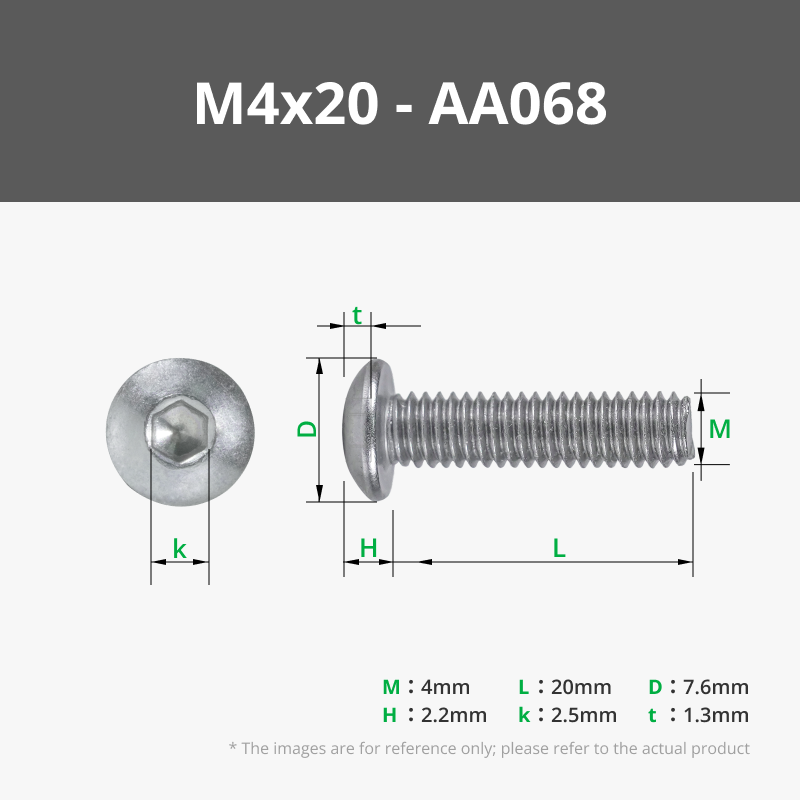
- M4x20 Machine Screw x 4: If not bought at Makers Supply
- M4x25 Machine Screw x 4: If not bought at Makers Supply
- M4x50 Machine Screw x 1: A little bit longer than 50 would be even better/easier to assemble
- M4 Nuts x 8:
- M4 Secure Nut x 1:
- Superglue x 1: Any Superglue that glues PLA
Description
Boost Me (for free)
If you want to show some extra love for this project, consider giving it a boost! It’s a simple way to help more people discover the Leaf Grabber for Kids, and every boost means a lot to me. Thanks for your support and for being part of this awesome 3D printing community!
Last updated: 24.10.2024
Leaf Grabber for Kids – Empower the Little Helpers!

Contents:
- Introduction
- What Makes it Unique
- Model Sizes and Age Compatibility
- Important Notices
- Assembly Instructions
- Support and Feedback
1. Introduction:
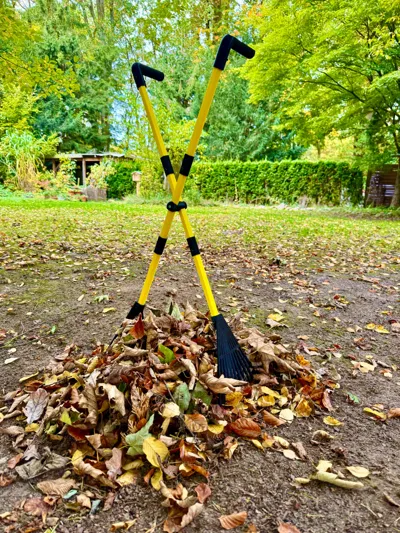
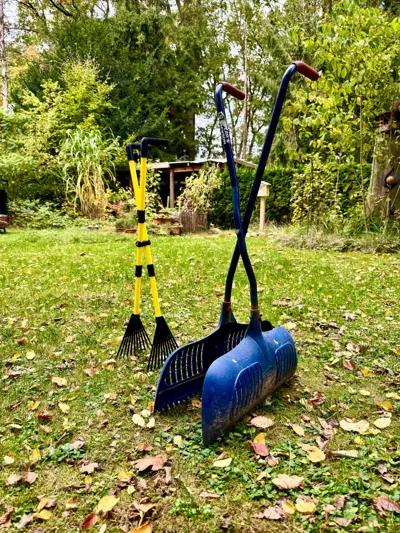
In the heart of our forest home, autumn brings an endless sea of leaves. After years of using the Spear & Jackson Leaf Grabber, we faced a new challenge – our son wanted to join in the leaf-collecting fun. But the tools were too big for him. So, I took inspiration from Spear & Jackson and designed a smaller, fully 3D-printable leaf grabber just for kids.
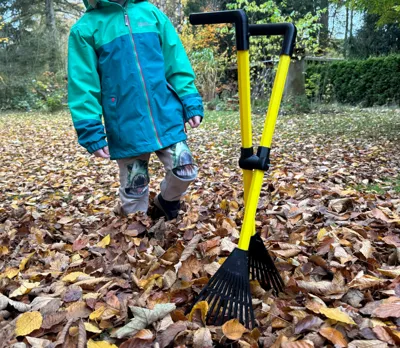
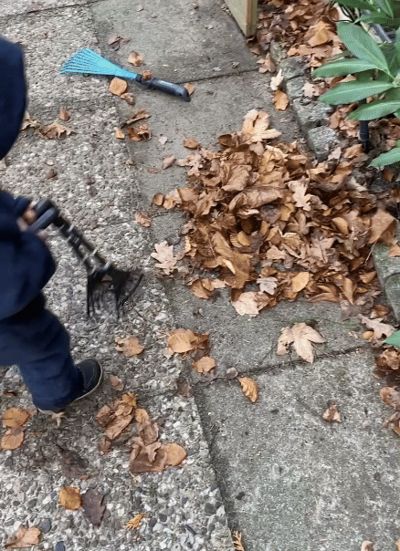
Made for young nature lovers, this tool lets children actively help in the garden. With adjustable rods that fit any child’s size, it’s perfect for little hands eager to make a big difference. The printable rods come in different lengths, so you can choose the perfect fit for your child. Once printed, the rods can be combined, but they are not adjustable on their own.
There are five different printing profiles available depending on your needs:
- Leaf Grabber – All Parts: As the name suggests, get all parts available.
- Leaf Grabber – Small: Prints the small version, suited for younger children between 2-3 years.
- Leaf Grabber – Medium: Prints the medium version for children between 3-6 years.
- Leaf Grabber – Big: Prints the largest version for older children.
Leaf Grabber – Upgrade Kit (Medium to Big): Allows you to upgrade the medium model to the big model by printing only the necessary additional parts.
2. What Makes it Unique:
Nearly every part of this leaf grabber is 3D-printable – the handles, the joint, the rods, and the rakes. Only screws and nuts need to be sourced externally, making this an almost fully print-ready project. It’s designed for kids, allowing them to engage in garden tasks with a tool that’s perfectly sized for them.

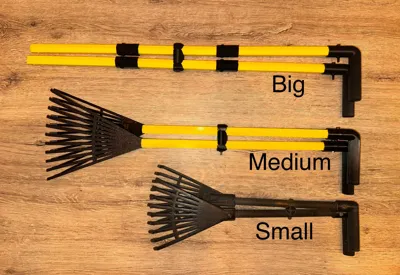
3. Model Sizes and Age Compatibility:
| Leaf Grabber Size | Model Height | Child's Height | Estimated Age |
| Small | 40cm | 85cm - 100cm | 2 - 3 years |
| Medium | 60cm | 100cm - 120cm | 3 - 6 years |
| Big | 80cm | 120cm - 160cm | 6+ years |
*The small shown is the first version from 3 years ago. Design is the same as the other sizes, the size is still the same.

Choose the model size that best fits your child’s height and age.
The rods are designed to provide the best usability and comfort for children of different sizes.
4. Important Notices:
Not a full-sized tool: This leaf grabber is designed specifically for children and does not provide the same strength as an adult-sized tool. The rods and rakes are somewhat flexible, limiting the amount of weight that can be lifted. For those looking for a more robust version, I can offer a similar design that uses carbon rods for increased strength and durability.
Correct printing materials: The model can be printed in any filament or color of your choice. However, it's important to use the right materials for different parts:
Rods: These should be printed using a rigid filament to minimize flex. We used PLA for our rods to ensure they remain sturdy but easy to print.
Rakes: On the other hand, the rakes require some flexibility to prevent the tines from breaking too easily. We recommend using PETG, which provides a bit of flex while maintaining strength.
Other parts: For the handles and joint, feel free to use the material of your choice, as they don't need the same material-specific properties.
Usage: PLA isn’t very UV-Resistant. If you store the Leaf Grabber outside, make sure to use more UV-Resistant Material.
5. Assembly Instructions:
Choose your print profile: Select the appropriate print profile based on your needs:
- For all parts in one print, use Leaf Grabber – All Parts.
- For specific sizes, use Leaf Grabber – Small, Leaf Grabber – Medium, or Leaf Grabber – Big.
- If you’ve already printed the medium version and want to upgrade to the big version, use Leaf Grabber – Upgrade Kit (Medium to Big).
Print all parts and remove support: Depending on the chosen profile, make sure to print all necessary components (handles, joint, rods, and rakes). For the Upgrade Kit, ensure you have already printed the medium version. The underside of the connector may appear imperfect due to the underlying wall thickness. This is normal and will not affect functionality, as it will be hidden inside the connection tube once assembled.
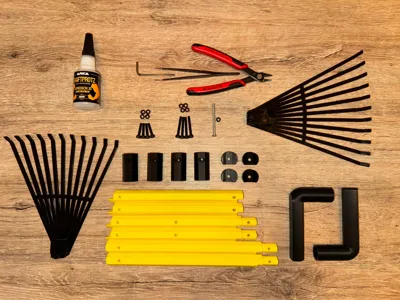
Prepare the screws and nuts: As these are the only non-printable components, make sure you have the appropriate screws and nuts ready.
What you need to Assemble the “Leaf Grabber Big”

Understanding the Rod Connections

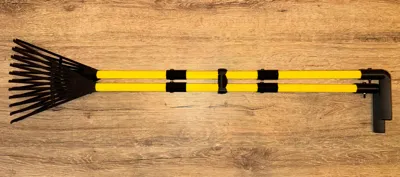
Lay out the parts for a complete grabber arm

Glue the rods together at the two connection points using super glue

Slide the connector reinforcements over the rods

This step is crucial for providing additional strength at the joints, ensuring that your grabber is sturdy and reliable for use.
Attach the reinforcements using one M4x20 screw with a nut for each connection

Connect the handle and rake to the corresponding ends of the rods and secure them with screws

Assemble the second grabber arm

Lay out the arms, the joint parts, and the M4x50/55 screw with secure nut to connect both arms together

Insert the screw from the outside through one of the rounded joint parts and then through the arm

Attach the second arm in the same order to connect both arms

Congratulations! Your child's Leaf Grabber is now ready for use!

For those assembling the Medium Version

- Instead of three rods, you will only need the two outer rods.
- To allow for future upgrades, do not use glue for the connections; the connection will be secured with the connectors and the joint screw!
6. Support and Feedback
If you enjoyed this project or have any questions or issues, feel free to reach out! I’m always looking for feedback to improve my designs. Also, if you found this project helpful, consider boosting or supporting it to help bring more innovative designs to the 3D printing community. Your support is greatly appreciated!
License
You shall not share, sub-license, sell, rent, host, transfer, or distribute in any way the digital or 3D printed versions of this object, nor any other derivative work of this object in its digital or physical format (including - but not limited to - remixes of this object, and hosting on other digital platforms). The objects may not be used without permission in any way whatsoever in which you charge money, or collect fees.
Comment & Rating (27)