Search models, users, collections, and posts
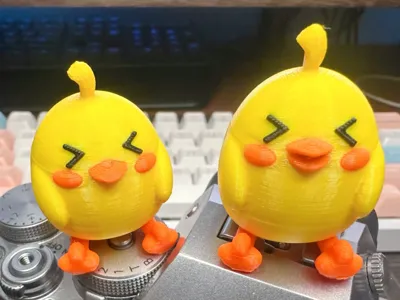
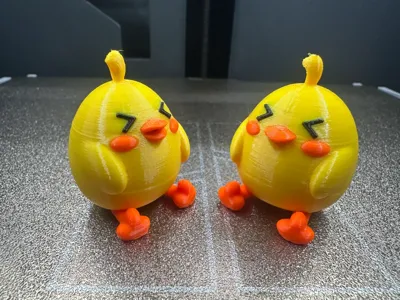
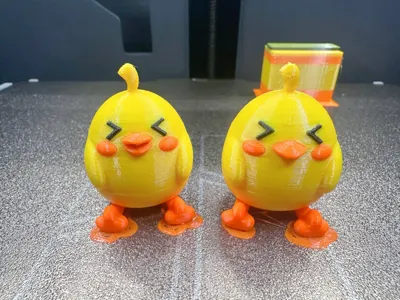
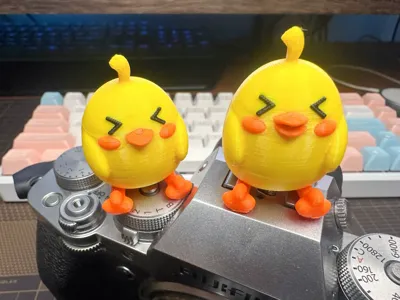
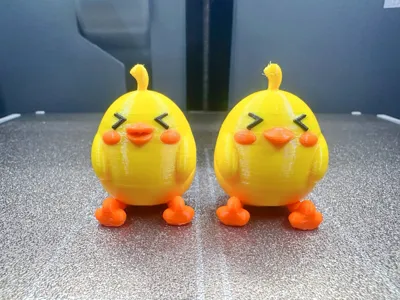
Cute Little Yellow Chicken
IP Report


Print Profile(1)

0.2mm layer, 2 walls, 15% infill
Designer
4.1 h
1 plate
Open in Bambu Studio
Boost
9
16
0
2
20
6
Released
Description
Content has been automatically translated.
Cute Little Yellow Chicken
This content is a great choice for a trendy toy, a gaming room desk decoration. The printing material is Tianrui PEGT multicolor. The layer height can be 0.16-0.2, the tree-like support is a slim tree, with tight support in key areas, the threshold angle can be 25-30 (easier to remove). After multiple tests, the best printing ratio was obtained. The default size can be printed. Please adapt the material temperature to your own before printing. (It has been rated 1 star by many beginners) Welcome to all the bigwigs to post pictures and comments! Thank you all!
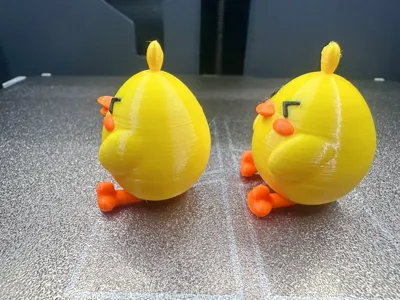
- The size can be scaled and printed according to your preference. It is recommended to print with PLA material, the effect will be more delicate! (I used PETG material)
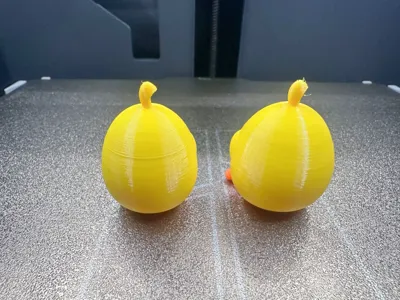
- You can print with default parameters, if you have higher requirements, you can adjust it yourself. Please click on “Support only key areas” in the support settings. Please click on “Support only key areas” in the support settings. Please click on “Support only key areas” in the support settings.
- Personal experience: When disassembling supports, remember to use force in the direction you need to remove. Be sure to cut off the part of the support that is far away from the surface where the support touches the model, leaving just enough for the pliers to open. This way you can clip the top of the support that is closest to the model. Rolling the pliers --- When clamping the support close to the surface of the model, use the pliers to roll and tear, which can likely roll up the layer of support to be removed. Pay attention to adjusting the fixed posture of your hand, be patient, and take it step by step...
Boost Me (for free)
If you like my content, please give me a little rocket boost! Your boost is the driving force behind my content updates! Thank you!
3D Printing Techniques and Preparation Notes
- (All models released by this account have been tested and printed, and can be adapted to all models. Before printing, check if the printer and consumables are working properly. If you encounter problems that cannot be solved, please send me a private message, I will try my best to help solve them!)
- Precautions:
- If you encounter problems, you can go to Reference learning area: Print quality and solutions | Bambu Lab Wiki.
- Make sure the machine printing plate is clean. It is recommended to wipe it with 95° medical alcohol after each print, which can ensure stable printing quality and prevent it from crashing. Because the oil residue on your hands after touching the printing panel will greatly reduce the adhesion of the print. At the same time, the debris from previous prints and the tiny residue of the printed parts will also affect the printing quality of the first layer, thus reducing the yield rate.
- Pay attention to drying the consumables (PLA generally does not need to be dried, it has a good anti-humidity ability), which will greatly affect your printing quality and printing experience! Consumables will inevitably become damp after being placed for a long time. If stringing and spaghetti occur, you need to ask the merchant for the drying parameters and printing parameters for adjustment. Most merchants' consumables are not dried at the factory, so if you have the conditions, you can pre-dry them, and the printing effect will be better.
- The choice of printing materials, generally PLA is used for appearance parts, and PEGT is generally used for structural parts. The prices of these two materials are relatively affordable and the volatilization of toxic gases is almost zero. (For health, it is best to have an air purifier running)
- It is recommended to print with consumables from a new manufacturer. Perform consumables flow calibration immediately, and modify the calibration factor, which will greatly affect your printing quality. This is also a necessary process for new consumables to adapt to your printer.
- If you encounter the problem that the printing suddenly becomes poor in quality and the yield rate is low, check if the nozzle is clogged, check if the printer is placed stably (it is more reliable to place it directly on the ground). You can also try recalibrating the printer.
- Print at the printing speed recommended in the model instructions. Overhanging mass, model surface count and printing speed are directly related. The right speed (too fast or too slow is not good) allows the material to have more time to cool and shape during deposition.
- Set the bed and nozzle temperature reasonably according to different materials. Too high or too low temperatures can cause warping, layer deformation or adhesion problems, thus affecting printing quality and success rate. P1S and above models, if the temperature inside the user cabin exceeds 35 degrees, be sure to open the glass door of the machine body.
License
This user content is licensed under a Standard Digital File License.
You shall not share, sub-license, sell, rent, host, transfer, or distribute in any way the digital or 3D printed versions of this object, nor any other derivative work of this object in its digital or physical format (including - but not limited to - remixes of this object, and hosting on other digital platforms). The objects may not be used without permission in any way whatsoever in which you charge money, or collect fees.
Comment & Rating (0)