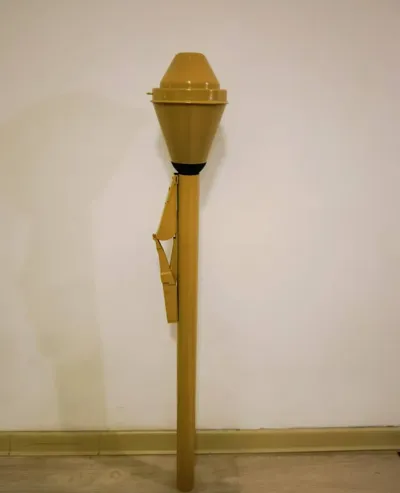
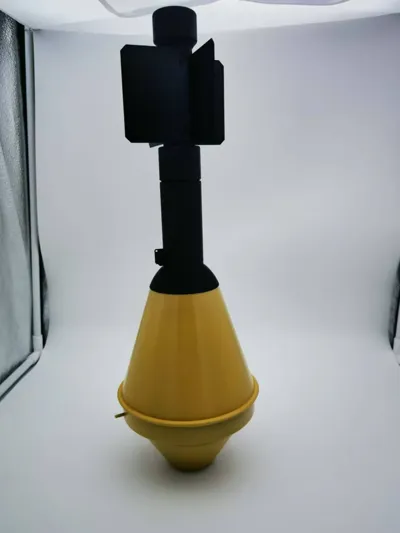
1:1 Scale Panzerfaust 100/60 Rocket Launcher


Print Profile(3)

Description
Update: Uploaded the printed barrel model

A 1:1 scale assembly model of the Panzerfaust 100 anti-tank rocket launcher, meticulously modeled from real-life photographs
The dimensions also reference the Panzerfaust 60
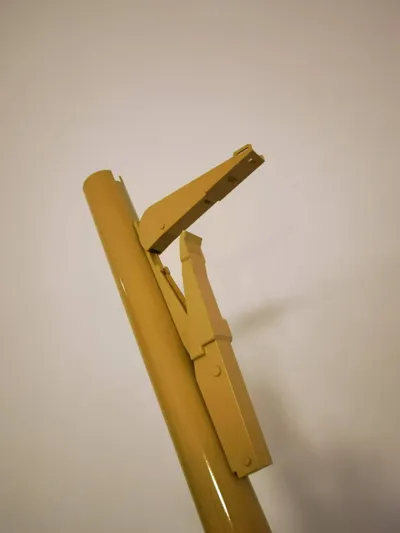
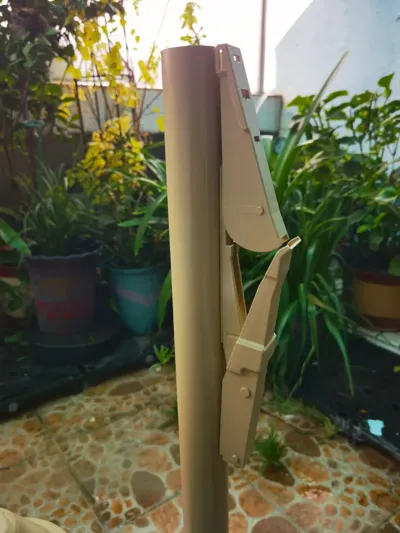
Includes an assembly warhead, sight, and trigger mechanism
Boost Me (for free)
Constantly improving, hoping for your support
Pragmatic design:
The hollow warhead interior provides ample space for concealing valuables~

The warhead can also serve as a small snack cup
=========================================================================
Regarding the Launch Tube
After researching the materials, the diameter should be 44mm
Three options:
- The direct print version has been uploaded. Assembled in four sections using adhesive. Note that sections 1 and 2 have alignment features to ensure the holes are aligned.
- Utilize an 800mm DN40 (British Standard) 48mm*3.7mm thick PVC pipe; printing is unnecessary
- Alternatively, use a 44mm OD, 1.5mm thick (41mm ID) 6061 aluminum alloy tube
=========================================================================
Regarding Installation:
- A 15mm long and approximately 15mm wide notch needs to be cut into the tube to secure the warhead

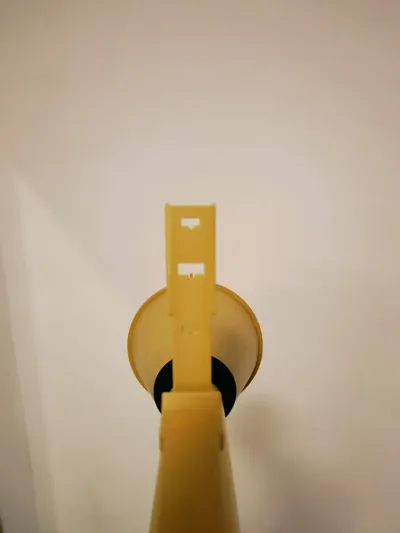
2. Sight Installation:
The sight base has a curved bottom for a snug fit onto a 50mm tube. Insert the warhead, aligning it with the safety pin, and mark the three mounting holes


Drill 2-3mm holes in the tube and secure the mounting bracket using M3-M4 screws
A field test confirmed that 3M double-sided tape or AB adhesive can also be used
The printed barrel already has three mounting holes pre-drilled, and can be secured with M3*6 screws
==============================================================
Regarding Color
I used matte desert yellow PETG for printing, but painting is optional
I also plan to modify it to be spring-loaded in the future
It is recommended to print the warhead fins using PETG, offering flexibility and allowing them to screw into the barrel. The warhead will automatically open when pulled out.


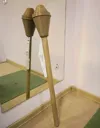
Reference image


Modeling rendering:

License
You shall not share, sub-license, sell, rent, host, transfer, or distribute in any way the digital or 3D printed versions of this object, nor any other derivative work of this object in its digital or physical format (including - but not limited to - remixes of this object, and hosting on other digital platforms). The objects may not be used without permission in any way whatsoever in which you charge money, or collect fees.
Comment & Rating (51)