
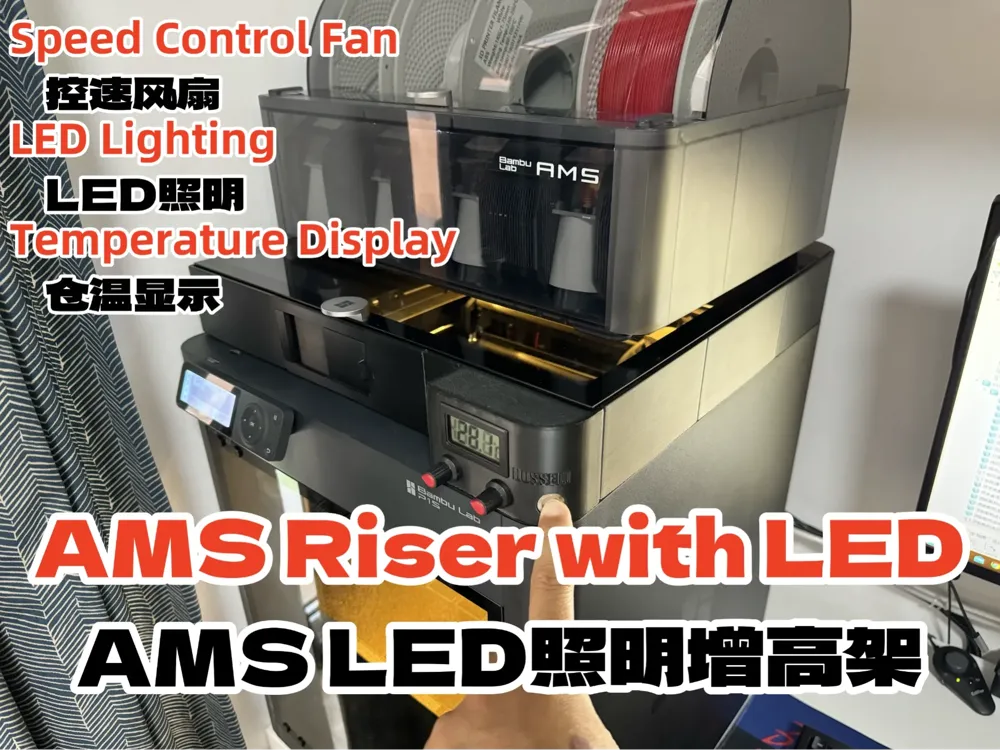
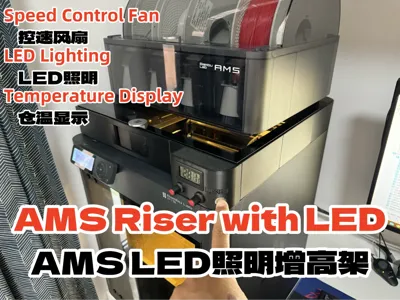
P1S AMS Riser LED Lighting Top Heat Dissipation Chamber Temperature Display
Print Profile(1)

Description
Boost Me (for free)
Your support is greatly appreciated!
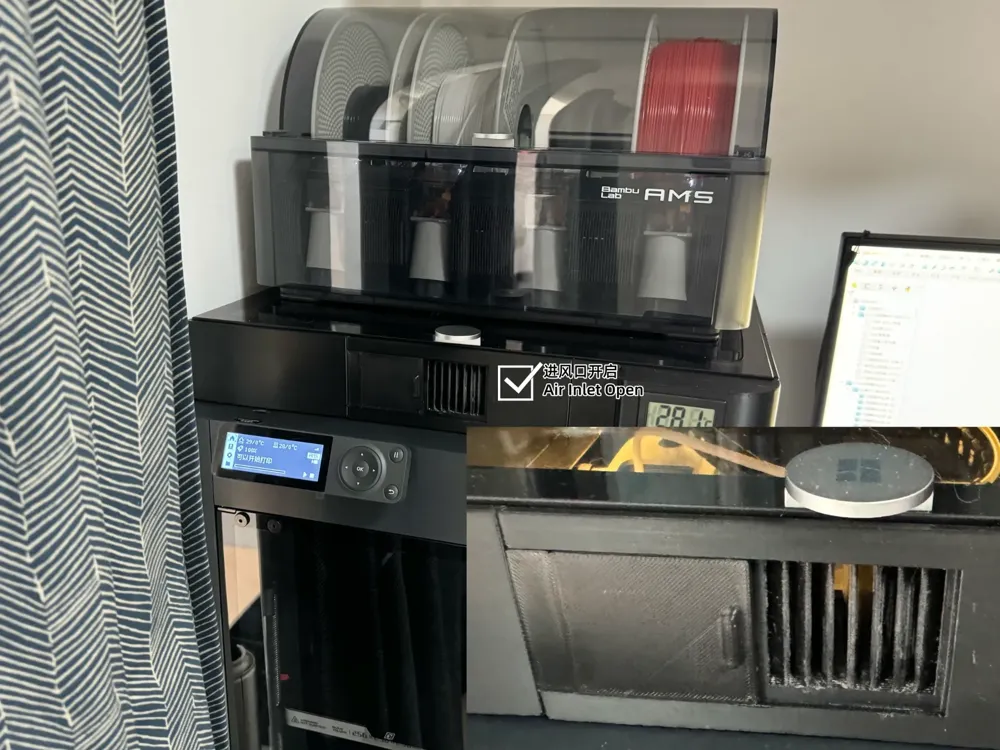
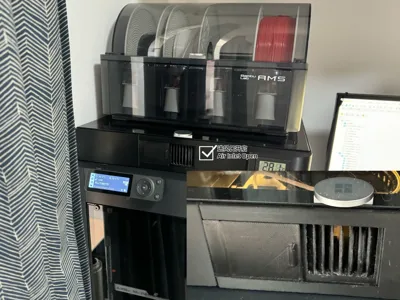
2025-03-20——Added a switch to the exhaust duct design. The duct can be closed when the printer is idle, preventing cold or damp outdoor air from entering the enclosure.
Perfectly resolves the issue of cold outdoor air entering the exhaust duct in northeastern China during winter, causing the entire room to become cold!
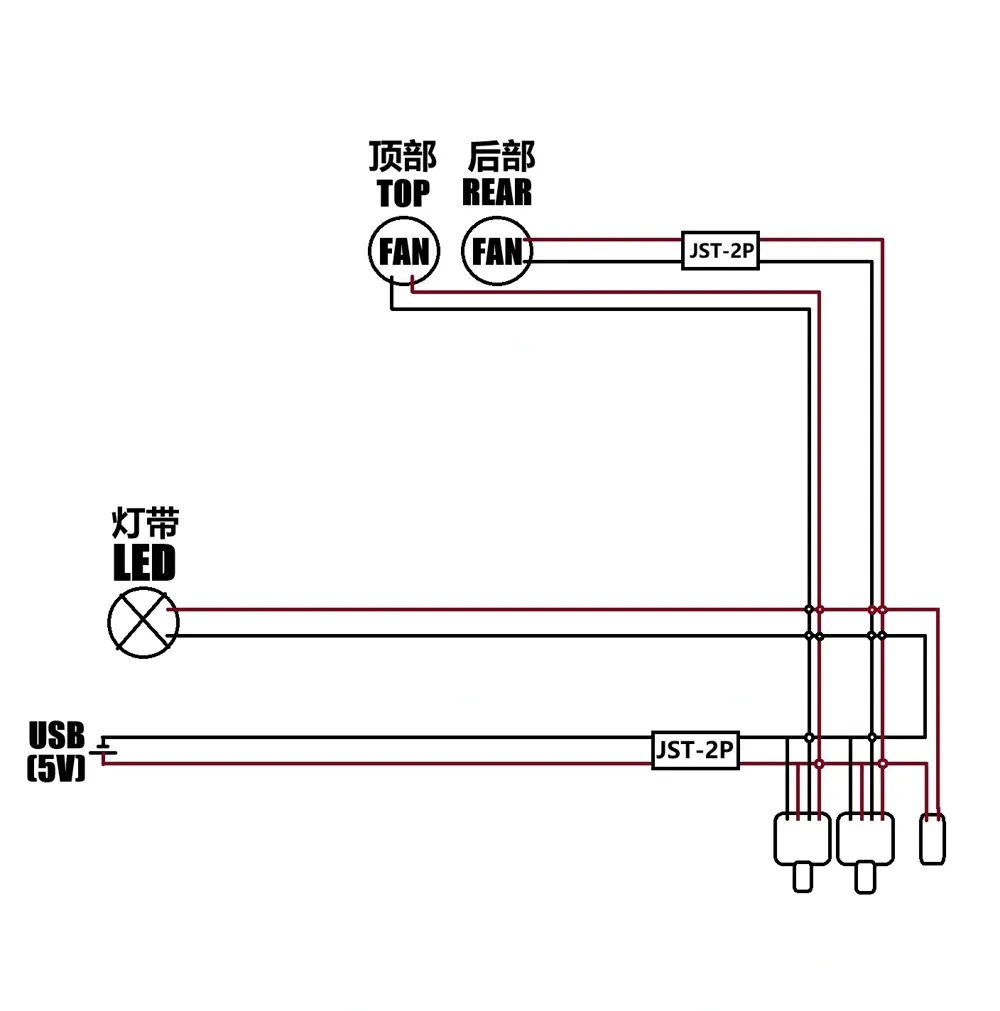
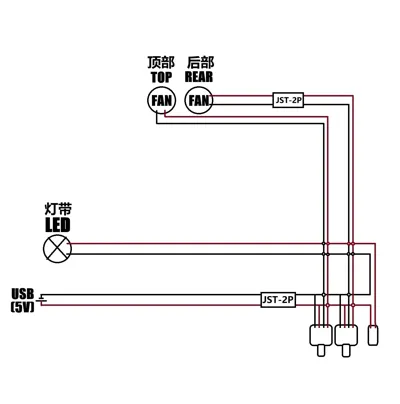
2024-11-12——Several users reported difficulty understanding the wiring diagram. Clarification: All circled sections in the diagram are not connected. Wiring instructions are as follows:
-The negative terminal from the terminal block should be connected sequentially to “light strip negative,” “rotary switch A power negative,” and “rotary switch B power negative”;
-The positive terminal from the terminal block should be connected sequentially to “light strip switch (two legs connect to the terminal and the light strip),” “light strip positive,” “rotary switch A power positive,” and “rotary switch B power positive”;
-Then, connect the “motor positive” and “motor negative” terminals of the two rotary switches to the corresponding positive and negative terminals of each fan.
2024-11-11——Many users reported that the standard-size riser was too small after printing. The standard-size main body has been removed from the latest print profile, leaving only a set of accessories (standard size + 3mm). It can be printed directly from your phone. The prefix should be “2024-11-11”. Please ensure you have the latest file before printing.
2024-11-03——Support settings have been updated in the latest print profile. It can be printed directly from your phone. The prefix should be “2024-11-03”. Please ensure you have the latest file before printing.
2024-10-28——The materials list purchase link has been updated (provided you have the mobile PDD app, copy the link to the WeChat file transfer assistant and open it there)
2024-07-01——Expansion accessories updated:
- Tool box, storage box (for AMS riser) https://makerworld.com.cn/zh/models/236091#profileId-154469
- Spool rack, expansion spool rack (for AMS riser) https://makerworld.com.cn/zh/models/235919#profileId-154289
2024-06-29——The prefix of the latest print profile should be “2024-06-29”. Please ensure you have the latest file before printing.
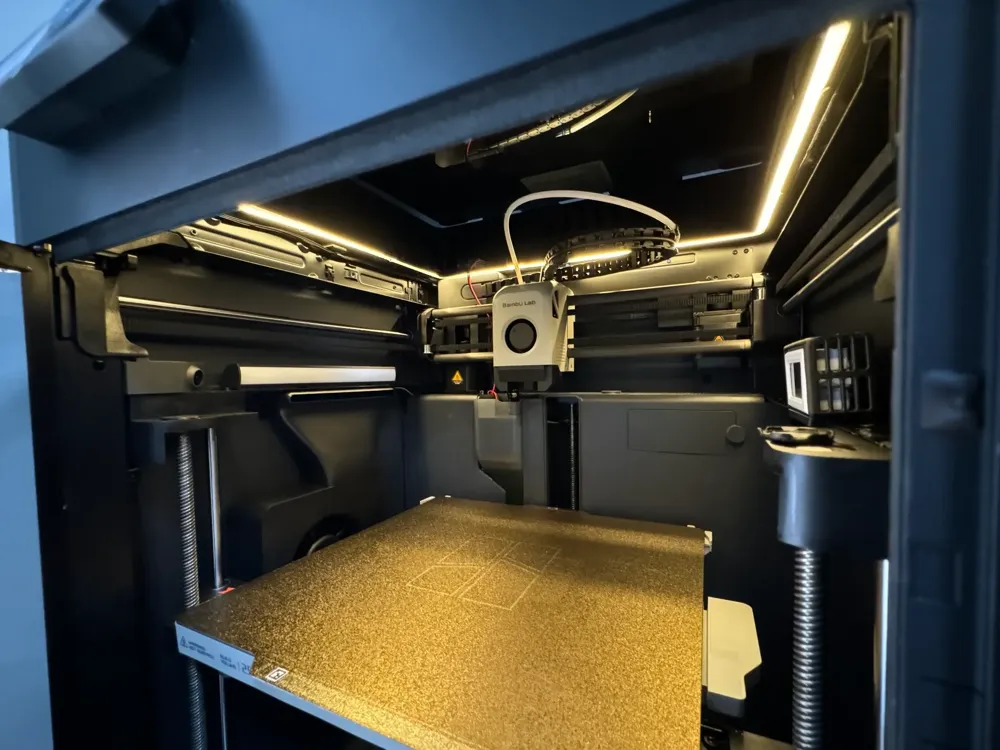
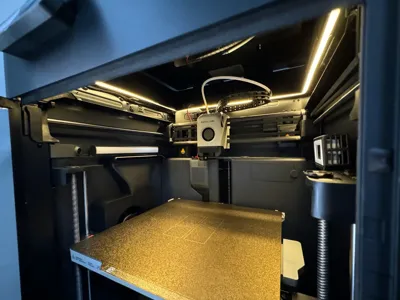
The P1S's built-in enclosure causes excessive chamber temperatures when printing PLA filament, leading to extruder overheating and filament jams.
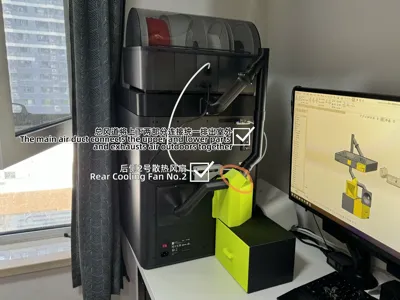
Therefore, I designed this top-mounted cooling kit. It enhances top-side heat dissipation via front and rear airflow channels and a 5V fan without compromising enclosure integrity.
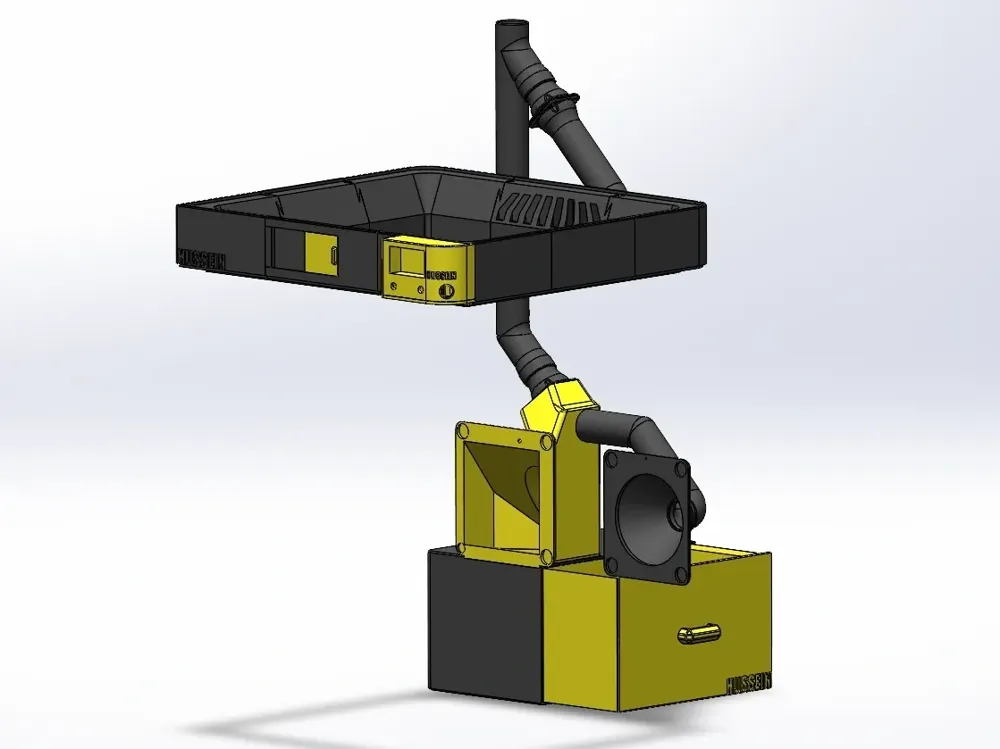
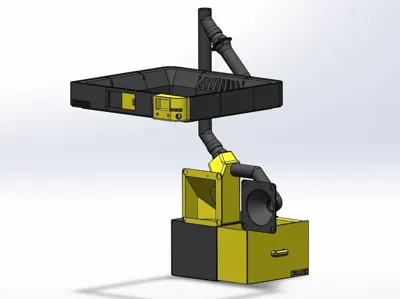
1.The kit comprises eight interconnected parts, facilitating easy part replacement if damaged. Future designs will incorporate additional components for expanded functionality.
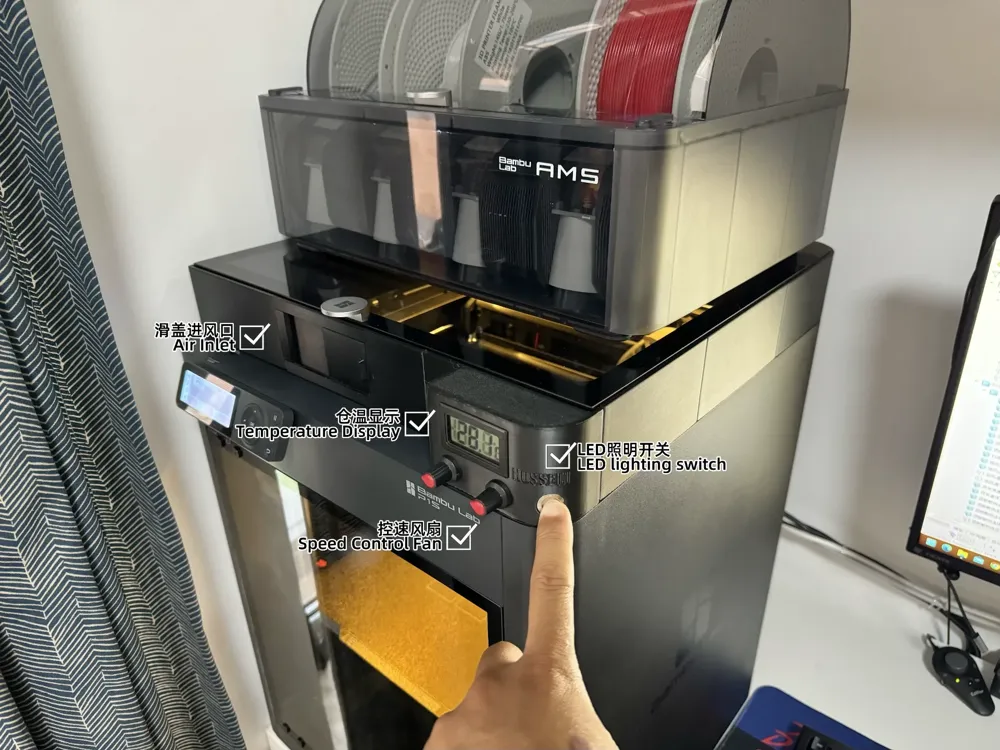
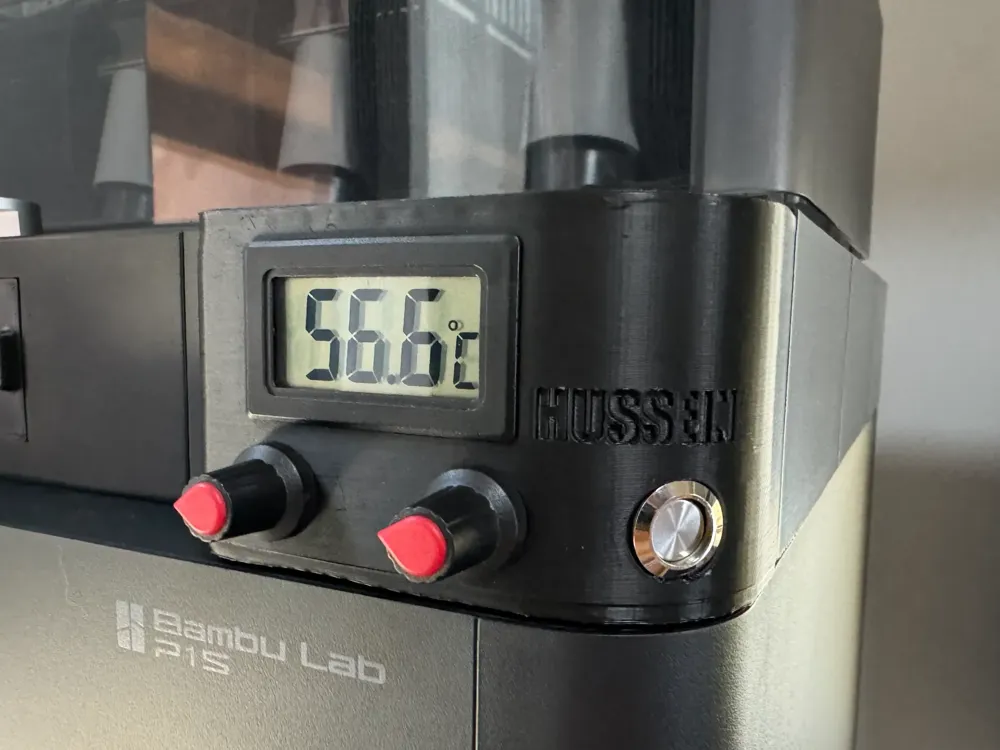
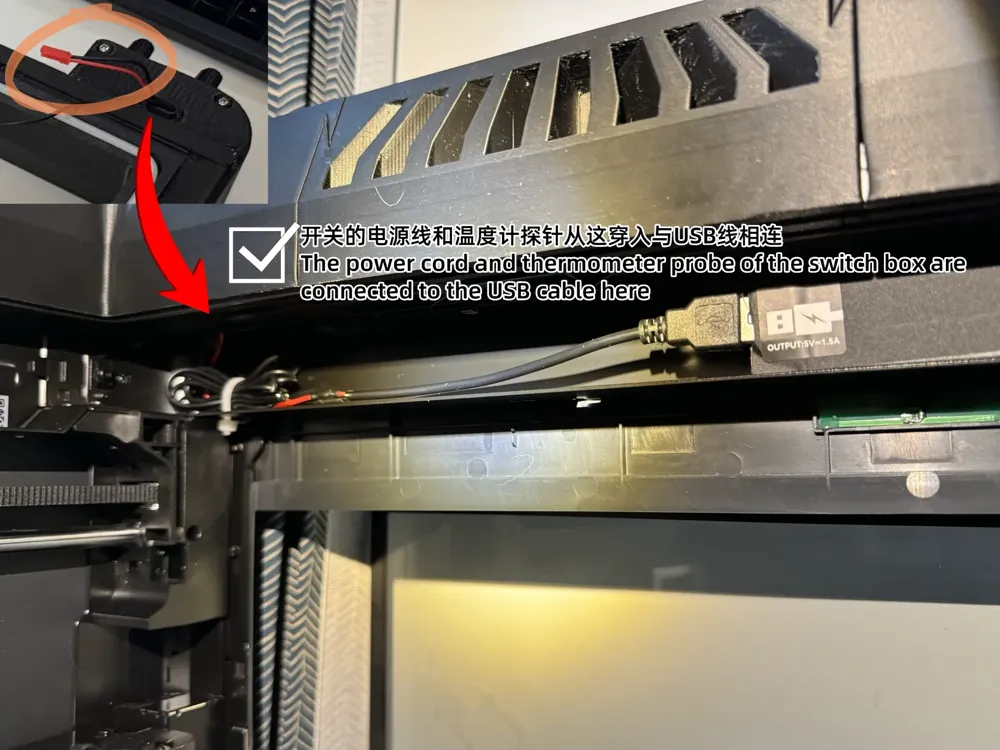
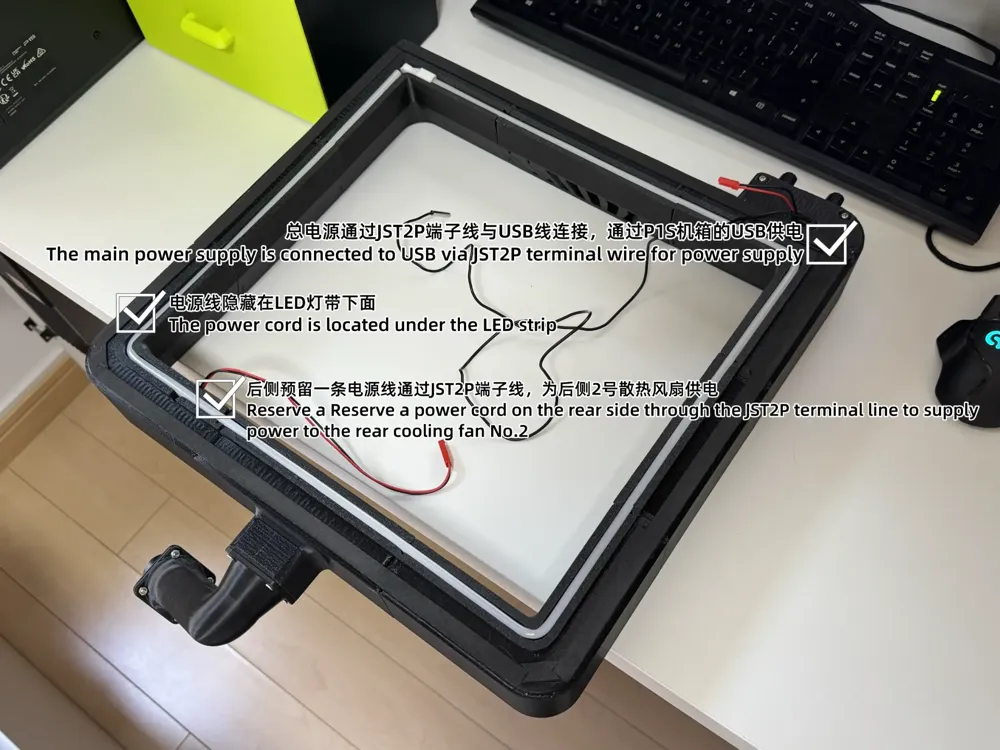
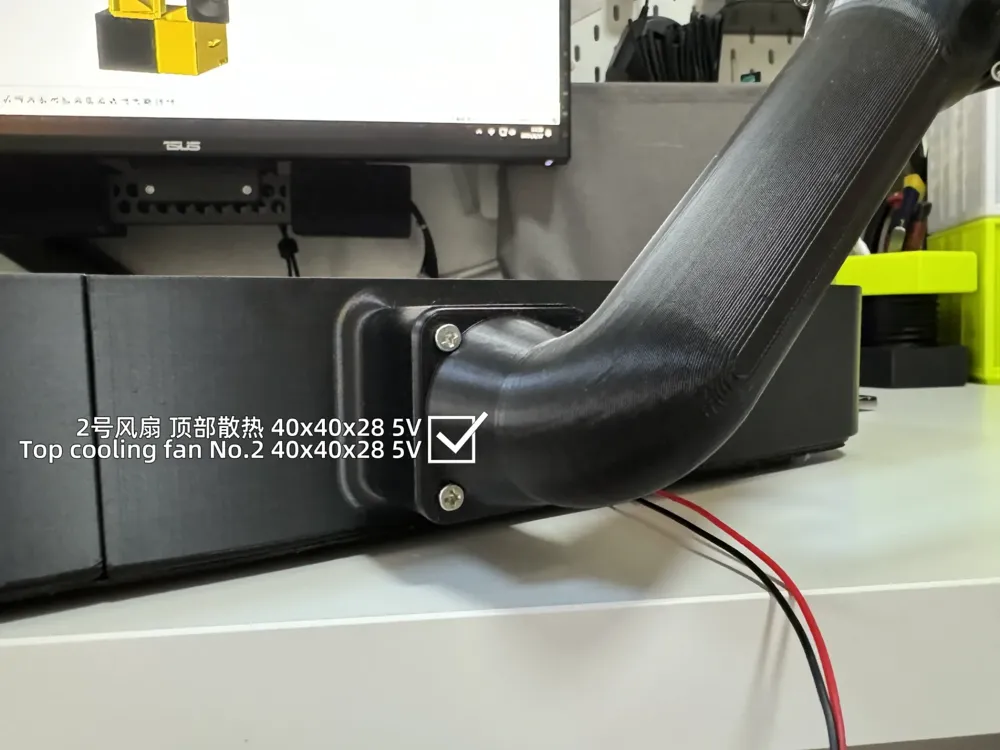
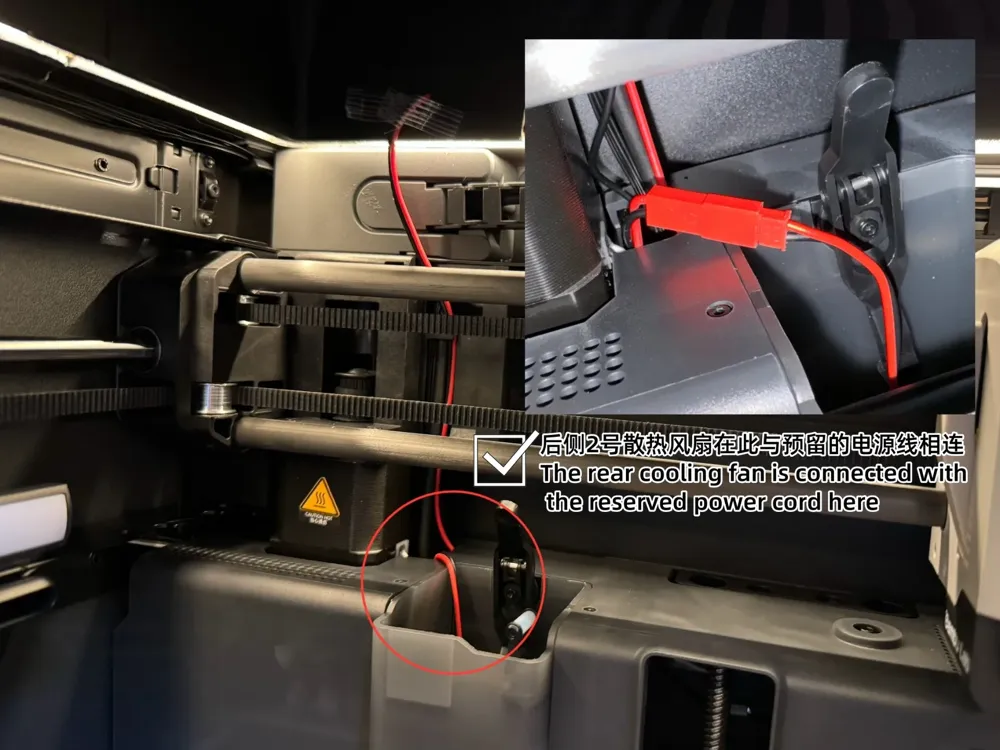
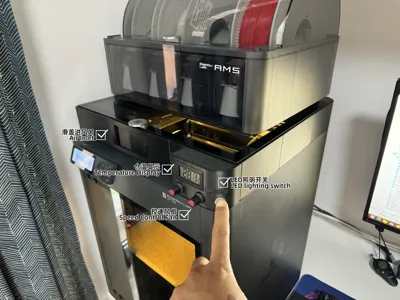
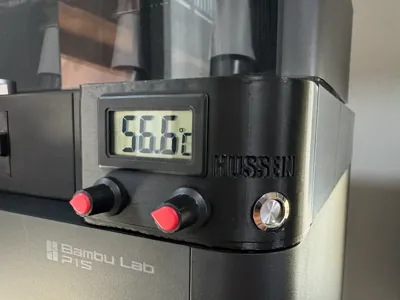
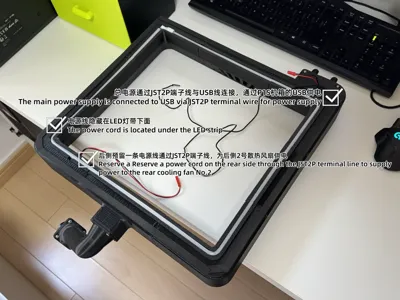
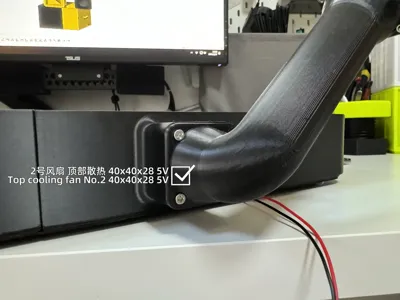
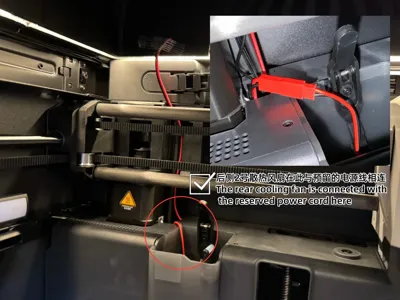
2.A 40x40x28mm 5V fan can be mounted on the back. The power cable runs through the inner channel of the light strip to the front switch, controlled by a rotary switch to adjust fan speed.
3.Another rotary switch is a pre-emptive provision for my other kit design, the “Bambu X1C/P1S Chamber Exhaust Kit” https://makerworld.com/zh/models/499198#profileId-413872, to control the rear case fan speed.
4.The front intake features a sliding cover for opening and closing. Two versions of the cover are available: a thinner one that can accommodate a 1mm sealing strip for improved intake sealing.
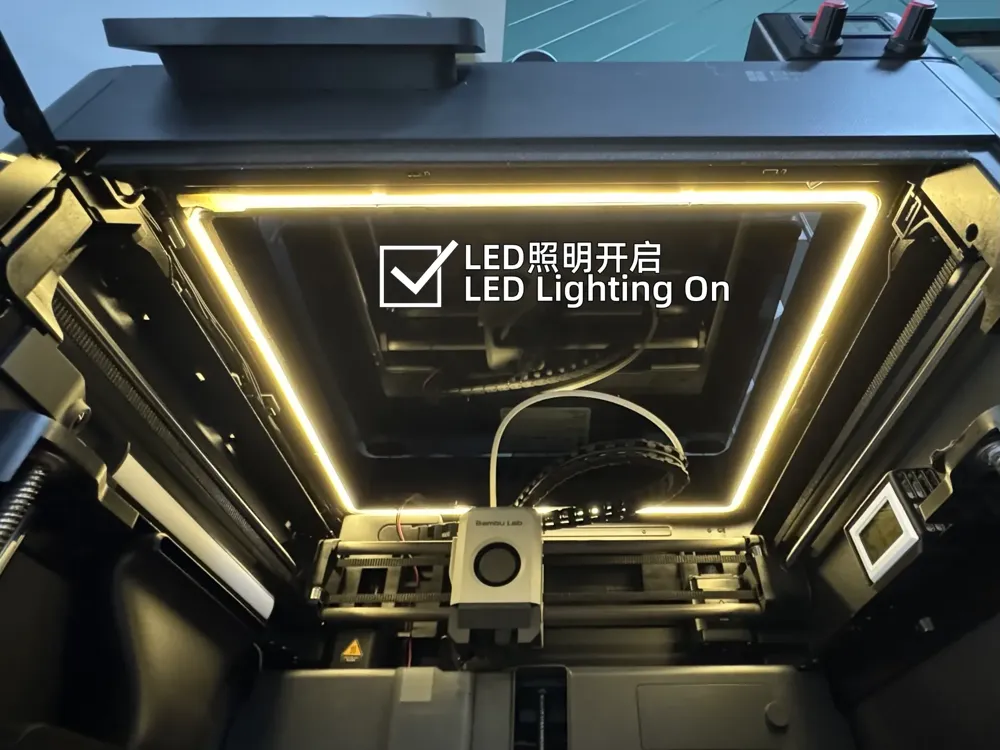
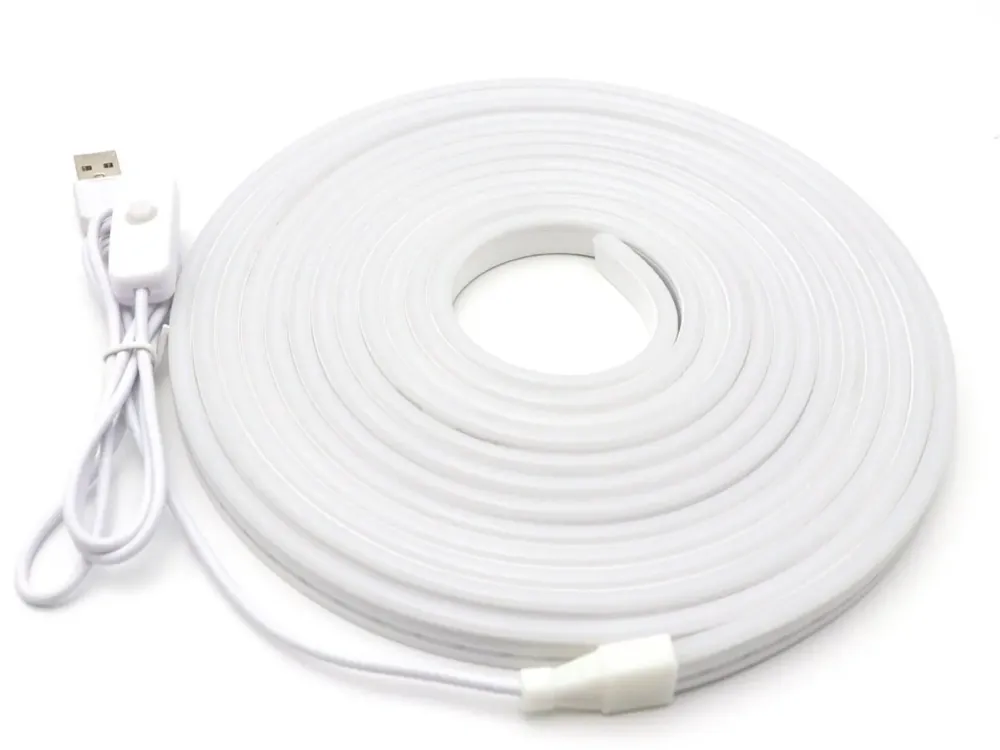
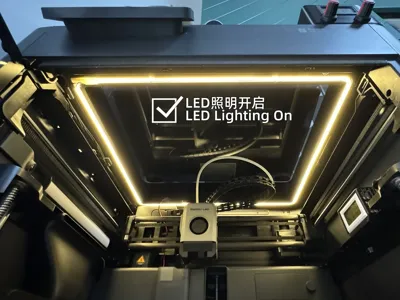
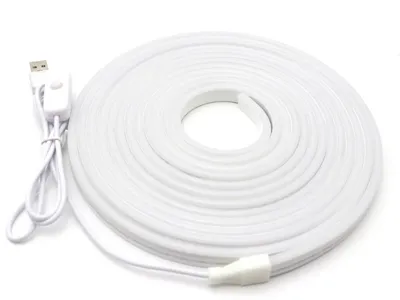
5.Internal space is reserved for light strips. The power cables for the two fans can be wired with the light strip to the switch, and the light strip is controlled by a push-button switch.
6.A thermometer with a probe can be mounted above the switch box to monitor internal chamber temperature.
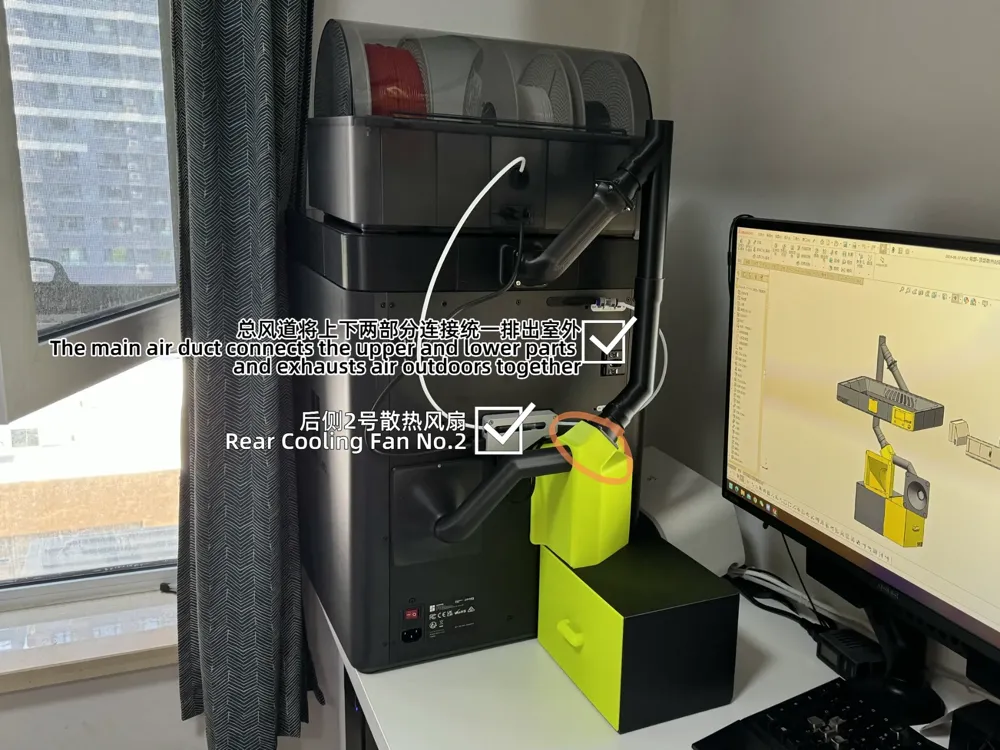
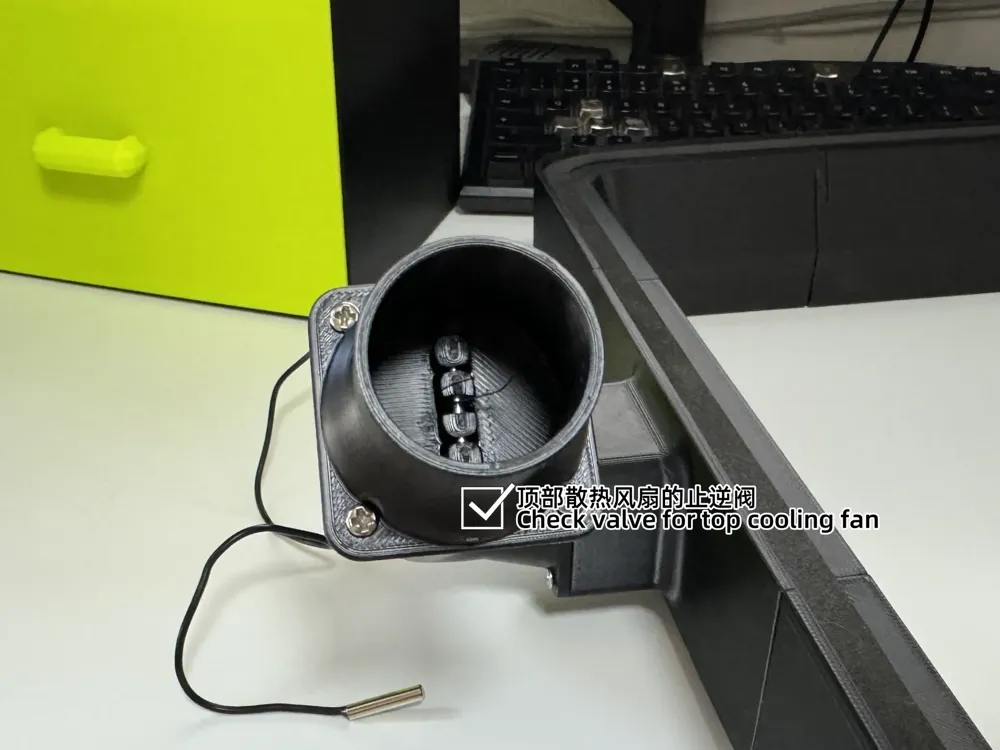
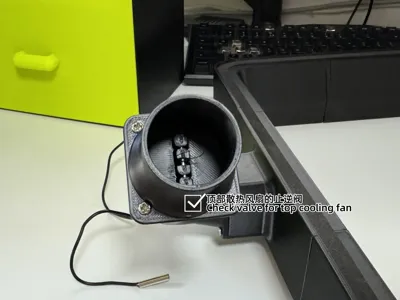
7.A 45-degree angled exhaust duct can be optionally attached to the rear fan for use with a check valve (prevents cold outdoor air ingress; the check valve relies on gravity for reset, hence the required angle). A shorter duct can be used directly to connect to the exhaust pipe without a check valve. Regardless, use a 32mm inner diameter exhaust pipe—readily available online.
8.For optimal sealing, use sealing strips around the top and bottom. This will also prevent noise.
9.If using my “Bambu X1C/P1S Chamber Exhaust Kit” simultaneously, print the Main Duct to integrate the exhaust from both kits and expel air outside using the “3D Printer Exhaust Pipe” https://makerworld.com/zh/models/405521.
Important! Besides the standard-size kit body, a model is specifically designed for materials with high shrinkage, like ABS. If using ABS and encountering size discrepancies with the standard model, use the model with “ABS+3MM” in its filename.
Materials List: (Materials purchased via the mobile Pinduoduo app, hence it's recommended to view using a mobile device)
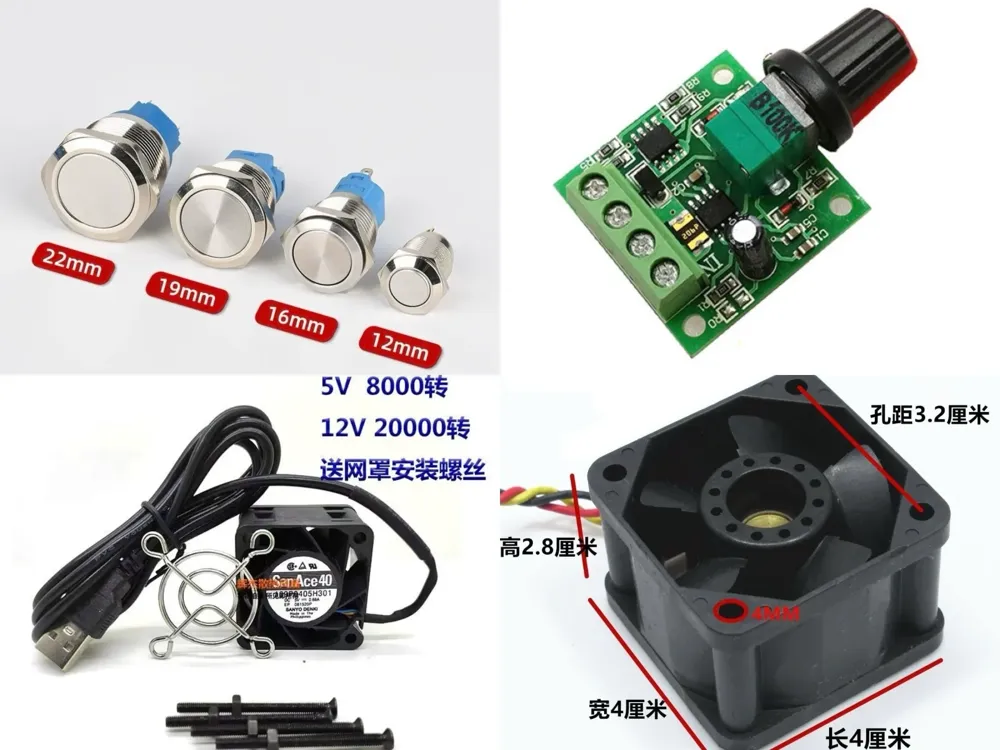
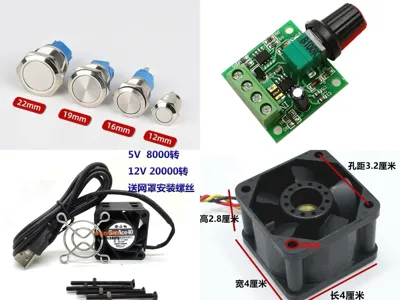
1.5V Rotary Switch: 2 (as shown) https://mobile.yangkeduo.com/goods1.html?ps=vuooAY1BVJ
2.5V Push-Button Switch (12mm): 1 (as shown) https://mobile.yangkeduo.com/goods1.html?ps=cAXqeX3v4U
3.40x40x28mm 5V Fan: 1 (2 fans required if using the “Bambu X1C/P1S Chamber Exhaust Kit”) https://mobile.yangkeduo.com/goods2.html?ps=is57UP7GWW
4.5V Light Strip: 2m https://mobile.yangkeduo.com/goods.html?ps=qBCqy0wwff
5.Thermometer with Probe: 1 (as shown) https://mobile.yangkeduo.com/goods1.html?ps=MrCzdHo2re
6.M3x10mm Screws & Nuts: 4 sets
7.M3x40mm Screws: 3
8.2mm Diameter, 40mm Long Stainless Steel Rod: 1 (optional, if not using a check valve) https://mobile.yangkeduo.com/goods2.html?ps=ed5q37lkNN
9.10mm Wide, 1mm Thick Sealing Strip: 3-5m https://mobile.yangkeduo.com/goods.html?ps=GGABd6mX7L
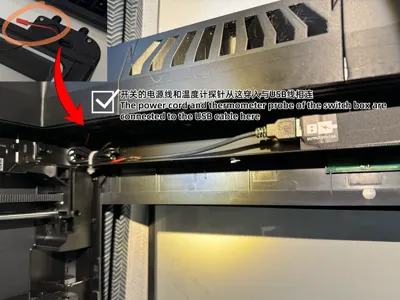
10.JST2P Terminal Wire: 2 pairs (1 pair for fan power in “Bambu X1C/P1S Chamber Exhaust Kit”, 1 for main power supply) https://mobile.yangkeduo.com/goods1.html?ps=D8bTMrBdbQ
11.USB Plug: 1 (connects main power supply to USB plug, obtains power from the internal case USB port)
Installation Video Tutorial: https://www.bilibili.com/video/BV1Sf421B7gZ/?spm_id_from=333.999.0.0&vd_source=499412e81d15ce232db58061b3c13a31
License

You shall not share, sub-license, sell, rent, host, transfer, or distribute in any way the digital or 3D printed versions of this object, nor any other derivative work of this object in its digital or physical format (including - but not limited to - remixes of this object, and hosting on other digital platforms). The objects may not be used without permission in any way whatsoever in which you charge money, or collect fees.


Comment & Rating (0)