


Print Profile(4)

Description
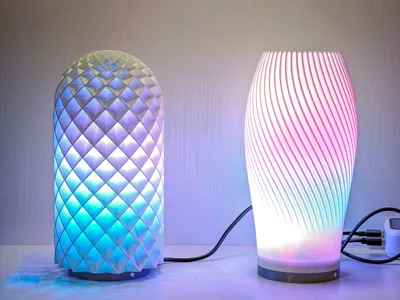
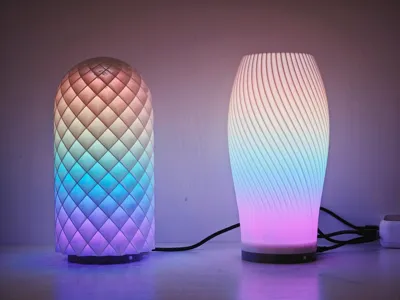
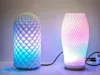
Bambu Lab LED Light Kit ESP32 WLED Addressable Ambient Light Control Base
2026 Update: Added a version featuring a microphone. The column now utilizes a threaded connection for enhanced stability. It employs an ESP32 D1 Mini development board, with audio input handled by an INMP441 sensor. For wiring instructions, please refer to: https://kno.wled.ge/advanced/audio-reactive/
Update: Added configuration for the ESP8266 D1 Mini board. It can be tried, but performance is not very good, and the number of LEDs should not exceed 80
Drives WS2812B LED beads, compatible with LED strips or LED panels

Ultra-low cost WLED smart ambient light base, suitable for official night lights and similar modified fixtures
I previously made an LED strip holder, please see the links below for the result
https://makerworld.com/en/models/429476
https://makerworld.com.cn/en/models/195117
I found that it still required a separate controller, which was not elegant, so today's low-cost integrated solution was developed
The advantage is a single-cable connection and a retained button, allowing you to switch the ambient light on/off, change lighting effects, and more, all with ease of operation
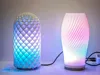
The lampshade uses the official LED light 001 and other fixtures with the same interface
Official light housing addresses:
https://makerworld.com.cn/en/models/125815
https://makerworld.com/en/models/13717
Accessories list and prices:
1. Luat ESP32-C3 Development Board, 9.9 RMB with free shipping. Purchase the unsoldered version and solder it yourself

2. SKRGAMD010 Tactile Button Switch, 6x6x7mm 2-pin through-hole, 0.15 RMB + 3 RMB shipping

3. DuPont Wires, 20cm Female-to-Female, 1.5 RMB. Purchase together with the tactile button switch
4. WS2812B Addressable LED Strip, 5V Full-Color 5050 LED Beads. Specifications: 60 LEDs per meter, 2 meters, 23 RMB. A maximum of 78 LED beads are needed. If not required to fill completely, 1 meter is sufficient at 12 RMB
All Materials (Total cost: 9.9 + 0.15 + 3 + 1.5 + 23 = 37.55 RMB)

The assembly process is as follows:
I. Welding
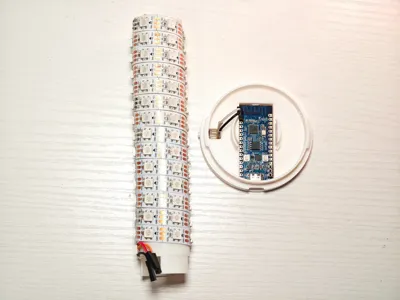
Solder the button switch (it's best to wrap it with electrical tape after soldering) and the LED strip (as shown above) using DuPont wires
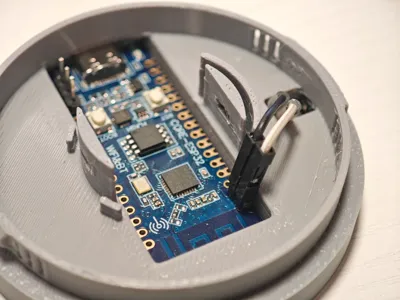
Solder the three interfaces on the Type-C side: GND, +5V, and IO09, along with IO00 and the adjacent GND. (You can also solder all pins. Just wire as needed; I will explain using my wiring method below.) The completed soldering is shown in the figure below

II. Placing the Controller and Components
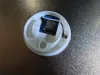
First, place the ESP32 controller, press the antenna side, and snap it into the buckle:

Snap the button switch into the opening on the right side (ensure smooth pressing), and plug in the DuPont connectors for IO00 and the adjacent GND, as shown in the figure


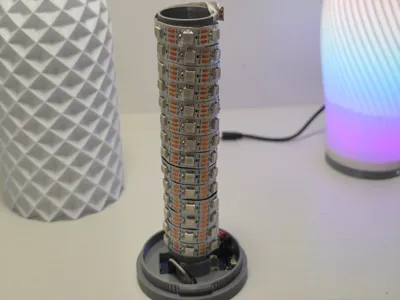
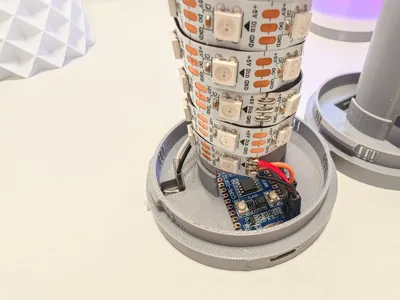
Install the pre-wound LED strip (wind it yourself, 6 LEDs per circle, adjust appropriately to align the LEDs vertically for better effects). Align the side of the hollow cylinder with the buckle to the base and snap it in. Insert the LED strip's DuPont connector into the control board. Pay attention to the silk screen; starting from the Type-C end, the pins are GND, +5V, and signal output (IO09), respectively


Finally, screw the base into the light housing to complete the assembly
III. Flashing WLED Software
You can flash it directly online:
1. Prepare a Type-C data cable (if the Type-C plug is too short for the computer to recognize, you can flash it before inserting the control board into the base). Connect it to your computer and ensure the computer recognizes the serial port correctly
Open in Chrome: https://install.wled.me/

Click Install and follow the prompts. After installation, use your phone to connect to the Wi-Fi named WLED-AP for network configuration. After configuration, check your router for the new device's IP (the device name starts with esp32c3-). Once found, open the IP in a browser, e.g., http://192.168.2.219

Perform a simple setup: set the LED count in config - LED preferences. After saving, the lights should normally glow orange

To configure as an LED panel, set it in 2D configuration

Configure button functions in config - Times&Macros

Return to the main interface and add presets. Here, only a random switching effect is added; other presets can be set by you. After operating as shown, long-pressing the button will switch lighting effects, while a short press defaults to turning off the light

That's all
Special thanks to the WLED project and its creators. For specific settings, you can visit https://kno.wled.ge/
Limited by the performance of the ESP32-C3, audio-reactive functionality has not been added yet, but light synchronization can be controlled based on computer audio via third-party software, such as https://github.com/LedFx/
I will update with an audio-reactive version when time permits
License
You shall not share, sub-license, sell, rent, host, transfer, or distribute in any way the digital or 3D printed versions of this object, nor any other derivative work of this object in its digital or physical format (including - but not limited to - remixes of this object, and hosting on other digital platforms). The objects may not be used without permission in any way whatsoever in which you charge money, or collect fees.
Comment & Rating (40)